Tuesday, October 31, 2006

PTGui Stitching Software


While it might vie for the unappealing software name of the week award, this photo stitching software seems to be very good. I have done several stitches with it, two of which gave me trouble in the past. Not only was the process easier, the result was better. For whatever reason PTGui seems capable of coping with minor parallax errors which drove PTMac wild. There is still a risk that in large prints I will discover matching flaws that I haven't seen so far but tentatively I give this a thumbs up. Thanks to Roger Hein who suggested it to me.

In the image above, since I was moving vertically and didn't have a 3D pano head, rotating through the nodal point couldn't be done and eventually I had to align the ladders manually through cut and paste after the stitched image was brought into Photoshop. Errors have been common enough that I have been outputting to multiimage tiff's which created huge files and slow bringing together of the layers in Photoshop.

With this image this time, I brought the images into PTGui, did the alignment automatically (I didn't have to find the matching points in the images, hell, I didn't even have to tell the software what focal length I was using, what magnification factor, whether the images were horizontal or vertically oriented and whether they stacked likewise. The resultant image in the editor showed some rotation of the building. This was easily corrected with the editing tools in PTGui. I subsequently found that I could enlarge the editor window and the image automatically got bigger and one could do an even better job. I asked it to make the maximum size stitch (pixels 1:1) and it did this quickly and painlessly.

Once the image was in Photoshop, I did a fine tuning of the image rotation and perspective correction (I could probably have done that in the PT Gui editor with the larger version of the image but the alignment grid in Photoshop distort, lens correction made it easier and I was even able to deal with a little chromatic aberration. The result looks really good to me.

Image wise I still like the black and white version which I did originally.

10 Ways To be Kind To Yourself, For Free

1) Ever get out in the field and find you forgot something important - I have been known to discover after a hike that no, my cable release isn't in the backpack. How about a check list yout type up - you could even laminate it but then it wouldn't be free - but you could probably afford it.

2) Anything you carry need batteries? Even large format photographers have light meters. Either carry spares or make sure they are fully charged before going out. Running out of juice in the middle of a shoot isn't cool!

3) Ever lost anything out shooting? Like lens caps, CF cards, or whatever - how about carrying a few cruical spares?

4) rely on a camera bracket or tripod or something that has to be tightened? Do you have the necessary Allan wrench or whatever to fix it - I keep the specific Allen wrench (just an L shaped piece of hexagonal metal rod) for tightening my Really Right Stuff L Bracket. The other day I found a tiny light weight socket wrench for my Gitzo tripod. I have once had the entire head of the tripod come off fortunately without losing the rig over the side - it's held with one nut - I now check it regularly.

5) there's nothing more chumpish than sleeping in and missing the good morning light - so check the time of sunrise the night before - don't assume - and remember the best light is often before sunrise so be on site an hour before sunrise - yeah - I know it hurts - but you have to suffer for your art - at least be there ready.

6) Take your first shot quickly, but do yourself a favour and before you move the camera, look through the view finder again - is there anything not quite right about the composition, if in doubt, move a little and shoot again - give yourself a choice of images to work with when you get home.

7) It's a nuisence to use the waist strap on the backpack but if your camera gear is heavy and you are walking any distance, do your back a favour and do up the strap and take a lot of the weight on your hips - much easier.

8) Have a metal tripod? - ever get cold hands carrying it? How about puting insulating round the legs so you don't get cold hands on those early morning Fall walks?

9) To avoid disappointment, have a backup plan. This might apply if the old factory you plan to photograph has been flattened and new apartments are under construction but actually I was thinking more of you go to your main shoot and are really busy, but it can be a good idea to plan a secondary shoot in the same area. Sometimes the main plan turns out crud and the 'oh what the heck, might as well while I'm here' photos turn out to be the winners. A matter of not puting all your eggs in one basket.

10) Be kind to yourself and don't set yourself unrealistic goals. If Ansel took 12 great shots a year, what makes you think you can do any better - or more to the point expect any better or demand of yourself better. He got 12 great shots in probably more than 50 trips a year (one a week), many of them lasting several days. You shoot for a few hours each weekend, some weekends, and really, when you add it up, you really only have 20 excursions in a good year, most lasting half a day or less. Right, so be kind to yourself and set yourself realistic goals. Anticpate that this trip might not produce a winner at all, but go out often enough so that some of them will and the pressure on any given excursion isn't that much. It would be silly to miss a lovely day out and some gorgeous scenery because you were so worried about getting 'the great shot' that you didn't notice the experience.

It is reasonable however to set yourself the goal of prodiving the printer (likely you) with the best possible exposures and as few as possible technical issues) - make the art part the only possible excuse for lack of winners and have a good time out there.

Monday, October 30, 2006

Chip Forelli - worth a visit

Chip is a fairly well known photographer - published in Lenswork and other magazines. His website is well worth visiting for his superb black and white photography.

Pressure To Perform

Most of us shoot for ourselves. We may have ambitions to sell our work, but we get to choose the subjects we photograph and we have another source of income so we won't actually starve if we don't photograph or even harder, don't take 'great' photographs.

So there's no pressure to perform, right?

Wrong.

Pressure comes from all manner of sources, from within and without. We set ourselves up to be pressured. We share our work with others thus setting up expectations of quality that are hard to maintain, at least on a regular basis. My setting up this blog puts pressure on me - I need images to publish - all text makes George a dull boy. If we are selling our work we need new images to maintain client interest.

If we are lucky enough to publish, the glow doesn't last long and soon we are looking for new mountains to conquer - new places we can get our work published. I remember telling myself that if I ever got my work in Lenswork, that would be the be all end all and I could rest on my laurels after that - yea, right!

It doesn't matter what we accomplish, we soon want to move on and achieve the next goal. Our achievements might be modest - giving a print to a family member, showing our work at the local Camera Club, simply having an image good enough to spend $25 on a frame.

If 10 people a day visit my website or blog, then I want 20, if thousands, then more thousands.

So, lots of pressure, much of it self generated based on assumptions about what other people think.

I wrote previously about '10 things to do to get out of a slump' but here I want to discuss coping with the pressure.

First, simply recognizing that the pressure is self generated is a start - identify your enemy.

Second is to analyse the way that the pressure affects us. The obvious thing to do is to take even better photographs but this implies that we shoot more of the same thing, only better. This is a direction of very limited scope. Yes, you might eventually get a better shot of a particular mountain, but if you keep photographing the same subject in the same style, the odds of creating anything better are slim, even though that is what we want to do.

Rather we need to create something different. It may turn out to be better, it may be worse, but do we really need to make the same shot as before only better and is it even realistic to anticipate that we could make the same shot better. I mean, how could you take the same shot only better - do we look for a nicer tree, a rockier rock, a wetter stream?

I think we need to get past the idea of improving on previous photography and simply move on to new photography. Perhaps our mantra should be' been there, done that.

This isn't to say that we should abandon the places we love, but rather that if we revisit old haunts, we need to challenge ourselves to say something different about it, to try to make a different photograph, not a better one.

I strongly believe that in doing this we will improve our photography without trying to 'improve'.

Sunday, October 29, 2006

Saturday, October 28, 2006

Stitching In Photoshop


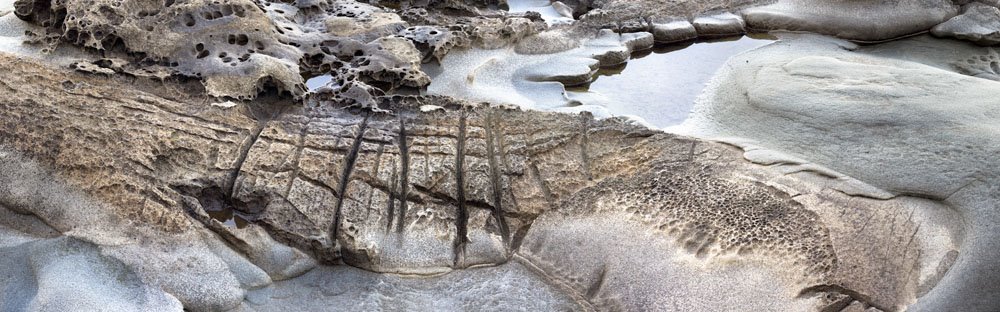
This is a three image Photoshop stitch from my 90 ts-e using the shift facility of the lens to create a left, centre and right shift image. Alignment isn't perfect since you have to loosen the tripod's grip on the camera and slide it along and reclamp but usually the variation is small enough that it's not difficult to blend the images.

Below is a description of how to use Photoshop to stitch images. While Photoshop has a stitching utility in 'automate' in the file menu, it seldom produces perfectly invisible seams and I never use it. Instead, I do it manually. In theory I could use the following technique with ordinary lenses and when the camera has been rotated between images, but as PTMac will take care of perspective and pin cushion and barrel distortion and morph the images for the best possible stitch, I reserve Photoshop for lens shift stitching.

In taking the images, I move the camera the opposite direction to the lens shift so that as close as possible the lens stays stationary and the 'film' slides over.

My technique is to first select all three images in Bridge, then command-O (control-O on a PC) to open the three into Camera Raw. There I select all and then synchronize. Note that while synchronize all should in theory make the images match perfectly in colour, contrast, etc. , in fact, if you leave the colour balance as 'as shot', then if you used auto white balance in camera, each image will have it's own white balance despite your efforts to set everything the same. It's simple to move the colour temperature slider slightly, even if you then move it back to the original position - now it's 'custom' in stead of 'as shot' and all three images will have the same colour temperature.

You may yet have differences amongst the images. You will of course have used manual exposure and manual focus so those don't explain differences, but what about differences in lighting - even the thinnest cloud will change the image brightness and even colour. Don't forget too that if you are doing a stitch in which you rotate the camera between images (ie. you aren't using a shift lens) polararizers will prevent a good match as you swing the camera to a different position relative to the sun thus affecting the amount of polarizing.

Getting back to the process however, I make the changes in Camera Raw (or whatever raw processor you are using) and open the images in Photoshop (had I been rotating the lens, I wouldn't even consider using Photoshop to do the stitch, I'd save the images as TIFF's and then bring them into a dedicated stitching programme.. Anyway, this time we are using the shift capabilities of my lens and so into Photoshop they go.

I find the rightmost image and use that as my base. I use 'Canvas Size' in the Image menu to double the size of the image. Most often I'm stitching horizontally in which case I will locate the anchor in the third column, middle row, set the units to percent and select 100 as the amount. This will double the canvas size, growing to the left.

I then find the centre image, use command-A (control-A for PC) to select all, command-C (ditto) to copy the image and once it is copied, I get rid of the image and paste by command-V after reselecting the rightmost image.

The middle image is added as a layer to the newly grown right image. I do the same with the left image, automatically placing into a third layer when I do command-V.

Use the move tool (top row, second column) to move the overlying images around. What I do is turn off the left most image so I only have two to work with. I click into the second image and just under the layers sign where it says 'normal' I select 'difference' instead. This first of turns the middle image into a negative, but more importantly, when the second image is aligned exactly over the right image, the two cancel each other out and the overlapping section becomes black. Since alignment is never perfect, I simply aim for the blackest possible alignment, while the image is magnified to about 50% size. I look for the best alignment in the middle of the join both vertically and horizontally. I do initial movement with the mouse and final alignment with the keyboard arrows. Lastly I convert the layer back to normal.

Once aligned, I add a white mask to the middle image layer, select the brush, set the brush hardness to 80, opacity to 100%, shrink the image so it all fits on screen, select black as the painting 'colour' and paint the right part of the mask so that the image underneath shows through. In practice it shows through anyway because of the way Photoshop pastes smaller canvases into larger ones but what I'm looking to do is find the edge between the two images. In painting all of the right side of the mask, as I go towards the left eventually some of the middle image will disappear (because I'd painted black into it's mask. This tells me where the edge of the rightmost image is. Having painted all of the right part of the mask and showing a thin line of the middle image out, I magnify the image on screen to 50% again, shrink my paint brush and carefully create the seam between the two images. I go round lines where I can and find places where lines blend best if I can't. The end result is a careful blend of the two images which won't show, no matter how big a print I make.

To do the same with the top image, I first turn it back on (which doesn't select it), then select it, set it to difference, move it, create the white mask and paint to blend it and now I have all three images aligned and careful seams created. At this point I have to be sure that the three images really do match in colour, brightness and contrast. Sometimes an image is soft enough it isn't obvious there is a difference. I can increase contrast with a temporary curve layer and increase saturation with a temporary hue/saturation layer.

If these steps show any miss-match, then I go to the Layers menu and select 'adjustment layer' and levels or colour balance as needed. When you do so a window appears with the name of the adjustment layer and just underneath a check box which ties the effect of this layer specifically to the layer below. In selecting this box, you make any changes in colour or contrast apply only to the layer below (based on it's mask). I then use the white, black and middle adjustments in the levels settings to match brightness throughout the seam, and adjust colours with the colour balance adjustment layer. I should now have the seam completely invisible, even with the temporary contrast and saturations layers. I can now throw those away(or just turn them off).

If I am confident I did a good job with stitching, I flatten the image. If I have any doubts, I save the image first. I found it handy to use a function key to flatten the image as I use this a lot.

And that's how I stitch images in Photoshop. The process to combine images that have been stitched with PTMac is a little different in that the canvas is already large and the surround of each modified image is black. I still use white masks and black paint to create the seams but I don't have to move the images around since they already have the optimum alignment (as created by the stitching programme). I could have PTMac do this for me but there are times when even a 3 pixel error in stitching would show so I prefer to manually select my seams.

Friday, October 27, 2006

Abstract Rocks


Exposed by the receding tide, the rocks were still wet and shiny and had the most amazing collection of colours.

Hornby Island Rock Formations


8 image stitch, shot with my 90 ts-e using the tilt facility to adjust plane of focus. I had to reduce the size of the output file so it would fit in Photoshop - seems like it doesn't like anything more than 20,000 pixels across - anyway it declared it didn't recognize the file type, yet when I reduced the pixel width to 15,000, it had no trouble.

Trying To Make Order Out Of Chaos


The picture above is one of the beautiful spots which I found very difficult to photograph - the rocks have lovely greens and blues and even magenta tinges in them, there are pools and falls, carved rocks, multiple levels. The image above encompasses less than a quarter of the rocky area which is interesting.

Even this image suffers from some clutter. The right upper corner is too fragmented. I haven't decided if I like the tip of the rock on the bottom at the left - I was tempted to crop it but doing so weakens the bottom left.

I used Akvis Enhancer but found the effect too 'over the top' but managed to 'Step Backward' so I could no longer fade the effect. No problem, I simply clicked on the prev. step and used the history brush with 30% effect to undo the parts that were overdone in Enhancer.

The rocks in the upper left were in shade and a lot cooler in colour than those in the upper right so some colour balancing was done along with reducing saturation specifically for blue, again with masking to avoid removing blue from the pools.

I like the effect of the pool at the top left, the pool in the middle to the right, then the white water bottom left, forming a triangle. The stagnant pool contrasts nicely with the fall.

I wonder if I lightened the reflections in the upper pool too much - after all the reflection shouldn't be brighter than what it is reflecting - I think its ok, but living with the image for a while will tell me.

Below is the original image - frankly it doesn't look anything like what I saw - the colours are washed out, the variation in rock colour is missing. I might have gone too far with the final image but it will be interesting to see actual prints.

Having just made my first print, the colours were so over the top I have toned them down and replaced my 'good' image above.

Thursday, October 26, 2006

Do Beautiful Photographs Come From Beautiful Objects?

This question is of more than philosophical interest. If it's true that the best photographs come from photographing beautiful things then it has serious implications for where we go looking for things to photograph.

To start, let's think about some classic images. We can start with my favourite Pepper # 30 by Edward Weston. It's possible that holding the pepper someone might see beauty in it's curves and even see the sensuousness of it that so strongly comes across in the print.

There's a Paul Strand picture of a mud guard and spokes of a motor cycle wheel - it has beautiful curves and shadows and is a very nice photograph. The motor cycle might have been beautiful to some people but I doubt anyone would have thought the wheel itself was all that exciting, it's only in the way that the spokes, shadows and mud flap come together that makes an interesting photograph.

My picture of the underneath of a railway bridge is beautiful in my opinion. It had a bicycle path running under it and I'm sure thousands have gone under there and perhaps many have even looked up briefly. I doubt any of them saw anything beautiful there - it is in reality dark, dirty, and ordinary. With enough exposure and interestingly composed and emphasizing the wear patterns and light coming through the raiway ties, it makes an interesting picture.

Many of Michael Kenna's images have a simplicity which makes them beautiful but were you to look at the whole, I suspect most often you would not see beauty.

Some time ago The Online Photographer, Michael Johnson showed a photograph taken by a recently suicided European photographer of two forks touching - it was wonderful - they were very ordinary forks, there was nothing to lead you to think it would be a magic image, yet the photographer was creative enough to place them together, light them, select a background and print them in a way that was unquestionably beautful.

It's a little harder to pick examples of not needing beauty when we talk about the grand lansdscape, but think of your drive through the mountains on holiday. Sure they were pretty enough, but hardly the stuff of famous photographs. What makes the mountain pictures exceptional is the photographer selecting wonderful light or unusual weather conditions, a different time of year. Even here though, it's often how the elements are put together that 'makes' the image. Any other viewpoint would have been pretty but nothing more.

OK - so beauty isn't essential to photographs, even landscape photographs. It's probably true though that if you want to photograph the grand landscape you are going to have to go somewhere pretty and interesting, then find the beauty in it - if you can move in a bit, then you might not need inherently pretty scenery but you might need persistence or luck. If photographing a portrait, you'd want at least an interesting face if not a beautiful one. If doing figure studies, beauty helps if shooting the whole body but if concentrating on parts, you might well be able to work with all sorts and sizes of people.

Shooting industrial and still life, it's a matter of finding the beauty in ordinary things or outright making the beauty through careful juxtaposition, use of shadows, looking for interesting shapes and lines within something very ordinary.

Does it actually hurt to have something beautiful to photograph? Perhaps in one way it does - the more beautiful and dramatic the subject, the harder it is to create something that is better than being there. You risk the post card with 'whish you were here' on the back.

A scene can be so darn pretty that it's difficult to isolate something that will make an interesting composition. On our trip to Vancouver Island we stopped at a waterfall/boulder complex which was absolutely beautiful - but it was the whole experience that was beautiful and the whole couldn't be shown in a photograph. I really struggled to find something and no matter how interesting the parts were, they never did equal the whole experience.

Conclusion: Beauty helps in a subject, in some subjects more than others, it can be distracting and it doesn't come close to guaranteeing a meaning full or beautiful photograph. If cruisin' fer snaps, it pays to head to interesting subject matter, but the definitiion of interesting can be pretty wide and your definition is almost certain to be different from mine.

Wednesday, October 25, 2006

The Nature Of Lenses

Ever stop to think about what the properties of a particular focal length are - not the lens itself but simply what does it mean to shoot with a 100 mm. lens as opposed to, say, a 25 mm. lens?

Obviously the difference is one is telephoto (or at least long focal length) and the other wide angle. They have obvious implications about close focusing and depth of field etc. but beyond that the nature of lenses impacts the look of a photograph.

Lets say that you are photographing a 3/4 length portrait. If you photograph it with a wide angle lens, you have to stand closer than if you use a long lens. The depth of field ends up the same so that isn't the difference. Two things occur. Anything closer to the camera is portrayed larger, whether it be a hand or nose. Were you to stand back and use the telephoto, the relative difference in nearness of the hand and nose are smaller so less distorted.

This can be used in landscape work where there are two objects, one in foreground and one in middle ground and you want the foreground object to dominate. On the other hand, if you want it the other way round, then stand back and use a longer length lens.

Changes in the appearance of the image are strictly a function of position of the camera, not the focal length. The change in lens simply determines how well you fill the frame with your subject from a given position.

The other characteristic of the lens is how much of the background is included. For example if you are 4 feet away from the subject and your lens encompasses a width of 5 feet at this distance, at double the distance it will include twice as much but double the distance is only 4 feet behind the subject.

With a telephoto, you might be 20 feet away and encompass the subject 5 feet wide, but at 4 feet behind, the coverage is about 6 feet, not 10 like in the wide angle example.

this of course is simply the foreground issue turned round, but it does mean that when you want a simple background, you are more likely to find one with a telephoto than a wide angle which includes so many more things in the background that the chances that some of them interfere with the image is that much greater.

As an example, your sitter is in front of a weathered barn door. With the telephoto the background is the door, with the wide angle, the background is the barn, the telephone pole, part of the tractor and the dog's tail. Perhaps you wanted an envoronmental portrait, but maybe not.

Tuesday, October 24, 2006

Travelling Light

My normal backpack is almost 30 lb. these days and the limit for carry on is 22 lb. So far no one has weighed my backpack or tried to squeeze it through the little test gear they have at the terminal gate but one of these days.

This weekend I was in Victoria for a conference and in rushing to pack I couldn't find my small backpack and in frustration travelled with my S3IS, thinking I'd have little time to photograph anyway.

As it turned out Butchart Gardens was lovely and I deeply regretted not having the 1Ds2 with me.

This raises the question of what would or should travelling light look like? Obviously it depends on what you might be able to photograph and how tight your packing limitations are and how far you plan to hike. If we assume though that you want to cut the weight of your pack in half and that you want general coverage with your lenses, here's some thoughts I have about next time.

I shoot landscapes, not sports and not wildlife so I don't need really long lenses - forget the 300 mm. lens. Most of the time I can live with 24 mm. as the widest lens and if I really needed 17 I could rotate the camera and shoot three well overlapped images with the 24 and stitch them. SO I don't need my 17-40.

For a really light load, I could travel with my old and quite trusty 28-105 - sure it's not the sharpest lens I own, but it's actually not that bad and on a full frame camera covers a good range. Had I a 30D or XTi I'd go for the 17-85 IS as the ideal travel lens.

If I could take a mini-trecker, then I would take my 24-70 and 70-200 and poss. the 1.4 ex. I'd take the Epson 2000 to save cards to and forego the laptop unless I was taking it with me anyway.

I would not consider any of the 28-200 and bigger lenses, whether Canon's or someone elses as being not sharp enough to even consider. Sure people have lovely 4X6es from them but I really wish my shot on the blog yesterday from Butchart Gardens had been shot on my good camera. As it stands it barely makes an 8X10 print but it's such a lovely scene it really deserves a 4 image stitch on the 1Ds2 and print to 36 inches. I even briefly thought of flying back to Victoria for the day just to take the one picture - almost sure I could sell the image for more than the cost of the trip - but weather and falling leaves and not being sure I could repeat the shot I probably won't.

As to using a lesser camera than your best one - unless it was very close to your best (say an XTi instead of a 30D - though why bother), or a 5D instead of a 1Ds2 (weighs half as much and is half the size), it probably isn't worth while.

For really light travel options while maintaining quality, what about travelling with a film camera like the Mamiya 6 or 7, or even my old Zeiss Ikonta which can slip easily into a coat pocket.

As regards tripods, I consider them essential - I know that at Butchart I was exposing for up to half a second at f8, ei 80 so it's absolutely essential for the kind of work I do. What I actually did this weekend was to pick up a light weight 'digital' tripod for beginners, made by manfrotto, four section legs so it would fit in my suit case, centre column because it doesn't quite make it to eye height without. Sure it isn't the most robust tripod on the market, but it is light, small, portable, and in the absence of a breeze or really long lens, does the job. It even came with a small ball head and quick release plate and a carrying bag with shoulder sling. Sure it doesn't have multiple position legs, but it does get fairly low and has a reversing centre column for really low work and it sets up quickly.

I'd leave at home extra filters and gadgets. I'd take some lens cleaning tissue and that's all - I'd live with any dirt on the sensor for the duration of the trip. I'd still have to take the spare battery but as long as the batteries on the 1Ds2 last, I'd probably leave the charger at home. For cameras like the 10, 20, 30D and Rebels whose batteries give out part way through a day's shoot, I'd carry two or three - they aren't large, and the charger, which likewise isn't large.

So, for lack of this foresight, I don't have the ability to print my image large, next time I will be better prepared - anyone know where I left my mini-trecker?

Sunday, October 22, 2006

Butchart Gardens, Victoria


At a weekend conference and was able to visit the Butchart Gardens in the afternoon. The Japanese Garden was wonderful. In the rush I grabbed my Canon S3IS and not my good camera - sigh...

On Selling Photographs Part 2

First off, let me recommend you read the pertinent comments by Scott in commens on previous blogs about selling.

There are ways to sell your photographs - but I think that it is likely it won't be by any of the traditional methods - galleries, stock agengies, etc. Had I toughed out the Farmers Market a bit longer, had I perhaps been semi retired, it would have been perfect and might in the end have produced $15,000 a year in profit - hardly a fortune but fair for an artist.

I also sell my train photographs at a local Model Train Store, Trains N' Such. That has been fairly rewarding and has definitely generated a profit. I have some images at Glenbow Museum and that produces a very modest income, and more images in a small art/craft store in Bragg Creek which also produces modest sales of small images.

As I was winding down the Farmers Market sales, I actually had an offer to sell my images at a local truck stop - apparently truckers often spend money on scenery pictures. Perhaps we really need to think outside the box to make money from our photographs. Of course, it begs the questions as to whether you want your images sold at a truck stop, to hotels and restaurants.

Scott makes a very good point - is it better to work extremely hard to get your work sold at reasonable prices, or is it better to have it seen by the most people possible by selling at very low amounts?

Probably for the most of us it's just exciting to get our work out into the public - but it would be better if it didn't actually cost us a fortune. Every photographer should have a website of his or her images. Every photographer should have their best work on their own walls - even the bathroom.

One time I purchased a series of metal frames which I could rotate images through. It's possible to make very nice imitation matting with photoshop so images could go right into glass. Matte images can go right against the glass without any major problems.

What about offering your images to your local coffee shop for free - with your card and a price just in case.

One of the more lucrative markets would be downtown offices which spend a fortune on art and decoration - they tend to buy from dealers who specifically sell to that market but perhaps you know someone who know somebody...

I look for suggestions.

Saturday, October 21, 2006

Low Cost Prints, Photographers and Market

Scott's comments about selling are I think very important and deserved more than just a comment. Scott uses the experience of Brooks Jenson of Lenswork to illustrate selling large numbers of inexpensive prints. I tried selling 8X10 images for $19 at the local Farmers Market and if I was lucky I'd sell a few a day, yet sell 5 or 6 13X19 @ $69 and one or two really large ones for $250+.

I wanted to get rid of the small prints after trying this for a few months but my daughter pointed out that people looked at the $19 prints but bought larger ones - so to keep them.

I believe Brooks was selling larger images for $20 but to be fair he has a huge captured market for his work.

I found that at the farmers market anyone walking around with an slr around their neck was first off very unlikely to even stop to look at the images and second, almost certainly not going to buy one - even though they sometimes took up a lot of my time.

No, my market was the general public. I sold mostly colour images but there was definitely a population of young people interested in Black and White and also interested in the more abstact or industrial images as artwork as opposed to a pretty picture.

I note that probably one of the most successful photographers of fine art work is Alain Briot. Mind you he's a shameless hustler of his work (he even got The Online Photographer to promote his new book - nice going.

He has a picture of the month which he sells fairly reasonably ($100). He made his money off art shows to start - never galleries, and he worked damn hard, and had his wife working with him, and spent many many hours on framing and matting and packaging - a full time occupation in other words.

It's unrealistic I think for anyone who wants to spend less than 8 hours a weeks selling (not photographing) to even expect to break even, never mind make an income.

Thursday, October 19, 2006

The Cost Of A Print

One of the things you need to do if selling your work is to be realistic about the cost to you of each print - both in terms of dollars and time.

Here's a little list of some of the costs of making a print

paper - but don't forget to add in a fair share of all the trial runs, ink blotched, bent, damaged or otherwise unsalable prints - could be that in real life you use three sheets (hell, 25 is probably more like it) for every one you sell, if you start counting from the first print made.

ink - see above re trial runs though, and what about nozzle cleaning - with Epson pigment printers, that's a huge cost that you must factor in - there are some useful references on the net to ink used per print produced that take into consideration nozzle cleaning - but if you print intermittently - better double the cost to allow for more nozzle cleaning.

printer wear - printers don't last forever - if you are good enough to sell your work, you are doing a lot of printing and should realistically amortize the cost of the printer over two years. In the mean time at least two newer sexier and perhaps better printers will come out. Within a year of the 4000 coming out, along came the 4800 which apart from having epson's black and white print driver and less bronzing on gloss papers and a wider gamut, also removed the second black container making it a hell of a lot more expensive and difficult to switch from matte to glossy and back.

Containment - if you sell more than a few prints, you soon run out of print boxes. For myself I have to figure in the cost of the mylar art bags - roughly $1 each, depending on size. I have litterally spent thousands in the last two years on acid free foam core. I get 5 13X19 from one sheet, 2 17X22 but only 1 24X24 from each sheet.

Shipping: if you mail, you have the ups or post office cost but don't forget the packaging cost - for a mailing tube if rolled, plus cost of a protective sheet you roll up with the print so the image doesn't rub - I used a roll of vellum - handy but probably not the cheapest. When shipping flat, the only way I have found to reasonably guarantee safe arrival of a print is to put it in the mylar bag and tape that to a sheet of 1/8 inch hardboard (masonite).

Returns - better factor in the cost of some images being lost or damaged in transit so you have to replace the whole package. Even when not shipping, if the customer drops a print on its corner while standing talking to you, you are likely going to swallow the cost of the replacement.

Time - you might be tempted not to charge for your time, but that's only because you are selling one print - get lucky and have 50 sales and I bet you start to feel differently about how much your time is worth.

Computers - this is a bit more controversial as you know damn well you would have had the computer anyway, but you might have bought a new one because of the business being done, a bigger, faster one with more hard drives so you may want to take that into consideration.

Artistic Worth - this is a topic for a whole other discussion so we'll just say for now that opens a whole can of worms.

And I'm sure I have forgotten other factors and deliberately left out several - the cost of camera gear, travel, burned dvd's etc.

Does make you think though.

Good shooting,

On Selling Your Work

I suspect many of us dream of selling our work. It means we can buy better and more equipment, it's the ultimate sign of worth - people actually willing to pay for your photographs. I'm going to tell you about my experience first then discuss some thoughts about the whole 'business' of business.

My first experience selling photographs was as a university student. We would borrow the Crown Graphic 4X5 and shoot residence floor groups and sport teams and sell the prints - I got to learn the ins and outs of making 60 prints in a hurry - and the problems of a dryer with fixer impregnated cloths. Quite lucrative, hardly creative.

It wasn't until 2003 that it occured to me again to sell my work and at first it was more about getting my work up on the wall than it was about making money from it - just as well as it turned out.

A local coop photography gallery would rent wallspace to photographers and they had themed shows throughout the year. They juried the work so there was at least some sense of approval in getting in - though you never knew how much competition for wall space (if any) there was. I did several of these shows and sold enough images to recoup the cost of thd shows but not the cost of the framing - so yes, I earned some money but yes I actually lost money overall. Still, nice to see your work on the wall of a gallery instead of inside a print box at the bottom of a drawer - I'd encourage anyone to do it.

My next effort at sales was to set up a booth at the local Farmers Market on Sundays. I'd read bad things about working with galleries and it seemed like this might work better. The market was a busy one. I got mylar bags from Crystal Clear Bags and picked up acid free foam core locally. I printed on 13X19 and 17X22 with a generous white border (which looked a lot nicer). I used wicker baskets to hold the prints. The start was painfully slow, selling 1 - 2 images a day but gradually things got busier. In the mean time I was continuing to photograph so I kept adding prints to the selection available (eventually about 200) but as I became more successful, it took more time to make the prints and to run around town picking up supplies and ordering from the internet when local sources didn't have what I needed. I was commonly printing till 3 in the morning before going to the market so it was taking me a full day to print the images, half a day to pick up supplies every second week and a day at the market, all this while maintaining a full time occupation. I liked chatting with customers and talking photography (though in general photographers are a cheap bunch and don't buy).

After two years of doing this I probably grossed $40,000 but I know my expenses were well over $30,000 and I'm not actually sure that I made any money at all, I was tired and my wife was frustrated with never seeing me, being on errands, at the market or in the basement on the computer.

In the mean time I submitted a series of badlands pictures to "Black and White Photography" which were published and I was paid a small amount. I then submitted a series of my back and white industrial images to "Lenswork". I had hopes that this would result in print requests but the net sales from that publication was two prints. I did get to swap prints with Howard Schatz of New York which was pretty cool.

I was one of the winning porfolios in "Black And White" but that hasn't resulted in any sales. I was persuaded after submitting images to "Focus" magazine to pay for a combination publication of prints along with ads with encouraging noises about quickly paying for the publication with sales - sales = 0.

My latest effort at selling is a show in Toronto at Leonardo Gallery. They contacted me about a show. They wanted large images which meant I couldn't print them myself (having only a 7600 and they wanted 3 foot images). As is typical of galleries they split sales with the photographer 50% - ok so far. But framing is my cost so I'm currently out $5100 for the framing of 21 images. Their prices were not unreasonable but they sure add up and the net effect is that before the show opens they are $5000 up and I am $7000 down (framing, invitations, ad, shipping, print costs). This makes it extremely difficult to make money as to break even I need to sell 18 of 21 prints in the show - almost unheard of. As this is standard gallery practice, I had expected and accepted it, but none the less, it makes working with galleries a less than lucrative prospect.

I looked at self publication of a book but the breakeven point was 375 books and I couldn't be sure I could do that even while I was still at the Farmers Market.

Thoughout all this time I have had a website but it has generated only a few print sales - not enough to pay for itself. It has however acted as an inexpensive catalog for my sales locally. People could see my work at the Farmers Market and then show their spouse on the net or decide for themselves which particular image they wanted. To that end it has been invaluable - but forget internet sales - a non starter.

And that brings you up to date. Next time I'm going to reflect on some possible ways to earn money. As I haven't found the ideal answer yet - it's going to be more a matter of thinking in print.

Wednesday, October 18, 2006

Can An Inkjet Print Be Too Small?

My normal print size is 13X19 - I settled on that because at smaller sizes I couldn't tell as much about the technical quality of the image for selling purposes and besides they look more dramatic - but it does cost more in paper and ink and time to print.

I happened to have some 8.5X11 (A4) paper in the printer recently for a specific project and so used it to make some prints from the recent trip to Tofino and in doing so observed something I had seen before - prints made that small on matte paper don't look sharp, even though they look fine at larger sizes, viewed from the same distance.

I think there are two things going on.

First, there is a limit to the resolution of inkjet prints and perhaps we are getting close to that with the detail in a high pixel count image when the print is small (the drivers interpolate downwards and the inks bleed into the paper).

The second reason is that with large pixel count images, I am output sharpening with pksharpener at 300 dpi with a print size roughly 13X19 from my 1Ds2. By the time the print is downsized to 8.5X11 I am probably losing all of the output sharpening benefit. I'm going to try an experiment downsizing the image for small prints, then doing output sharpen and see if there is a substantial difference.

Tuesday, October 17, 2006

Driftwood V.2


After living with the image on my wall for a day, I decided I too couldn't stand the out of focus sand opening on the left. Also there were peculiar purple tinges to the image and I decided rather than reduce them, I'd just convert the image to black and white. this is the result of combining another driftwood on sand image.

Sunday, October 15, 2006

Driftwood Pano


The image appears here very small but in fact it is a 7 image stitch from my 1Ds2 (camera vertical). The print size at 240 dpi is 19 X 76 inches. Click on image to get larger version.

The composition is grossly asymmetrical with the large out of focus background sand on the left. It still works for me but I'm interested in other people's opinions.

This reminds me that I have had several insightful comments in the past and they are much appreciated but of course blogspot does not give me the email address of commentors so let me just say thank you to all of you who have significantly added to the value of this blog.

Stitching was done with PTMac. Despite my best efforts at stitching I could not get the error down below a maximum of 10 pixels which is really too high. This sometimes happens. I could have reduced the error had I been willing to tilt the images relative to each other - why that should stitch easier I don't know but I think it might have something to do with the horizon. I deliberately lowered the camera so that it looked horizontally at the driftwood but suspect in hind sight that even so it was at the level of the top of the driftwood, not the middle. Stitching with the horizon not accurate results in the images splaying in an arc, high middle, low either end and I didn't want this.

In fact, when I output the stitch to multi image tiff (to maintain 16 bit) I was able to bring the 7 images back into a single layered image, use white masks into which I paint black to show the previous layers and do some careful edge design so that misalignment of pixels did not occur in the middle of a line. The result is the seams are invisible, even at 100% on screen.

I used to combine the images using a black mask into which I painted white but there is a bug in Photoshop that shows the original vertical seam even after you paint 100% into the black mask where you want it - somehow I'm only painting a maximum of 99% - or some such figure - strange - but using white and painting black works just fine.

I had a lot of fun with the driftwood in Tofino. Surrounded by logging country and facing the Pacific Ocean, next stop Japan, there are a lot of driftwood piles some of which have the most amazing patterns to them. I'd like to produce an entire portfolio of driftwood if I can find 12 - 15 images which are sufficiently different - I think I can.

Thursday, October 12, 2006

Lessons Learned On Major Shoot

1) remember to take the usb cord that connects my Epson 2000 to the laptop so I can burn DVD's - ended up with only a single copy of 1500 images - did get them home safely but hardly an ideal situation. A checklist is mandatory.

2) At the airport I thought I might have trouble with weight - my camera bag now weighs close to 30 lb. and the announced limit was 22 - fortunately they didn't think to weigh it but I might have to consolidate my lenses next trip (see prev. comments about not using the 300 much).

3) shipping my tripod I remove the centre column and pack both parts in my duffle bag (a lot handier than regular luggage) and pad the tripod with shoes and jackets.

4) Don't forget to put prominent numbers or letters on CF cards so you never have to wonder whether the one in your left hand is the one just out of the camera or the one that is ready to go in. I had two new ones purchased just before I went and didn't get round to labelling them.

5) Carry extra lens caps - I left one in my other jacket at one point - it was so easy to just reach in and grab an extra one.

6) Despite best intentions, occasionally lens caps fall off in the bag and without a uv filter you risk damaging your lens - I have finally broken down and invested in UV filters for my two expensive zooms.

7) I have the camera set up for sequential numbering of pictures since I bought the camera - but I have noticed that several times my Canon 1Ds2 forgets where it was and uses a completely erronious and previously used number for the picture - which means that when all the images were dumped into the same folder from this one trip, there were duplicates - I had to know this so I would not lose the non identical duplicates - which were from a different part of the shoot - have no idea how this came to be and not happy about it - just be aware that when copying the images to your hard drive, if it warns you about already being there - it may not be that you copied that folder already, it may in fact be two different images with the same sequence number.

8) One problem I haven't found a solution for other than being methodical and careful - when images are stored on the CF cards, the card holds a folder which holds a folder which holds the images - don't really see why this is necessary but is there some painless way to fetch the images without going through all those subfolders? I fear I will miss one folder in the process of transferring things over (I did and only noticed it by checking the continuity of sequence numbers on the images - there was a sudden jump and I found an entire folder of 100 images I'd missed. There has to be a better way - perhaps that is something that Lightroom or Aperture will address, or maybe I only have the problem because I'm too cheap to buy cataloguing software.

9) Zooms aren't just handy, they are essential if you want to avoid cropping.

10) having learned by hard experience, always zip up your backpack camera bag after changing lenses, that way when several minutes later and you quickly grab the backpack to move camera positions, you don't end up having the lenses roll out. It also keeps the interior of the bag cleaner, free from salt spray, etc.

11) the least speck of dust on my 17-40 front element shows up in the picture either as a spot or as flare (the joys of lots of depth of field and a wide view that is prone to flare) so every time you mount the lens, check for dust and clean as needed.

12) when cleaning, never ever use any kind of compressed gas - they all sometimes spray gunk on your lenses or even worse your sensors - for lenses use a brush and if need be lens cleaning tissue, for sensors, the spinning sensor brush.

13) Never assume the weather isn't right for pictures - it can change, either by location (cars can move faster than clouds sometimes) or simply over the time it takes you to drive or hike to the location. Remember that for every time you go out and just before the shot the weather goes wrong, there are other times it finally turns right. Seems like most cities claim they have the fastest changing weather. Sometimes it works FOR you.
14) the little things that slightly spoil an image and you think maybe it will be ok - trust me - it won't - anything that is slightly noticeable through the viewfinder is a gobsmacker in print - move on.

15) the harder I have to work to make a picture, the less likely the picture is worth taking. I don't want this to be an excuse for laziness, but looking back at 1500 pictures, the ones where I went wow, then spent 10 minutes to show it to best advantage, turned out a lot better than the ones where I worked really hard to put a bunch of elements in themselves less than exciting into a pattern which was somehow supposed to make up for the lack of wow-factor in the first place - it never does - makes me wonder why I keep trying. There's a reason you had to work so hard, you had so little to start with.

Wednesday, October 11, 2006

First Efforts From Vancouver Island


The first two images take advanage of my 90 ts-e lens to tilt for change of the plane of focus to correspond to the scene, thus ensuring adequate depth.
The third image used a 9 image blend run through Helicon Focus to get adequate depth of field as there was no single plane of focus that even if I could have tilted the right way would have worked. In fact the nearest part of the stum was about six inches from the lens, the furthest about four feet. While Helicon Focus doesn't always work (at least without laborious editing of the masks, in this case it worked absolutely perfectly right 'out of the box'. No other technique would have worked at all, never mind as well.

Monday, October 09, 2006

On Flying And Photographing

Had a chance to charter a float plane from which to photograph. It was a mixed experience and in the end probably not worth the expence - I'd do things a little differently in the future - keep in mind this is after photographing from a balloon in the past with a fair amount of success.

I decded beforehand that I'd use the 70-200 2.8 IS lens. They offered to remove the door for me or alternatively I could open the window (hinges at top and the wind holds it open). I opted for the latter because the float blocked my view downwards so having the door off didn't seem worth the trouble to me - probably a good decision though it does raise the limitations of using a float plane at all as I couldn't shoot straight down - I guess I could have had the pilot loop round again and bank steeply at the appropriate moment but I couldn't even see straight down never mind shoot so one would have to anticpate something worth shooting - I'm not that clever.

For the kind of work I do - patterns, shapes, lines, shooting down was sorely missed - shooting into the distance meant the images didn't have that graphic look I like to achieve.

After takeoff I popped open the window, stuck out my camera and found out I could not keep the lens hood on - catches the wind too much - this turned out to be a bit of a problem since half the time we seemed to be flying into the sun (the joys of spending the other half flying the other direction and wanting to get home again) (going 90 degrees wasn't an option since that would have taken us out over the ocean).

Though I haven't had a chance to look at the images - just checking with the LCD on the camera and max. magnify seems to indicate the images are sharp enough - actually very impressive considering the hand holding, low ei (I chose 200 as a compromise between shadow noise on my 1Ds2 and adequate shutter speed).

I had the camera on program mode exposure and somehow managed several times to change the exposure compensation - I thought changes were made deliberately hard to make on the 1Ds2 - anyway something to watch for in the future. No time to check historgrams when you are flying.

At one point I actually had the lens fall off the camera - fortunately I was able to hold onto it - but a bit of a scare - seems I was gripping the lens close to the camera body and had accidentally pressed the lens release buttton on the body with the palm of my hand - never done that before and hardly the time to start doing it.

Focal length selection on the 70-200 was just about ideal for flying. The one really cool thing to see (flying over a glacier) happened just as I filled my first CF card and had to reach back to the camera bag for the next one - which then had to be formatted - right next time have the next card preformatted and in a handy but safe pocket. This might be the one time that a really large CF card makes sense (I was using 2 GB cards - not wanting all my eggs in one basket normally).

Fortunately the pilot obligingly went round again for me and I might have a good image.

The flight was an hour long, cost me $500 and was of the right length. The strut coming up from the body of the plane to the wing overhead cut into my view a little but wasn't in fact as much trouble as I had anticipated beforehand as it's in front of the door.

Looking through the images, there are no obvious winners and a few that might make something worth while - probably not a good investment in hind sight. It would have been better if there had been a specific shot I wanted that I knew would work if only I could capture it - as it was it was 'a fishing expedition' all be it in the air - we simply flew over the scenic points - mountains, shore line, islands, surf - and hoped for a worthwhile image. As this was what I'd done ballooning I had similar hopes here and came away a bit disappointed - perhaps i was luckier ballooning than I had realized - can't tell since have only done it once.

I remember taking the harbour tour by boat in Vancouver knowing as I went ashore that I had two really good images - no such luck this time.

Last Day Of Holidays-Finally Internet Access

If I hold the computer up just so and keep my knees crossed, I can mostly get wireless connected. Have been shooting every day - thumbing though the images on my Epson 2000 (forgot to pack the connector for the 2000 to the computer so most of the images exist only on the portable drive - sigh and hope...

If only I could skip all the crap images and concentrate on the few out of hundreds of images which are winners - then I could shoot with an 8X10 - but I know me - if I were slowed down that much, I'd spend all my time working on marginal images trying to make them work - moving the camera around, changing lenses, tilting, shifting, rotating the back, hoping for better light, for a miracle.

It would mean I'd never get to the few keepers I have managed to find. As it is most have been shot with my new 24-70 or less often the 70-200 (a reverse of my usual lens use) and a fair number have been taken with my 90 ts-e.

I could really have used a 45 ts-e and can see purchasing that at some point in the future.

Here's a breakdown of my lenses I carried and how much I used them on this trip to the west coast of Vancouver Island then on to Hornby Island on the other side of Vancouver island (no surf, incredible rocks).

17-24 - now only used at 17 since i have the sharper 24-70 - used it a dozen or so times - definitely still useful - but since I only use the 17 would make sense to replace it some day with a sharper lens.

24-70 - shot about 1/2 of the images, relying on stopping down to f16 for adequate depth of field at the wide end and shooting multiple images with changing focus for future blending at the longer focal lengths (either manually or with Helicon Focus).

90 ts-e - used about 1/5 of the time - often as a three image stitch using both tilt and shift left and right for a square image of 25 MP.

70-200 - about 1/5 of the time - just the nature of the kind of scenery I was photographing and problems of getting adequate depth of field - at the coast things are near to far - not uniformly medium distance.

300 - took a few snapshots of the surf but basically didn't need it - would remove it in the future - perhaps even sell it - but it's so darn sharp - we'll see.

Lenses I wish I'd had - just the other two ts-e tilt and shift lenses - or an 8X10 camera - or if I ever win the lottery, a medium format view camera and medium format digital back - hey I can dream can't I?