Friday, August 18, 2006

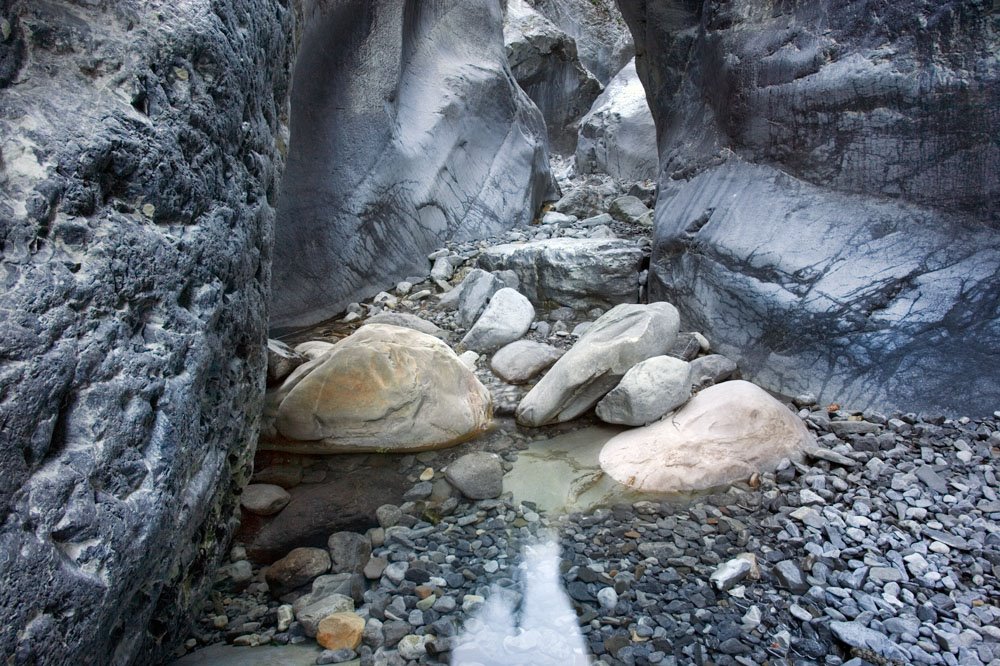
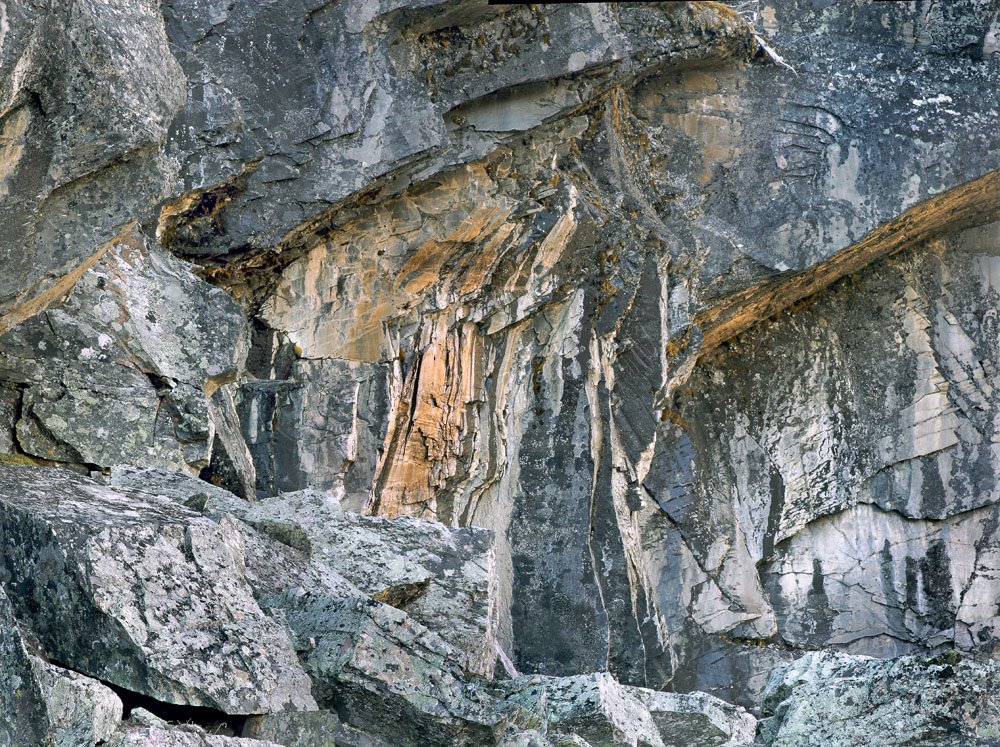
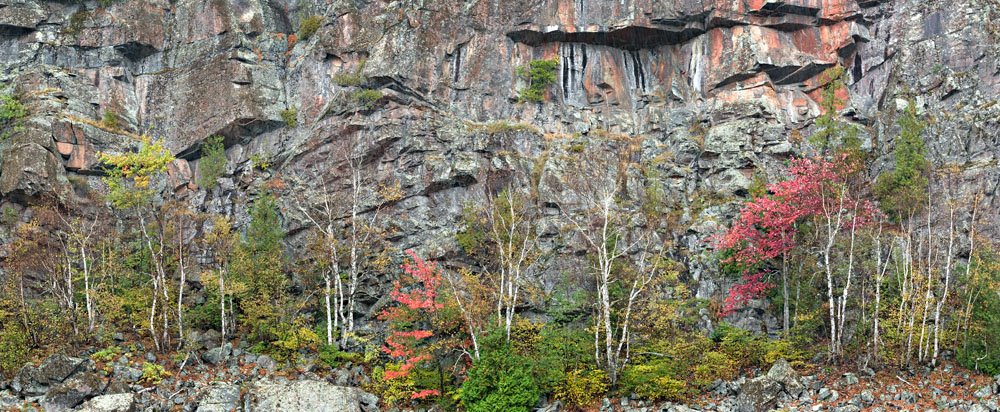
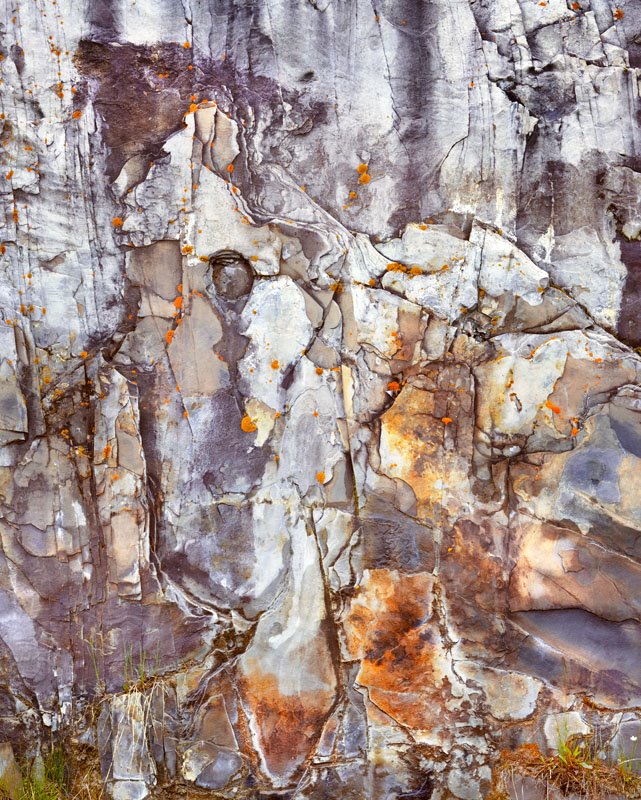
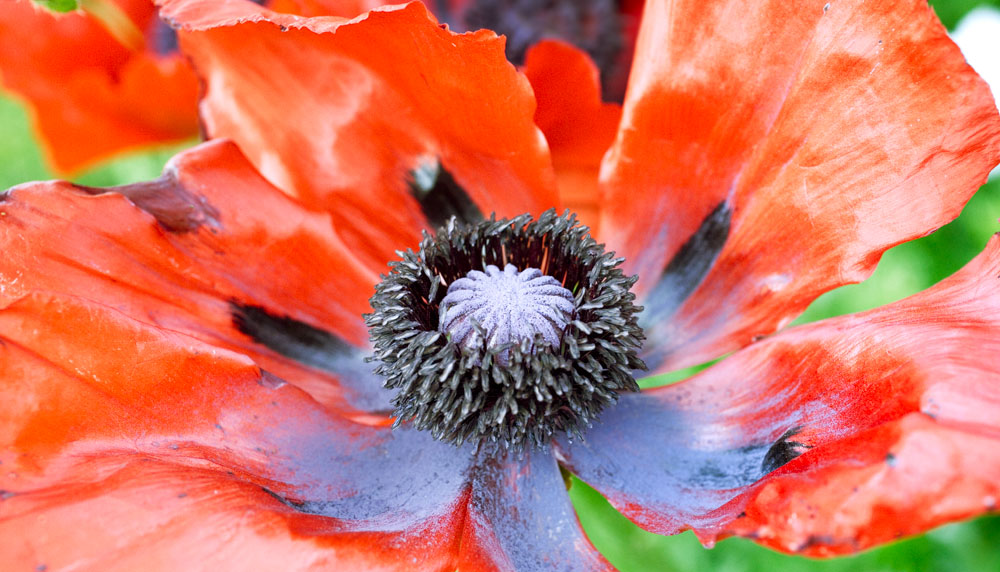
Another From Jura Canyon


Using Helicon Focus to blend three images focused at different points because this was shot with the 70-200 at 75 mm. and depth of field would not have covered the image at any f stop.

Awesome Day!


Robin and I headed for Jura Canyon this morning at - rationizing the late start (for a photographer) by saying that the canyon wouldn't see sunrise anyway. Located W. of Calgary on 1A, we parked at the Graymont Cement plant and made a short (he was right) hike to the stony river bed then only another brief hike to the start of the canyon. It just got better and better and we spent 3 hours having a great time photographing - Robin used his full complement of 6 rolls of 120 - he says this has never happened before. We worked our way up the canyon then back down, working past each other round corners so as not to interfere with each other. We saw a few hikers but for the most part we had peace and quiet (glad we went on Friday). Towards the end there was some splashes of bright sunlight on the west wall of the canyon and we both thought that perhaps after all we should have left earlier. Still, just a great day.

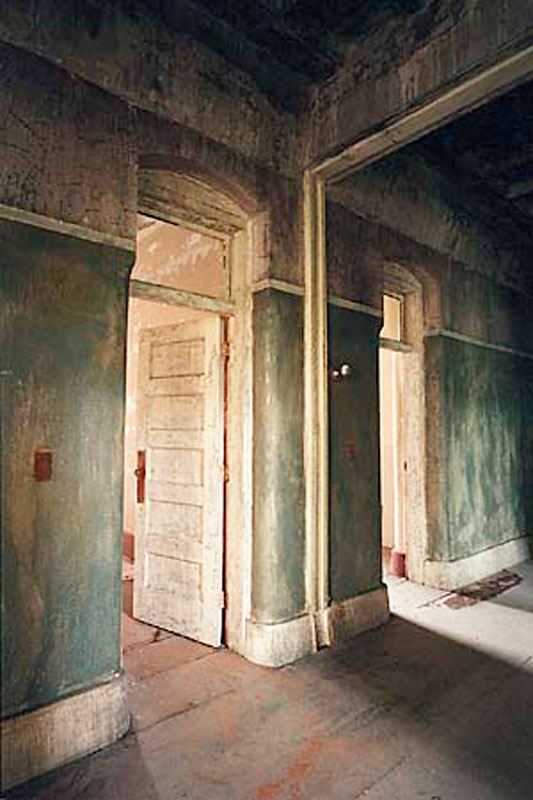
The image above was two images, one focused on the near rock on the left, the other for the rest of the image, 17-40 mm. on my 1Ds2 at 21 mm. f16. The left wall was only 8 inches from the camera.

Looking forward to working with some more of the images.

Thursday, August 17, 2006

Photographic Wish List

I don't suppose that anyone with any real power to change things is reading this, but just in case you know someone who knows someone, here's some things I'd like to see, and perhaps you would too.

In no particular order, because I'm a photographer, not an accountant here's my list.

Canon - I'd like you to increase the pixel count to 22meg or more in the next generation 1 series camera and I'd like enough pixels that you can offer it without a fuzzy filter in front of the sensor. I'd like you to add ultrasonic cleaning while you are at it. A painless way to adjust the custom features without going through menus would be wonderful - what about a programmable button or two. I'd like the exposure index visible in the view finder so I don't shoot 400 when I meant 100. I'd like live preview and a tiltable LCD screen. What about a series of really top performing fixed focal length lenses for landscape work - they don't need to be especially fast - just really sharp - to go with the new sensor. The number of people who shoot mostly landscapes and still subjects is pretty huge, canon could easily justify it. I'd like a better lock for the electronic cable release so that I don't have to press the plug in before every shot. On Canon's consumer cameras, it is really easy to be searching for the right setting and inadverantly reset the resolution to 640X480 thus rendering your images unprintable - I have now done this with two different canon cameras, S50 and now S3IS.

Lowepro - why is it that the only way your velcro attaching bag dividers work is if all the containers are full - my 1Ds2 is heavy enough to work it's way to the bottom of the bag unless all the lens pockets are full. Shooting 4X5 I have what I find the ideal camera bag - it was a backpack with wheels on the bottom and an extendable handle - neither of which I needed, but I was able to make a couple of wooden rails for the bottom so that it could sit upright and not tip over - what a concept. The main pocket held the camera on top and the lenses underneeth - after all what use are the lenses without the camera so the camera is always out when I'm reaching for a lens. The next pocket was also full size and holds my unexposed film, the one after that almost as large holds exposed film - reducing risk of reusing an exposed holder. Two more pockets contain various camera accessories and two side pockets hold the light meter and focussing aids. Mind you, it cost me $30 and the zip has already got a sticky spot (so I bought another one to keep spare). It sits on the rails so the pack itself stays clean and dry. It sits upright so things drop in and can't fall out - unlike the lowepro which if you pick it up thinking it's already zipped...

My Epson 2000 portable hard drive is just about perfect so no need to mess with it.

I wish my Arca Swiss ball head didn't add another 4 inches of height to the tripod and I wish it didn't stick when aiming severely down or up, friction adjustments notwithstanding. One of these days I might splurge and get the reallyrightstuff large ball head.

I wish my computer had more USB and Firewire ports - I always seem to be running out and having to unplug a printer to plug in a card reader or whatever. I see some computers are coming out with more ports - eg. the new Mac Pro.

I really wish backup wasn't such a hassle. I tried online backup but photographers have so much hard disk to back up, it isn't finished by the next morning (you did realize that with cable modems, the download speed is usually great, the upload speed is always terrible and on a par to a regular phone modem). And warnings that CD's and DVD's won't last isn't helping. We need a backup medium that is very archival while also very high density - at least 100 gig per removeable cartridge. Science fiction often refers to glass cubes - I really don't care, just give us something long term, ideally hundreds of years reliability. I'm not worried about backwards compatibility - there are still companies that will happily take your information off of your 8 inch floppy drive for you - and that technology is 30 years old!

Printers - well, thats a whole conversation in itself - I think I'll save that rant for another day.

Getting Ready - Trains Of Thought

I'm off photographing in the mountains tomorrow morning with a friend. Let's see, the spare battery for the camera is in the charger (don't forget to pack it), one of the memory cards is sitting at the computer, got to put that back, I wonder how the charge is on the Epson 2000 portable drive. Oh yes, I really need to clean my sensor. And it wouldn't hurt to clean the lenses befeore I go out - and the tripod is in the garage - and I can't find the slider for nodal point stitching - damn - it might have fallen out of my back pack last time I used it. When this friend said the hike was 1 - 2 km. I checked a map and I'm afraid he ment vertical distance, not horizontal - oh well - hope he can do CPR - really should lose some weight - might even help my tennis. Only two more weeks at the Farmers Market - sure will enjoy having some more free time but I'm going to miss chatting about photography every week, and miss the money, and lets face it, it's nice having people ooh and ah over your work every week - hope I'm doing the right thing - oh well, too late.

Wednesday, August 16, 2006

The Delights Of The Square Format


Ignoring the pros and cons of shooting with a square format camera, I'd like to address the aesthetics of the square print in a square matte and square frame.

There's something simple and elegant about a square image. Perhaps it's simply the novelty in a world of non square doors, windows, books, tv's and pictures.

Certainly the modern art painting world has embraced square images enthusiastically - it's just as common as rectangular images. That said, there is a reluctance by many photographers to print square.

Of course there is a whole line of thinking that says 'Thou Shalt Not Crop' and thus the photographer is at the mercy of his camera viewfinder. The whole business of cropping is a topic for another day. Besides, with stitching and higher resolution films and sensors it's less of an issue anyway.

Mathematically there are features to the square that relate to composition. With each side the same length, it offers a unique opportunity for composing four sides to the middle. The diagonal line between corners is half way at 45 degrees. That it isn't a horizontal rectangle actually takes away from the sense of a window onto the world and instead suggests that it is a created object - it clearly isn't a post card.

Square pictures allow for more foreground than a horizontal rectangle without entirely being about the foreground background relationship - look at the images of David Plowden, most of them taken with a 55 mm. lens on a film based square format Hasselblad.

There is a photographer whose name I cannot remember (and perhaps you know), who was published in one of the magazines. He shot long exposures in black and white of the edge of the sea, with an 8X10 camera blocked down irretrievably to 8X8. They were wonderful photographs.

Michael Kenna uses the square image. Howard Schatz often uses square format. Brett Weston allowed his format to be dictated by the camera he was using. His earlier images are 4X5, then he used a Rollei SL-66 squre format (see his Alaska images) and latterly was using a Mamiya RB67 so his hawaiian images are almost all 6X7 ratio. While we all want to use all of the negative possible, it does seem odd to me that a photographer with a particular format camera refuses to photograph anything which only composes well in something other than the ratio built into the camera.

Square format works very well for photographs of people in their environment - including just enough of the environment to interest without becoming the whole picture. Of course, some of this may have more to do with the waist level finder of square format cameras (waist level doesn't work unless you have square format or a rotating back).

Atlas Coal Tipple - 2006


This is a crop, conversion to black and white, the addition of another 12 or so adjustment layers, two different duplicate image and dodge and burn on the duplicate and when happy flatten it and adjust some more.

I'm quite pleased with the result and feel it is much better than the colour version I posted a week or so ago.

The image is three shots with my Canon 1Ds2 and 90 mm. tilt and shift, both slightly tilted and using the shift to cover more and increase pixels. I could just as easily have not bothered with the shift and swung the lens but this close, finding the nodal point of the lens around which to swing is critical for easy stitching (or stitching at all if you don't get really close to spot on).

There has been some perspective correction in photoshop since I was also looking up - theoretically I could have used the shift capability of the lens to do this but I was already using it for increased coverage so that wasn't possible.

Why Are Pictures Rectangular?

Ever wondered why we make almost every single picture rectangular? This might seen an arbitrary question but actually it has some things to do with composition. First off, paintings are almost always rectangular. Rectangles make the most efficient use of canvas and boards, they make stretching canvas easier, they take up the smallest space being stored. Rectangular pictures go on rectangular walls with more ease. It's easier to frame and matte a rectangle. A non rectangular adjustable easel would be near impossible. Photographic paper would be wasted at some point were we to print ovals or buy oval paper.

Think too that many of the things we photograph are vertical or horizontal lines - whether it be a tree, horizion or building. Many compositions rely on diagonal lines which react with the edges of a rectangular print more effectively.

Oddly the two placs where round makes sense is silicon wafers which are round, though as they typically hold dozens to hundreds of chips on one wafer, even here round is not the most efficient design, and lenses, which project a circular image and we throw away a significant part of that image to achieve a rectangle.

Next time I'm going to talk about square prints - both historically and compositionally - did it occur to you that if you had a square format, you'd never have to hold the camera vertically - hmmm.

Why Use A Mac?

Did you know that one of the biggest reasons to use a Mac is it's search ability? At any point you can do a search to help you find the file you are looking for. The search takes less than a second, to cover all your hard drives. This compares to up to several minutes on a PC - search on a Mac works, search on a PC is too slow to be useful.

So what?

Well, the ability to find things fast and painlessly at any point makes the Mac a lot more productive. Specific to photographers - the search ability across multiple hard drives almost instantly makes the mac your picture organizational tool - you can search for dates, ranges, names, part names - all instantly - want to do a backup of all your raw files, do a search on the raw suffix and every raw file can be backed up, likewise it's painless to search for every .psd image.

You remember the name of the image was 'rock something' - no sweat. I use search on a daily basis, for finding images, for finding text files that describe the images, whatever.

Tuesday, August 15, 2006

Techy to Artsy # 2

Right, I left you with a portfolio of images in the style of your favourite photographer and you were comparing them. there are two possibilities. First, your images are just as good as your favourite - in which case congratulations, you might want to try copying a few more styles until you start to develop your own style - this is not something you have to work at - it simply comes from having your own preferences - some things will move you, others won't. Any attempt to force a new style is I suspect doomed from the start.

The far more likely scenario for most of us doing this exercise is that our images don't hold a candle to our hero's. The deficiencies can be in several different areas - and working backwards - it could be a question of print quality, composition, subject matter, subject presentation and or timing (including waiting for better lighting or clouds or whatever).

With the above information you now go out again for several weeks and reshoot, all the while thinking about what made your idol's pictures better. Don't concentrate on the deficicencies of yours, rather look at the strengths of his/hers. it's better to have a target to aim for rather than a place to run away from.

If the problem is print quality - you can try reprinting.

If it's composition, then it's a matter of returning to the scene of your crime and seeing if you can move around and find a position in which the elements of the image come together in a stronger, more pleasing or more balanced relationship.

Perhaps the problem is that your images try to say too many things in which case, you work on simplifying your images. There is a risk that as you reduce the number of elements, those remaining are not strong enough to make a picture, in which case all you can do is move to a different location - the world is full of 'almost made a good image' sites and the ability to recognize when a spot doesn't quite have it can save tremendously on time, film, frustration and lets you move on to something with hopefully more possibilities.

Monday, August 14, 2006

Cape Breton Granite


From our trip to Nova Scotia last fall. I was attending a Bruce Barnbaum, Tillman Crane workshop - highly recommended, my wife was touristing - we both had a great time and loved Nova Scotia. I found the combination of Tillman and Bruce ideal - if Bruce got a bit carried away, Tillman was there to provide an alternate opinion which nicely put things in perspective. Seeing Tillman run around with his 12X20 camera was more than a little amusing. his baby camera is his 5X12 which was used for his Scotland pictures.

Here for your entertainment are pictures of Bruce and Tillman in action - if you can't figure out which is which, reread this blog.


Moving From Techy To Artsy # 1

So, you have been photographing for a while, you have some adequate equipment, you can make competent snap shots, but your images lack a certain something - well actually several somethings. What to do now?

Pick a well known photographer who's work you like and see what you can learn about his photography and how you could go about emulating him or her. This might mean a trip to the library, it could be internet searches, checking indexes for magazines.

You want to know how he does it. Don't worry about his equipment, equipment only determines the size of the print you can make, not the quality of the image so if you aren't greedy, you can make faboulous images with any old camera, film or digital.

What you do want to know is where does he get his subject matter, is there a time of day he likes to photograph, is there a certain style to his prints - light, dark, moody, contrasty, whatever. Study the type of images he shoots and that you particularly admire. Is there a favourite focal length, does he shoot things at infinity, middle distance or up close, or does he work on the near far type image.

If you have a choice between going to the exotic places he shoots or choosing a local city park at the same time of day and light he shoots in, pick the time and lighting every time. You are far more likely to get a good image in the city park at 5 am than you are near the top of the mountain, hanging from a cliff at noon. Several of my landscape images have been taken within the city (Calgary is 1 million pop.).

SO you try to emulate your selected photographer. You shoot for a few months and you make the best darn portfolio of 10 or more images that you possibly can - and now it's time to find out how you performed.

Take your 10 images and compare them to 10 from your selected successful photographer. Compare images that are as similar as possible.

Chances are you are going to like his images a lot more than yours - but it's the why that counts here.

You are looking for:

a) the overall tone of the prints - ignoring subject content and composition, are your prints as rich as his (be sure you are comparing small prints so techincal quality isn't a major component of the comparison - chances are you are looking at his in a book anyway.

b) shadow detail

c) subtlety of highights

d) composition - how well did you place the important parts of the subject compared to your guru.

e) lighting - did you time it as well as your hero - perhaps you slept in a bit late or got lazy.

f) subject matter - don't worry about how exciting it is, that could have to do with location more than skill - look rather to how well it is displayed - is it shown in the optimum way - this could be a matter of an uncluttered background or selective focus

g) does the expert's image say something to you that your images don't and if so why and how could you change your images to speak as clearly.

For example, lets say that you shoot industrial and that your idol is David Plowman, so you go out shooting for several weeks and you put together a set of your strongest 10 images. You print them small, say 5X7 on 8X10 paper - perhaps you even crop to emulate his use of medium format square images most of the time. David's industrial images are elegently simple - not a lot of clutter - are your images as clean? They are as strongly composed - check the balance, the use of foreground and background, does it show the subject as well as his images. Most of his images are shot on cloudy days and with soft lighting then the contrast is increased to make rich prints - rather than the more typical hobbyist approach which is to shoot on a sunny day then spend hours trying to rescue the shadows and highlights. When David shoots a ship, it really says ship - it's a clear message - is your message clear?

Next time I will discuss what do do once you have done this comparison.

Do We Really Have To Love What We Photograph?

Frequent advice is photograph what you love. If that's really the case, then great art would have a lot more pictures of girl friends and hot fudge sundaes. it completely ignores the creative photographer who photographs raw material which in itself is boring but he knows that in the darkroom or computer he can make it sing. A look at Ansel's proof sheets and you might suggest he not give up his day job - though come to think of it, that was commercial photography.

It might be better to think of a photographer as someone who is very observant and that we have to find the things we look at interesting to take a photograph. This better explains the behaviour of most ammateur photographers who are in love with the process of photography and who may or may not become observant over time.

In my experience, photographers who pick up a camera to use as a tool to capture what they observe (the artsy types) become good photographers a hell of a lot faster than the techy types who obcess about films, developers, pixels and profiles. The arty type knows what he wants and only needs to find the path to get there - the techy type doesn't know where he is going, but he has maps for everywhere and lots of gadgets to help him on the way - if only he could figure out the destination. This process can lead to a huge amount of frustration.

I think that many of us started out as techy types and now want to be artsy types and there isn't a lot written about the move from one to the other. I'm going to address this issue in the next while - how to move from techy to artsy.

Sunday, August 13, 2006

Why Images Work # 6 - Tenaya Creek, Dogwood

Right Click Here for one of my favourite Ansel Adams images. While not as graphic as 'Moon Over Halfdome' or 'Aspens', this image is entirely about light - the sunlight pouring through the trees. You'd think this would be a fairly easy shot to get but I understand from talented photographers who have found Ansels tripod holes that it isn't. This is no surprise. On the average sunny day with the sun behind this must be quite boring and with the sun coming towards the camera 'soot and chalk' is the order of the day.

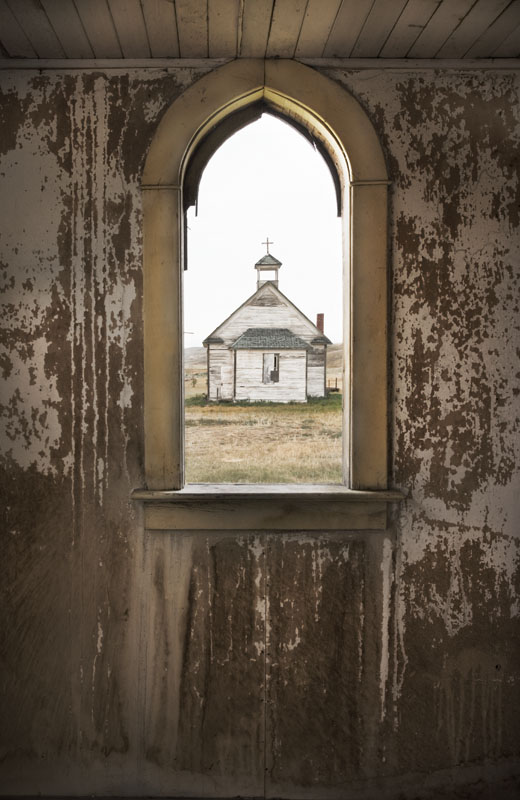
No, this image is about recognizing that very special light that sometimes happens, often after rain, in which the landscape glows. All you have to do then is capture this wonderful light. Ansel took advantage of thick emulsion films which recorded a greater dynamic range than modern films, processed it appropriately and then printed superbly. We can emulate this kind of film and processing by shooting more than a single digital exposure and either blending the images or bringing them into the new Photoshop HDR mode - 32 bit high dynamic range recording - I had occasion recently to reprocess the 'Church Through Church Window' image and it was a lot easier to get a good print with the HDR image than the previous two layer sep. exposure combination that I have been doing for several years. Tutorials about HDR imply that you need many exposures to blend but this is absolutely not true - two did very nicely here covering a good 14 stop range.

While not a bold composition, it is none the less well composed. The rock balances the tree on the left, the bright leaves on the right (?Dogwoods) balances the bright leaves on the left side. Note the trees angling slightly towards each other and framing the distant tree snag which iteself shows well against the fluffy light background of leaves. Even the evergreen in the background is positioned well - can you imagine if the large tree on the left hid half of it - ugly-so.

The foreground gravel makes a nice triangle at the bottom of the image - so much better than a straight line across the bottom seen in so many images.

The dark snags in the upper right are perfectly placed. Shadows are not harsh yet are rich.

This is the kind of image that you don't want to jump out at you and slap you - it says peaceful, quiet, light.

Friday, August 11, 2006

Symmetry


Sometimes it pays to make an image perfectly symetrical - emphasizing the power and structure of the object.

Thursday, August 10, 2006

The Ethics Of Cropping To Order


I have a customer who is interested in four 24X24 inch prints to fit between a series of bookcases. She selected four images but one of them is very definitely rectangular - what to do?

Arguably the concept of asking Monet to trim off a few inches from one end of his paintings would be ludicrous - having Ansel shorten Moonrise absurd. I didn't immeditately tell the customer to drop dead though, I looked at the image and thought it might work quite well as a square image, and in fact might even be stronger than the rectangular original - is this a cop out?
Probably, but see for yourself what you think both about the ethics of agreeing to crop and the particular image pair here.

Is it in fact unreasonable when buying a photograph which can so easily be adjusted to ask for such a change - after all, they could easily have done the trim job themselves after purchase - at least this way I have some control over how it is cropped, and I do have the veto over saying, you know what - I don't want my name associated with what I think is a weaker image.

In this case I had a suspicion it might work out well and in hindsight believe it did.

This raises questions about the value and use of a photograph - is it inherently wrong to think of photographs as decoration - if we do, we eliminate 90% of our market for our photogrpahs. Should we in fact treat the images as holy relics, to be handled with white gloves and kept in a humidity and temperature controlled vault and only to be shown to a select few. What does this have to do with The Mona Lisa with Donald Ducks head?

Why Images Work # 5 - Brett Weston

Heresy of Heresies, I actually prefer many of the images of Brett to his father Edward, both his abstracts and his landscapes. This particular image appeals on several levels. To access the image, right click Brett Weston: Cracked Glass, 1955 to bring up the image in a separate window. Resize as needed so you can see both windows at the same time.

Right off the patterns are interesting. The glass shows well against the almost black background and the glass has interesting shading. Note the large horizontal s curve starting top left then down the middle and curving back to horizontal in the lower right and hinting at curving up the right with the edge of the glass.

The delicacy of the pattern is intriguing - we all know such patterns even in glass can't last forever. Ask yourself which part of the image is surplus to requirements - I think they all work together.

Re cropping, he's almost touched the edge of the glass on the top near the left (but not quite) while giving a bit more generous space to the glass on the far right - I think this was almost certainly deliberate and the right choice.

Can you imagine the image without the two tendrils of glass that are hanging almost straight down in the large dark area in the upper left - they are essential to the image - such a large dark area would be hard to justify otherwise but in fact here provides the perfect background for them - too cluttered would have spoiled their dramatic appearance.

It's hard to see on a small web image but even here we get hints that the dark areas still contain some detail and are not absolutely black. The curve of the lower left corner matches the curve in the upper left and is of course the inverse of the curves on the right.

Altogether a very nice image.

Monday, August 07, 2006

Why Images Work # 4 Shaun O'Boyle


Copyright Shaun O'Boyle

After my industrial images appeared in Lenswork last year, I got a very nice email from Shaun O'Boyle, who amongst other things indicated he too had an interest in industrial and old building images. I visited Shaun's website and found lots of interesting locations. I felt at the time that he had some way to go to refine his seeing, yet there were a few very good images and one outstanding image which I feel priviledged to have swapped for and now have on my wall.

One might be tempted when a few images are strikingly better than their bretheren to assume it was luck, yet this type of image is constructed. There are lots of ways he could have photographed these same doors and hallway which wouldn't have had nearly the impact.

I am delighted to see on Shaun's site some more recent work indicating that the promise of stronger images to come is being fulfilled - I'm not surprised. His vision is becoming stronger, he knows better what he wants to say in a given subject and concentrates on the parts of the scene which help make that statement. He showed this in this earlier photo though I don't think that at the time he knew just how exceptional this image was and is. He knows now and has been able to build from this.

So, on to discussing the image above which Shaun has given me permission to show.

We have to discuss the colour - it's wonderful - the rusty red of the floor, door knobs and light switches, the well weathered rich cream of the doors, baseboards and archways, the textured green of the walls all work perfectly together. Exposure is spot on - always a challenge in colour - no detail is lost in the brightest highlights to the deepest shadows.

Note the diagonal lines of the baseboards, floor boards, and upper wall as well as those of the shadows on the floor and the sun coming in, also the archway. How about the darker edge on the right keeping your eye from wandering off to the right. I like the archway which gives a sense of this being a mirror and not more corridor to the right - yet the sunbeam clearly indicates it isn't a mirror. That it is a long shut down mental hospital makes you wonder who lived behind these doors and what stories the building could tell.

I like the way the lines come to the corners, perfectly on the bottom left and between two lines in the upper right. The upper left doesn't come perfectly to the corner and I actually prefer it this way - it's possible to be too clever.

I did wonder if the perspective should have been corrected so the vertical lines are in fact perfectly vertical - an easy job in Photoshop, but that would have been more of an architectural shot and less a tale of mood, story and statement.

The textures are wonderful. There is a painterly quality to the image which is no Photoshop trick.

I've had the image for a year and like it every but as much as I did when I first saw it - wish I had taken it but sure glad Shaun did.

DeJa Vue All Over Again


Sometimes you get a chance to reshoot an image and improve on it - the original was shot with my 10D and a consumer grade 28-105, this time I shot with the 1Ds2, three overlapping images with the tilt shift 90 T-SE. I can print it about 3X linear bigger and no longer is the gear on the left slightly cropped (which always bothered me).

Sunday, August 06, 2006


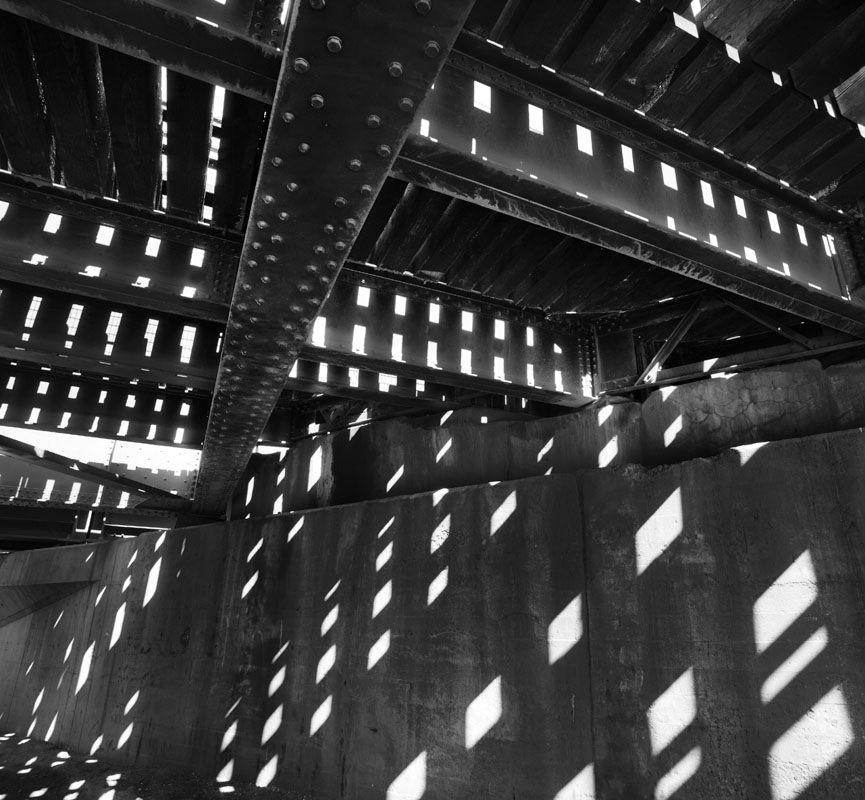
Base of wooden through truss bridge near Atlas Coal Tipple Historic Site, E. of Drumheller.


Moon Over Badlands, Red Deer River Valley, E. of Drumheller, 300 mm. lens.


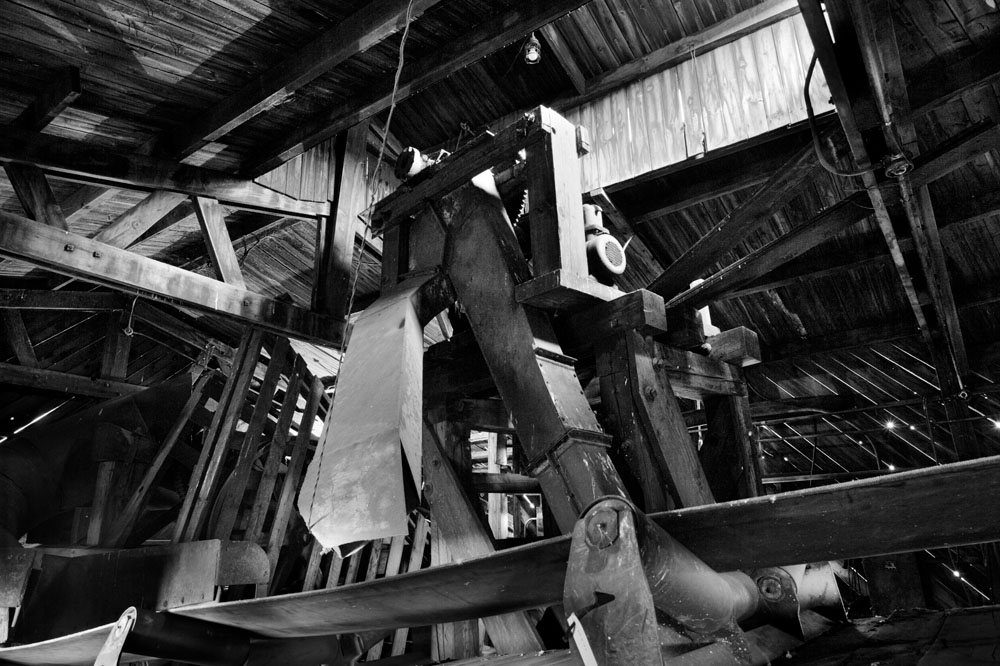
Inside of top of coal tipple at Atlas Coal


Church through church window, Dorothy, Alberta, two images combined and masked - haven't masted HDR yet.


Truss Bridge, sev. images combined using Helicon Focus.


Church, Dorothy, Alberta - 17-40 mm. lens @ 17 mm. and corrected using photoshop distortion/lens correction to correct barrel distortion and vertical perspective.

Friday, August 04, 2006

Why Images Work # 3 - Huntington Witherill

Today I am going to discuss the work of one of my favourite currently working photographers, Huntington Witherill. There were a number of images I could have picked to discuss but I finally elected to choose this one of a sand dune. Right Click here to view the image in a separate window so you can read and view together.

To my mind, dune images of the usual type with bright highlights and deep shadows shot in early morning have been done so often that I really don't want to look at another typical dune image. So my first reaction to this image was 'what cool shapes' and my second was wow, someone has actually done something different with dunes.

High key images are hard to do well. I own a print of this image and trust me the highlights are superbly printed - and it's inkjet. This image certainly puts paid to the rule of images having to contain a full range of tones.

OK, so I like high key images done well and this is one, but what makes it an exceptional image? Well, the subtle tones are important, the shapes define the image.

There is something pleasing about the lines in this image - the foreground dune and its ridge, the shadowed dune on the upper left, the very subtle sweep of the dune in the upper right. While not showing well in the web image, there is good texture throughout, showing micro ridges.

I had talked before about sketching (in your mind) or for real a very simple 6 line drawing of the image you are about to take to see if it works - I think you can see here it would show very nice balance and interesting juxtapositions.

The high key gives a sense of brilliance to the light. The subtle tones make it a very peaceful image with a calming effect.

Had the foreground ridge been straight, or the foreground dune top line been convex instead of concave, the image wouldn't have been nearly as effective. Note the balance between the edge of the shadow in the upper left with the ridge line in the bottom of the image.

Below find a couple of my own high key images. You can decide for yourself whether they work and is this a technique that is worth exploring for you.


Wednesday, August 02, 2006

Why Images Work # 2 - Andre Kertesz

You will find the image here and by right clicking (or control clicking on a mac) you can open the image in a separate window.

This Andre Kertesz photograph is another of my favourites. Here are some of the things that work for me.

First, the photograph is is of an older era as indicted by the board floors, the straw boater, the less than rectangular door frame. It seems to describe a simpler time or place - there is no clutter, the elements of the photograph are simple and clear. the flower vase and flower nicely balance the stairs on the right. The dark on the left works with the light on the right. The position of the flower is perfect against the dark background and not intersecting the door frame. Likewise the stair railing is well positioned not quite coming to the edge of the wall and recess. On both left and right you have light dark, light. The wall that the hat hangs on nicely balances the recess on the right in the distance. Note the triangles created by the door frame on the right and again on the top, also triangles created by the shaddow of the flower pot on the table. Note the matching shadows at the bottom of the door, both angling down and to the left. The door mat doesn't quite come to the edge of the door frame. The light coloured wall in the distance is needing a paint job and has some real substance to it. The white of the right edge of the vase is brilliant. The hat on the left works nicely, you have the hat, then down and right to the flower vase then up and right to the stair railing and your eye is kept from wandering off by the recess and door frame. In fact it's hard for your eye to leave the image in any direction.


Emotionally it evokes a time and place. Even without the title, we wonder about who lives there, what's up stairs, who wore the hat. I can feel the sunlight pouring in.

I just find that every single element of the photograph is in exactly the right place. This does raise a point. Kertesz could only control some of the element of the image - he could move the vase and change his camera position and even wait for the right time of day. he could move back and forth and select a suitable lens to put foreground and background in the right relationships. He could even have purchased the straw boater just to help the left hand end of the image. Yet many of the elements that work had to be luck - the shape of the door frame, the shade of the light wall, the bannister and stairs. What if they had not worked as well - my guess is we wouldn't have seen the image - it would be consigned to the photogaphers 'almost worked' pile, or had he a lot more discipline than I have, he would have moved around the location, noting the elements, lining them up as best possible and when they didn't fit perfectly, folding up the camera and moving on. Personally I would have shot the best I could get, hope that some extra magic would happen inside the camera or that somehow I could correct the deficiciencies in the darkroom or computer. OF course, 99% of the time this doesn't happen and too many of these almost images can be discouraging. there's nothing worse than coming home with a bunch of almosts and puting a lot of effort into processing the film and making contacts only to realize you got squat. It's enough to make you put your camera away if it happens too often.

Update On Pepper # 30

Although I discussed the compositional elements and the wonderful shapes, I didn't discuss perhaps the most important part of the image, the wonderful tones. That pepper glows, it's three dimensional. Intererstingly it does this even in cheap mechanical reproductions and on the net. I did once however see a very light version of the image and the rich tones were ruined, it was less than half the image it normally is, yet arguably it was well exposed and showed normal tonality - were it an illustration for a gardening catalogue, it would have been just fine and arguably preferably to Edward's interpretation of the Pepper.

This does raise the question though which every photographer struggles with - just how dark to make a print. In the wet darkroom days it was all too easy to make the whole thing too dark - some of the tones would be rich, but at the sacrifice of others. Ansel went through stages of printing much darker or more contrasty so even with the masters some variation over time is normal and part of the creative process. These days with digital printing, it's easy to nail the dark and light end of things with curves or levels, yet we can dramatically affect the overall brightness of the print by how we interpret the midtones.

Prints that look right at the time you make them sometimes look completely wrong the next day. In the wet darkroom we had issues of dry down and how bright an inspection light to use and such, we still have some of those issues today. Dry down is much less (though with some papers and inks it still happens to some degree) and the quality of the viewing light is a problem.

I once went to a camera club to give a talk and after they had a print competition. They set up two flood lights one on either side of the print and about three feet away and blasted light onto the prints. Any print that was right for that lighting would be hopeless in just about any normal lighting situation from galleries to home.

Some people have never ever seen subtle highlights or rich shadows and literally don't know what they are missing. I highly recommend subscribing to lenswork magazine even if you yourself work in colour. It's superbly printed and is as close to original photographs as you can get with mechanical reproduction.

Tuesday, August 01, 2006

What Makes A Good Photograph?

The correct answer is it depends on who's asking. What works for me won't necessarily work for you, or your neighbour, family or the dog (he wants a fire hydrant). For example, lots of people insist that a photograph have a centre of interest, even if it isn't in the centre. Some of my most popular photographs don't so clearly it isn't just me who feels this is not essential.

So given this significant limitation to my ability to answer the question, let me make it very personal and say what works for me.

There is no single characteristic of a great photograph which makes it a winner. Were that so, the lovely tonality of large format contact prints would make every single one a winner - trust me, they aren't. It could be an interesting subject - but poor photographs of interesting subjects don't work either. But telling you all the things it isn't can't be very helpful so we'll quit while we are behind and concentrate on what it is instead.

Let me say that a good photograph is interesting. That may seem self evident, but I think there is something to be learned here. Can we agree that there are great photographs of fairly mundane (dare I say uninteresting) subjects. Is it possible that the dirty underside of a railway bridge, something you might cycle past daily and not pay attention to, could actually be interesting. What about peppers, dead birds, rocks, weeds, grass, cracked roads, etc. etc.? So somehow it would seem possible to make an interesting picture of an uninteresting subject. How is that done?

The interst could come from showing details that aren't normally seen (or more likely just ignored), or isolating parts of something to make interesting patterns or shapes. The interest could come from comparing two things - I think of Ansel Adams picture of fresh grass in front of a burned stump - alive and dead. The interest can come from seeing places we have never been to, or a time of day at which we are normally tucked in bed so miss out on.

Think of portraits. A picture of a beautiful woman (or drop dead gorgeous man if you lean that way), merits a quick look but normally most adults don't give it much time, don't tear it out of a magazine and don't frame it - yet there are portraits which cause us to do all of those things. Migrant Mother (by Dorothea Lange - so you can find it on the net) is a beautiful portrait and one could say that the woman shows a special kind of beauty but really, it's a picture of a tired, worn out woman who's given up hope, yet has the strength to struggle on. It is such striking image of those things though that the photograph is beautiful even if the person photographed isn't.

A news photograph might not be considered beautiful at all, but a good one is certainly interesting - interesting because it shows something we haven't seen, or is so representative of the problem that it serves as an icon for our feelings about a situation - say war, or natural disaster, politics or whatever.

As my particular interest is in landscapes and as my background is in black and white , lets limit our discussion to this. What makes a landscape picture interesting?

In Europe, landscapes are often photographed with high speed film in 35 mm. cameras and the results can be wonderful, so it isn't the format that's the answer. Prints poorly reproduced in books can still be interesting so it isn't print quality (at least not always).

Our eyes read photographs. We may read a page left to right, top to bottom, but in looking at photographs, we start at the centre and then wander around, following lines, stopping at points of interest and wandering right out of the photograph if there is not enough to hold us. The centre of interest can be anywhere but if there are not elements to support it, the eye quickly moves on and loses interest.

I'll now take you through some specific photographs that are considered classics and discuss what makes them work. As I don't have permission to reproduce the images, I'm simply going to provide the link to the sites.

Pepper # 30, Edward Weston

The image consists of some light coloured blobs, a line down the middle and a dark background. It's just a pepper, but the way the light reflects is wonderful, the shapes are interesting. I have always thought of it as a nude woman with her bottom to the lower right and her back extending upwards but looking at it today I also see a right hand grasping something and the thumb on top. The shapes themselves even without sexual inferernces are interesting. Despite the limitations of the internet and book reproduction, all images of this print look good and some look wonderful so the fact that it was shot on 8X10 isn't really relevent.

It was photographed in a funnel and you can see the circular scores in the tin funnel at the bottom of the image, giving the pepper a base and allowing our eyes to come back into the centre.

The dark background shows off the pepper nicely, a well lit scene would not have been nearly as interesting. The reflections on the surface of the peper are not so white as to be glaring yet are bright enough to be dramatic.

Notice a third of the way down the left hand side you can see a little of the background letting you know the pepper is not in isolation. Even this line keeps your eye in the image.

Look at the knobby ends of the folds of the pepper - they face each other so your eye can't wander off. S bends are generally attractive and this image has several.

Though it varies depending on your monitor, the shadows while deep are not black - no underexposure here - in fact it was something like a two hour exposure due to slow film, low light and bellows factor this close with the 8X10.

Well, that's probably enough discussion for tonight but I think I might just pick some other classic images and discuss why they work. Let me know if this is something you find useful. Leave a comment or email me directly. My email is george dot barr at shaw dot ca (you will have to type the real thing in).

Good shoting, see you next time.

George

Sunday, July 30, 2006

Returning To The Scene Of The Crime


Yesterday I didn't have a lot of time (promised the wife we'd go out to a movie - The Devil Wore Prada - I liked it, she didn't), anyway that pretty much determined that I'd stick around town. I could have checked out a new spot but I hadn't done much photography lately and didn't want the spot to turn out to be a dud so I chose a location I'd had success at before.

I think this is a strategy that can sometimes be useful, though it should be combined with exploring new territory.

The advantages to returning to a previously successful spot are several - you know how to get there - it can't be a complete wipeout - perhaps you will see something even better than before or at least different - it's efficient - it gets your day off to a good start - arriving at a different time, day, season means the original shot probably isn't even there and it's like working the scene all over again.

The downside would be if you only ever returned to successful spots and didn't push your boundaries, but if you have time and it's on the way, there's nothing wrong with stopping off at a known spot before going on.


Next blog I'll discuss the process of working this particular spot.

Friday, July 28, 2006

An Experiment


Was playing tennis tonight, not a breath of wind and on the way home noticed some very nice Rudbeckia (Gloriosa Daisy) and wondered what would happen if I used a fairly long exposure and moved the plants part way through. I thought of hooking them with a coat hanger, then it occured to me I could blow on them and when actually shooting I actually used my arm to knock the stems and cause a real sway.

Of course the wind came up just as I arrived and getting complete stillness was impossible. Still, this is more or less what I had envisioned.

4 seconds, f22 (broke my own rule about not going below f16 so I could get long exposure - really must buy a neutral density filter), 90 mm. tilt and shift lens tilted to keep flowers in focus.

The Value Of Rechecking Old Proofs


Shot a year ago and ignored, I went through the 'proof sheet' with Adobe Bridge and thought I might be able to do something with these two images. Perhaps you too can find some images you quite like now yet thoroughly ignored after the shoot.

Tuesday, July 25, 2006

On Attending Workshops


I heartily recommend going to workshops. You can go for one of a number of reasons - it's a great way to get back into creating if you have been in a slump for a while. You can go to learn from the teachers - but if that's the reason, be sure you like their work - after all that represents what they know. You can go to workshops because it's a fun holiday with a bunch of like minded photographers who love to talk shop. You can go because the workshop is being held in an area you haven't visited before and the leaders have and they can save you a lot of time and hassle by showing you the hot spots.

Over the years I have tended to bring to the workshop the idea that I'd work hard at my photography and shoot what I could. The images here were all obtained during a workshop - sometimes while actually with other photographers, other times by getting up really early or by standing in pouring rain while the rest of the group peered out of the fogged vehicle windows. I've made a fair amount of money from that particular shot - sorry guys, but if you were too lazy to get out of the car into the rain, you missed the best shot of the day.

Oh So Close


Don't you just hate it when a picture might have worked. Here's an example of one that could have been. I'm not happy with the totally horizontal composition. The image was overexposed (4X5) and is grainy as all getout. Still, we live for another such day and for the skill to record it properly this time.

Repeating Patterns


Note the repeating pattern of fallen over 'A's.

This is another blended image usng Helicon Focus, in this case only two images (though 3 would have been better). Shot with a long lens and not enough depth of field even stopped down so shot two images, each focused on a different spot. In theory could have blended in photoshop with layers but not nearly as effective as letting Helicon Focus adjust image size to match (as you focus nearer, the image enlarges so you can't just lay one image on top of another (at least not often).

Monday, July 24, 2006

Limited Editions

Customers quite often ask if a print is a limited edition. This time the question is an informed one and my answer that no, they are not, is clearly unsatisfactory. Even my daughter thinks I may have to give in and limit the editions. Her arguement, after discussing it with other artists and customers and friends, is that the publishing industry has done such a selling job on the necessity for collectors to purchase limited editions, that it is now the standard.

Perhaps if they thought about it, they'd realize the following:

1) none of he great photographers of the past limited their editions - hell, you can still buy Pepper # 30, and boy am I tempted. Ansel didn't, Edward didn't, not Strand.

2) the customer loses because the price is dramatically higher - the real beneficiaries are the galleries. The photographer loses because if it does turn out to be a popular image, he's going to kick himself. Imagine if Ansel did put a limit on Moonlight Over Hernandez. The gallery on the other hand, doesn't care if a particular image runs out - on the contrary - if the price is fixed, they sell all the better towards the end of the run, if as happens often, the price goes up towards the end, then they reap the benefits, and when the series runs out, well they just move onto another photographer.

3) For the most part, for the majority of photographers and for the majority of images, it doesn't matter one toot - they were never going to get to the end of their limited run anyway. For the one or two images from really good photographers that are that popular it's conceivable that it's a problem, but I doubt that even the most popular images sell into the hundreds, not fine art images anyway.

The people who most 'need' limited editions (other than the galleries) are the investing collectors - the people who don't want an image for itself, rather as something to be held for a while then sold, rather like gold mine shares. the odd thing is, I suspect they are shooting themselves in the foot here.

Lets say they have $1,000 to invest in photography. They can purchase one limited edition print or 10 unlimited prints. Assuming equal care in selecting each of the images, I'd bet on at least some of the 10 returning enough on the investment to outperform the single limited edition print.

Does this mean I'm not going to limit my prints. Unfortunately I think that will have to be a question for the market to decide. Were I a full time photographer, I think I'd keep prices low and forget limited editions. As someone with a full time job though and worn out from two years at the Farmers Market (working 7 days a week), I'm going to have to rely on galleries to get my work seen, so...

Is It A Print Or Is It The Original?

twice this month I have been asked this question while selling my photographs. I point out these are photographs (in case they think they are paintings) but that doesn't satisfy them. I don't know how to reply. I guess it probably doesn't matter as the question means they almost certainly aren't going to buy - but my explanations seem to leave them thinking I am lying, or cheating or defrauding them - anyway they go away unhappy - I was polite, I explained the nature of photographs and original negatives, slides or digital files - but that doesn't cut it - oh well.

Is The Colour Real?


This is a question I quite often get in selling my photographs. Most people are not prepared to look at an image as an object in itself, rather as a recording of something. Why they should want a 'recording' since they weren't there seems dubious, but there you have it.

For the most part I work to create what I remember, but not always. The examples here are situations in which the colour is definitely over the top, and you know what - I don't care!

People often assume that if the image is digital, the colour must be cheating, and if from film, it can't be. This of course begs the issue of Fuji Velvia which always did make colours 'over the top' and what about Cibachrome prints which were very saturated and contrasty.

Ever see a post card with pastel colours? - I thought not.

We readily accept that a black and white image isn't a direct translation from real, and we forgive red filters darkening skies, green filters lightening foliage and polarizers seeing through reflective water surfaces. Somehow though, the fact that colour could have been a direct translation means that it must. Of course this begs the question of real colour - we don't see the blues that are real on a dull day or in the shade - yet what we 'see' is considered real and the blue is not - so who's to say.


Who's to say we even see the world the same way. We know that colour blind people see the world dramatically differently - what about the rest of us - are we all colour certified - I think not. Just as some of us have more sensitive senses of smell, there are some who can differentiate more colours and see subtleties more easily. Does this mean they see the colours as more saturated - or is it something else entirely?

What's real anyway, the last image is one many people don't believe - the rock couldn't have been that red - but everyone who has been to Red Rock Canyon agrees that it is - this is the colour they remember - only those who haven't been there question the colour. The image of Lake Louise is similar - the water really was that colour.


Wednesday, July 19, 2006

Having Found Something To Photograph


OK, so you have gone out photographing and you have found something worth photographing - now what?

Some questions to ask yourself before shooting:

1) what is it about this subject that appeals to me and is there a way to emphasize that characteristic - different time of day, different lighting, change in camera position, ultimately how I print the picture (previously on the cheap)?
2) Are there parts of the subject that don't in fact work, that add nothing or heaven forbid actually distract from the thing that makes it great? This could mean a filtering or planning black and white or cropping or a different position.
3) From what angle does the subject photograph best - this means walking around the subject if that's possible.
4) From what height should I photograph it - even portraits can change dramatically with a simple change in camera position. Many people found that the medium format waist level cameras made better portraits than pictures taken at eye level - which seems to defy common sense, but hey, it worked?
5) Is there a position which takes best advantage of the background or eliminated distracting elements (landscapes have the equivalent of the tree growing out of the head problems)?
6) Assuming you have a choice of lenses or zoom lenses, how close should you be to best photograph the subject? Try walking to and away from the subject and see at what point the subject is best. This is independent of figuring out how much of the subject to include.
7) You have found the ideal position to record the image - it has interesting shapes and lines, shadows, and forms. Now you have to figure out how much of the subject to include. It's been my experience that attempts to include as much as possible of an interesting subject often ends up with a muddled concept - the left part might be great, the right also but if they don't relate to each other, perhaps you should be photographing them separately. Unfortunately I sometimes find a subject that is full of wonderful things but they don't quite work all together and when you isolate the parts, they are not strong enough to stand on their own. Unfortunately, all you can do is smile and move on.
8) in framing your subject think of creating a painting - you need each part of the canvas to work, none along for the ride. It might mean bringing a diagonal line to the corner, or perhaps two diagonal lines to near the corner but on adjacent sides. Do you want to include all of the rock on the left, or is it stronger if you crop out part? How much foreground adds to the image before it starts to overwhelm the rest of the image?
9) A zoom is a good way to play with cropping but a simple piece of cardboard with a cut out the shape of your film or sensor works faster, lighter and cheaper. Try different framings so you can see which was strongest when you are home (there's nothing worse than wishing after the fact that you'd moved a little to the left).
10) if you have found the very best position to photograph the thing that interests you, if the lighting is appropriate and if you frame the subject the strongest way you can - well the rest is out of your hands - all you have to do is do a decent job of recording the image.

It's very tempting when something really excites you to start firing away immediately without going through these steps. Sometimes this is justified - if lighting isn't going to last, you grab the shot the best you can. But then, with your safety shot in the bag, then you go through the steps above and see if you can top the first image.

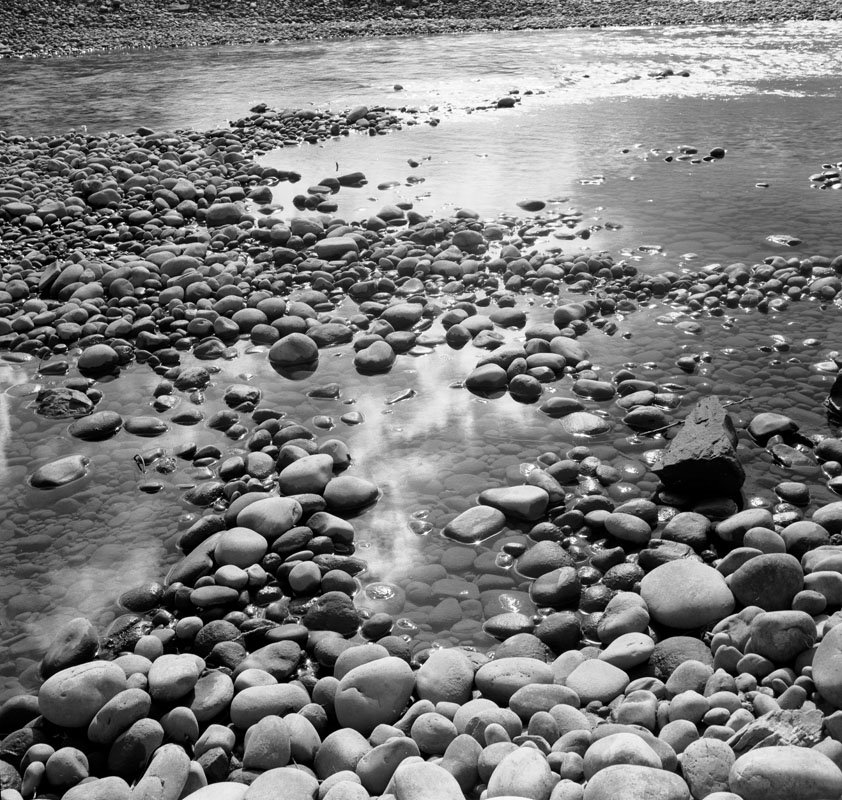
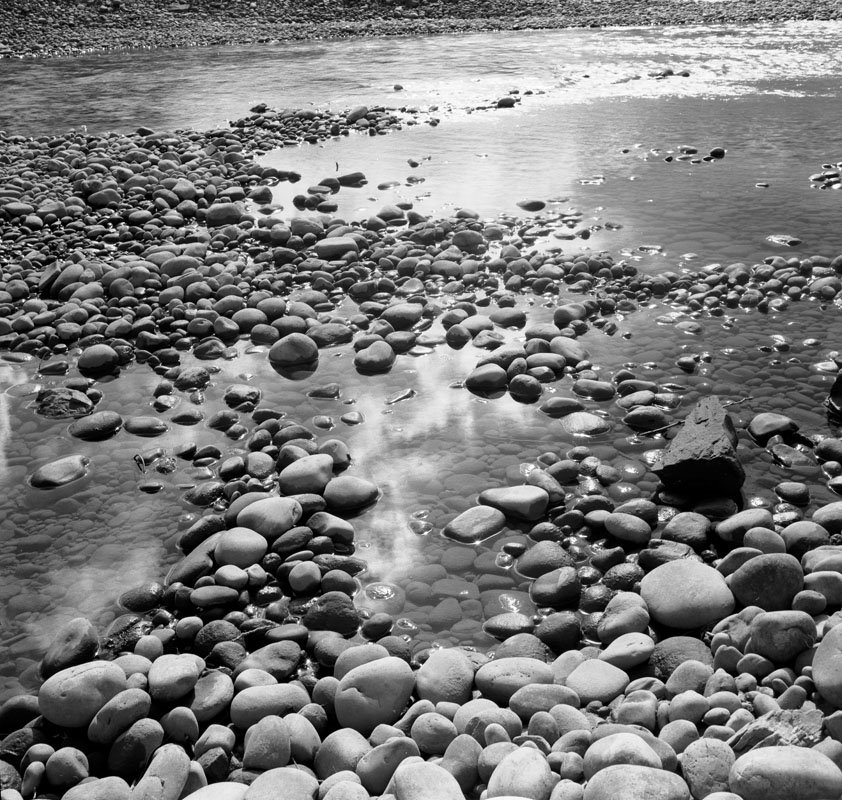
The image above was shot in 1977 or thereabouts. I was on a rare afternoon off from my residency in family practice and went for a picnic with my wife, exploring the country south west of Edmonton and west of Pigeon Lake. We found a dirt track down to the N. Saskatchewan river and there enjoyed ourselves sitting on logs having lunch and wandering around the rock flats by the edge of the river. The image illustrates several of the points described above. I found a position which showed the cloud reflecting in the pool, and with the glittering river in the background and interesting bending curves. I anchored the image with the boulders in the foreground but not with so much of them that it distracted from the reflection. I chose a height which showed the boulders to advantage and kept the reflection in position.

The image was taken with a Zeiss Ikonta 6X6 cm. camera, FP3 film.

Tuesday, July 18, 2006

On Looking For Photographs

I had written earlier about the process of deciding where to go to photograph, and when. I want to see if I can write something useful about the process of looking for something to photograph when you have already arrived.

Sometimes it's obvious, there's only one thing to photograph and I will discuss the process of doing so to best advantage towards the end of this article but what if it isn't obvious what to photograph.

Perhaps the best possibility is to illustrate with an example.

Last year I was at a Family Practice conference and typical of my style I attend lectures faithfully every morning and take off the afternoon to go photographing. As this was February, it meant missing the morning light but I'd been able to find interesting subjects at previous conferences (always held in Banff).

I had heard that a walk along an abandoned road for 4k would take me to the base of Sundance Canyon. It was on my 'must go there one of these days' list and so I headed off. The canyon walls are only 40 feet or so high, Grand Canyon it isn't, but I'd hiked 4km to get here and I wasn't about to leave without checking it out. Half the canyon was in brilliant afternoon sun. The shadows were deep and relatively short and it didn't look like I could do much with it. Colours were muted. Even the most interesting coloured rock photographs poorly at mid day in bright sun. The other side of the canyon however was more interesting. Lit by the bright other side, the light wasn't totally flat and the wall had interesting characteristics. I took several compositions as I worked my way up the canyon.

Half way up the canyon I came across the most amazing find. There was an incredibly coloured rock, white, red, pink, streaked, and in interesting patterns. Better yet a second rock sat in front of the first - perhaps the two could be combined somehow. The ultimate though was that in front of the whitish second rock was a wild rose covered in rose hips.

I just knew I had to combine the three. Depth of field would be a problem but perhaps if the background was a little blurred it wouldn't matter - I'd do the best I could and see.

I thought that if I used a wide angle I could move in really close to the rose and use the two rocks as background but no matter how I positioned myself, the background included too much - the nature of wide angle lenses. I tried several different focal lengths, finally settling on my 70-200 zoom, at 91 mm. at f32 (I have subsequently learned that no additional sharpness in any part of the image is obtained at f32 and you lose sharpness in the part of the image which was originally focused on - f16 is now my max. f stop with my full frame 1Ds2 - no matter what.


It took some effort, perhaps 20 minutes or more, even once I found the right lens, to move back and forth and find the one position left and right, up and down, two and fro that would record the image - no other position worked as well.

After finishing the rose rock combo, I continued to climb up and photographed a few more 'interesting' rocks which were all a letdown after this shot and I also made a few nice tourist brochure images which I don't particularly like but have sold ok.

The image 'sundance rose' did require substantial work to get it looking good. It wasn't super sharp (see above) but I have found that diffraction fuzziness does respond fairly well to smart sharpen in photoshop and I am able to make great 17X22 images and have even made a good 24X32 image.

Next time I will get back to my intention to discuss the process of what to do when you find something interesting to photograph.

Monday, July 17, 2006

Perils Of Digital, Part II, Computers

I'm writing this because in the last 9 days I have produced 300 prints for an upcoming Art Fair at 'Capital Ex' in Edmonton, 810,000 visitors expected. During this marathon printing session during which at one point I had three printers all going at once, I found every bug there is to find. I crashed Photoshop, I found a bug in Epson Print Utility on the Mac which can only be fixed by a cold restart (ie. kill the computer by holding down the power button), I ran out of memory (I have 6 gig) I lost communication with the printer a couple of times and had to restart the printer, I had the machines eat my very expensive 17X22 300 gm. Moab Entrada Paper.

That said, the idea of producing this much work and with consistency and high quality in the wet darkroom would have takenb months and would have been simply impossible. I think I did learn a few things along the way though.

Photoshop crashed because I used some new plug-ins - not a good idea when getting ready for a show. Uwe had touted the wonders of Akvis Enhancer and while I agree it is a good plug-in, unfortunately it doesn't work with the files from my 1Ds2 - too big - back to the drawing board. I look forward to an upgrade as I think this is well worth exploring. Once it works reliably on really large files I will let you know, in the mean time if you are not stitching and use an 8 MP camera, I do recommend trying it. Enhancer separates close tones - ie. it enhances micro contrast.

The bug in Epson Print Utility is that if you run it at the same time as you have the printer window open (the window that lists the prints being printed) or if heaven forbid you try to access the print utility from the printer window, the utility sits bouncing in the toolbar at the bottom of the screen and will not even respond to force quit. Yesterday I accidentally clicked on the utility at the wrong moment and had to restart the computer. Much to my surprise and delight, on doing so, the print que picked up where it left off and finished all my printing (20 more prints) for me.

Digital Can Be Pretty Darn Frustrating

You know, we spend a lot of time as digital photographers talking up the advantages of digital but I thought I would take a little time to discuss some of the frustrations, not so much to dissuade someone from shooting digitally (there are after all strong advantages) but to give a realistic idea of the pitfalls, hassles, costs and frustrations of a digital workflow.
The working premise here is that you are photographing seriouslly - not necessarily professionally but you have made the decision to produce a quality print, one that could be sold or given as a present, and that you are proud of your images and would be devastated if you were to lose the images.

Hassles While Shooting

Probably the worst thing you can do is to erase a memory card. This might seem hard to do but here's how you do it - first you buy 3 or more cards and you rotate them. You think you have a system so you know which card you used last, but the light is changing and you're in a rush and you grab the wrong card and erase it ready for action, only it isn't the one that is unused, it's the one you finished shooting with. Two workable solutions are 1) have separate pockets in your backpack for used and unused memory cards - this has worked very reliably for me since I instituted it. 2) always take the full card out of your camera and immediately back it up to a portable hard drive - I have an Epson 2000 and use it when out photographing more than a couple of hours. It also helps to label the cards boldly so you know which is which. You cannot afford to play with your system - always use it. Most people choose to not erase the images until loading the used card back into the camera - thus buying a little more time to save an image if the system failed.
Unless absolutely desperate, don't erase images while out shooting - good chance you will erase the one image you wanted, or the last image of a 9 image stitch (thus spoiling the other eight).

Be absolutely sure you don't clip the highlights. Depending on the camera the settings on the histogram vary but remember that gone is gone - if you don't record the highlights there is no way to save them, raw format notwithstanding. Expose to the right as is recommended, but view all three colour channels and make sure that none are clipped. If your camera doesn't show all three colour historgrams then if you are recording very strong colours, then don't move the curve quite so far to the right (one channel may be clipped while the other two are not).

CF cards are easy to drop, smaller cards even more so - be especially careful when standing in places where you won't get the card back if you drop it. Film rolls tend to be easier to hang onto.

Consider card size - with the cost dropping it's tempting to simply get the biggest card you can afford - but even in raw, that could mean hundreds of images on one card. Cards do occasionally fail and I don't think you want all your eggs in one basket. My rule of thumb is to keep the number of images to under a hundred - the equivalent of 3 rolls of film.

Next time I'm going to talk about the frustrations of working with a computer instead of a darkroom - issues like storage and backup and dealing with less than perfect software.

Thursday, July 13, 2006

New Black and White Images To Website


Just a 'heads up', I have added 15 monochrome images to the black and white landscape gallery, 7 images to the black and white industrial gallery

The image above was shot in 1977, on a 1938 Zeiss Ikonta 6X6 cm. folding camera and is of the N. Saskatchewan River S.W. of Edmonton, Alberta.

Adversity Is Your Friend

Many years ago the late Fred Picker wrote in his newsletter about a photographer who had sent him some lovely prints, and Fred included some examples in the newsletter. What was remarkable was that these gorgeous images were taken at home, on the bed (keep it clean) and were images of newsprint - simple virgin newsprint, heaped up onto the bed, then lit in ways which made for absolutely wonderful images. I have long since loaned my newsletters to someone and lost them but will always remember the example. The photographer was young, had a limited budget, had young children who tied him down and he absolutely made the best of the circumstances. If anyone knows who the photographer was I'd love to see his work.

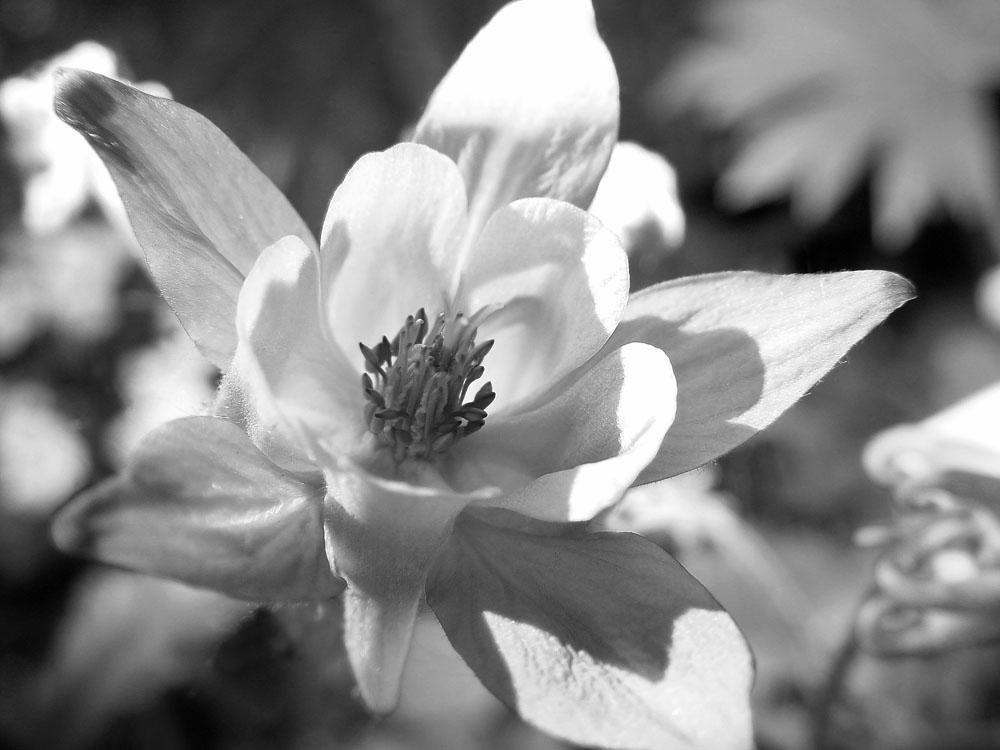
Flowers Can Be Monochrome Too


Some of the most beautiful flower pictures are in fact in black and white. Here's a couple of my efforts to get you thinking.

Wednesday, July 12, 2006

Thoughts On Tripods

1. any tripod worth it's salt should reach to just below your chin without using any centre post rise - unfortunately this eliminates 90% of all tripods - it's not that all photographs should be made at eye level - talk about boring - it's that you often can see over things and a shorter tripod can't, and sometimes you do want eye level or even higher (and that's the only time you can justify the centre column - set the camera with the column down, raise the column - this requires a column that isn't rotating so you don't re-aim the camera on raising the column. Which leads to point 2
2. center columns are a good idea - it's all very well saying that it decreases stability, but there are times - 95+% of my images are shot with no rise on the centre column - but at least some of those 5% wouldn't have been possible without it.
3. leg braces - you know - those braces that run from the bottom of the centre column out to the legs - utterly useless, with one possible exception - there are a few tripods in which the distance of this brace is adjustable and thus the angle of the leg - still a well made tripod doesn't need this and has better ways to deal with leg spread.
4. centre column cranks - useless - just how heavy is your camera anyway - left over from 30 lb. movie film cameras.
5. tubular metal legs - I once had a bogen tripod and managed to catch a leg in the car door - it took some tricky work with padded pliers at home to almost take out the kink that was created and even then the leg stuck a little bit.
6. wooden tripods - I loved my Berlebach tripod for it's tough toss it around, drop it in water wooden legs. It was a bit light for the large cameras and long lenses I tend to use. It's weakest point was not the wooden legs, it was the top of the swivelling centre column (the tripod has a sort of ball head/lock for the centre column that is just wonderful). The base upon which you sit the camera was a bit light weight and had slight play. Still, it worked well for several years for 4X5 on down until I broke down and purchased a carbon fibre gitzo 1348 (4 section, goes higher than me) and then has a centre column on top of that. Mind you it cost 3 times as much and while a bit sturdier, does require more care.
7. tripod locks - take your pick - levers are faster but occasionally catch part of you, rotating locks are slower but don't stick out, don't catch on things and you can control the tightness - the gitzo has rotating collars and frankly they are just fine - I don't find them terribly slow. Not everyone agrees though.
8. tripod heads - the absolutely worst head is a tripod with no leveller and a three way pan tilt head on it. These are horrible and should be relegated to 8 mm. movie making. That said, ball heads are less than perfect - some are huge yet not super sturdy, others seize up at the wrong time.I use an arca swiss with a knob tightener only because I took the lever base and put it on a wooden slider for stitching - I love lever locks - I distrust knobs - with a clamp that allows the camera to slide right out either end unless perfectly tight I'm always checking the knob to see if it is tight enough, and carrying the camera on the tripod and over the shoulder is only done after checking the knob, again. With the lever, it's on or it's off. I suppose a branch could catch it and flip it but it hugs around the Really Right Stuff base so it's not much of a risk and has never ever happened.
9. the lower the head, the steadier the tripod - sticking six inches of ball head on top of a tripod is like permanently using six inches of centre column. I have an arca swiss and am tempted by the new Really Right Stuff ball heads.
10. feet - my own preference for outdoor work is a metal pointed foot - but that's not what I have on my Gitzo so perhaps I'm too fussy - and at least the gitzo feet are easier to clean mud off of and are ready for indoor work.
11. quick release plates - are great, few serious photographers try to fiddle with finding threading and tightening a tripod screw - they use quick release plates of one type or another.

Tuesday, July 11, 2006

Places To Photograph


You might consider photographing at a heritage village. Many areas have something equivalent - whether it's a restored railway, farm displays, old time village, restored town, etc. Somewhere that actually does things is ideal, I remember years ago picking up a silver bracelet with my wife that was made at Colonial Williamsburg.

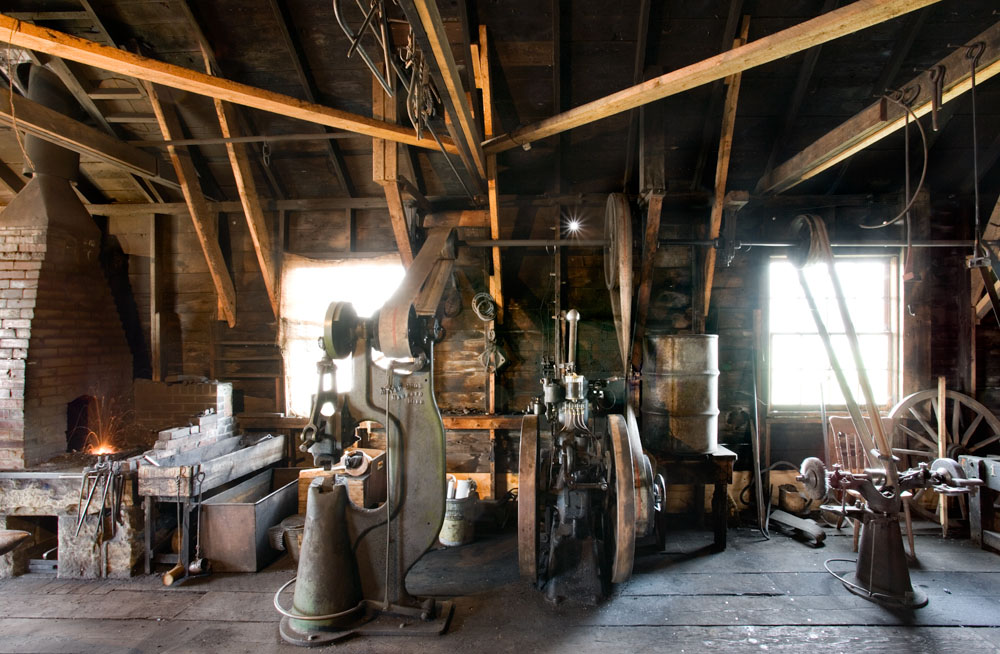
The above image was shot at Heritage Park in Calgary. It's not great art but it's fun and after all this is a hobby for most of us and you can't photograph 'great art' all the time!

The image below is very much a record shot but I think might well be worth returning to to see if I can come up with something a bit more creative. Think of it as raw material.


By the way, the smithy image was a 1 minute exposure in the middle of the day - man, it was dark in there - there were in fact a few flare spots in the image that I hid in photoshop though had I cleaned the lens they might not have shown - still, not bad when you think of the light pouring in the windows during such a long exposure - Canon 17-40mm. L zoom lens.

Monday, July 10, 2006

Textures, Shapes and Lines


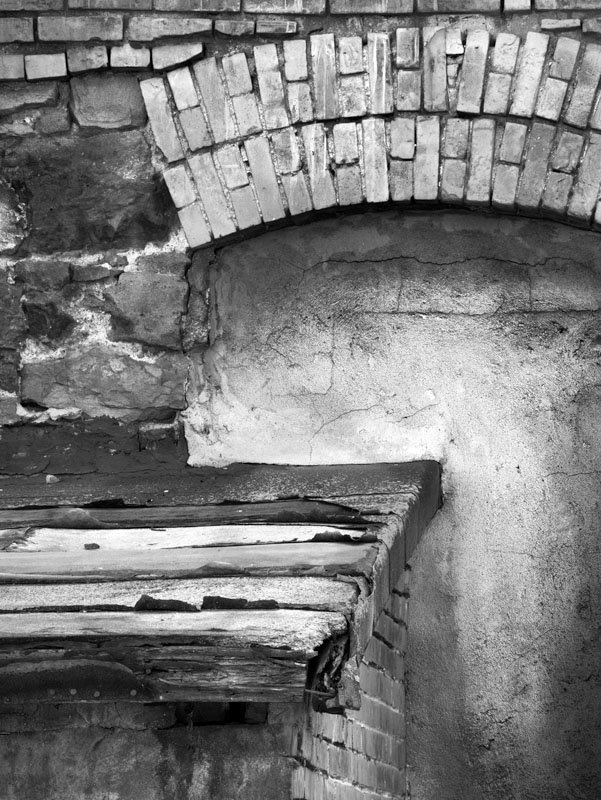
A not previously shown image from Coleman Colliery in the Crowsnest Pass in southern Alberta.I needed permission to go into the plant but Luscar Mines was very cooperative and I followed the rules.

The second picture is the image right from camera raw with no adjustments other than turning the saturation down to show the starting black and white image.

Saturday, July 08, 2006

Shooting Often To Avoid Disappointment


An all too common experience when photographing is to not find anything worth shooting, or worse, to shoot anyway, knowing you aren't getting anything really good and somehow deluding yourself into believing that magic will happen after the image is recorded. Of course it doesn't and you look at the proofs and sigh - all that work for nothing.

I was just reading a 'despatch' by David Noton talking about going out on a lovely morning yet not finding anything really worth it.

The obvious suddenly occurred to me - the only way to avoid major letdown is to photograph so often that a single day's shooting isn't all that important.

If you are like me in the past, photographing every few weeks when I finally had a day free - there was a lot riding on that one day working out. I had previously thought my success with digital had to do with shooting more images - but I think perhaps it had a lot more to do with getting out more.

I also note in David's 'despatch' that he shot anyway, he worked the scenes hard and tried his best - I suspect this kind of 'practice' is vitally important.

It's still a disappointment not to capture one of the 'great' images on a given day, but it sure beats staying home and cleaning out the gutters.

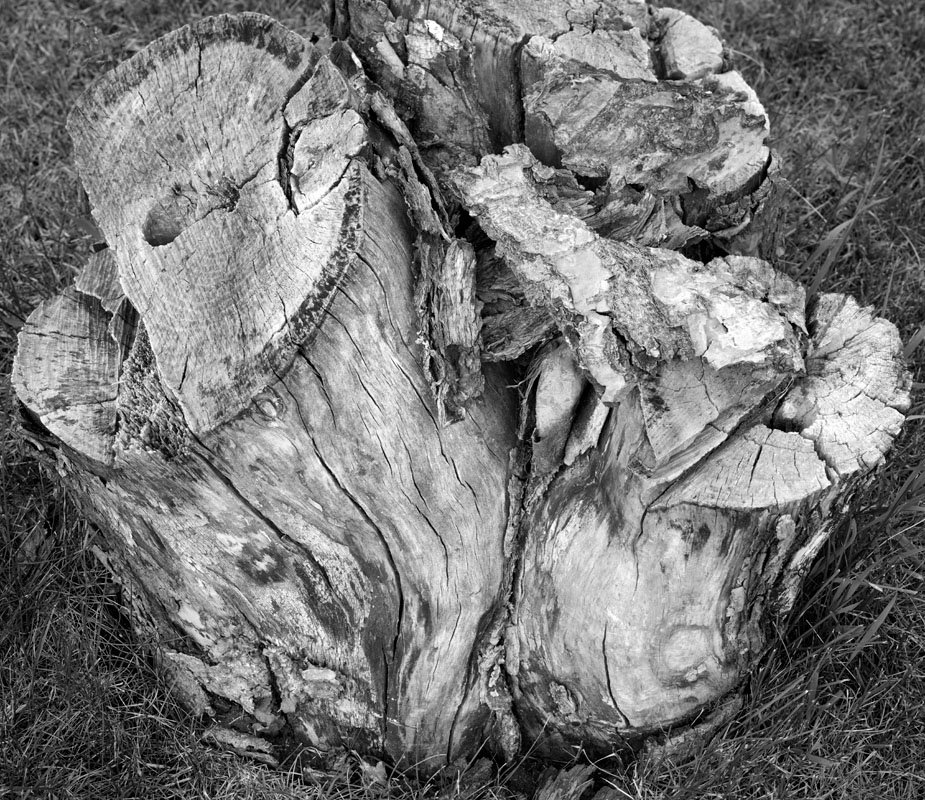
The image above was a stump in a front lawn noticed as I was walking the dog half a dozen houses away. It's a pleasant enough image but not 'top drawer' and other than as an illustration of a point, I wouldn't show it. If it's not a keeper, why shoot it? Well, my 'eye' was active, looking for compositions and textures and shapes that are interesting - that exercise is always worth while, the process of shooting the image (actually moving round the stump looking for the strongest composition) is useful. The actual process of recording the image isn't that important but producing a well toned rich print is...

Friday, July 07, 2006

Some Things Are Worth Photographing and some...


I think there are things that are not worth photographing and if you think about it you can save some time and frustration. For example, no matter how good a sunset picture you get, wouldn't you rather have been standing there watching the sunset? Pictures of grand canyon look lovely, but standing on the edge of the canyon has to be more thrilling, no matter how many pixels you used, no matter what size film you recorded it with. To be fair, the wonderful lighting that happens so seldom isn't available to most of us when we visit so recording it to show what you missed is I think relevent, but I would argue we'd still wish we were there during that wonderful lighting and the image is a pale shadow of the real thing.

On the other hand, and to flog an old story again - who would rather have Edward Weston's actual pepper # 30 vs. the image he made of it? The image is so much more than the vegetable. People have visited the spots that Ansel shot in Yosemite and been disappointed that the real thing wasn't nearly as gorgeous as the image.

The image above of ADM Flour Mill is I think more interesting than the silos it records. It's been published twice and sells well, yet I don't see lines of cars driving past the flour mill to get a glimpse of the silos.

Does make you think about what to photograph and what is the point of your photographing. Hmmn...

Tuesday, July 04, 2006

Example Of Changing Subject


Oriental Poppies from my garden.

10 Suggestions For Getting Through A Slump


Shot last night after deciding I had to get out, no matter what - followed a lead someone suggested for a new location.


Ever had a period when you couldn't seem to create a good photograph for love or money - everything you shoot turns out to be crap and after a while you lose enthusiasm? Thought so!

My life in photography has been a series of ups and downs, sometimes fairly dramatic (I gave up for 15 years). That said, I haven't had a serious slump for the last five years and perhaps my experience can be of help to a few other 'slumpers'.

1) You may be a dedicated LANDSCAPE (substitute your own main interest here) photographer, but if you want to avoid slumps you need some other areas of possible interest - that's how I got started with bridges and industrial. They had a number of advantages to me - they were closer, were less dependent on weather, and are inherently less common. How do you find your 'backup' enthusiasm? You have to try a variety of subjects and styles of photography which have provided other photographers with lots of subject matter.

2) Change style - are you normally a wide angle shooter - then deliberately force yourself to use your longer lenses - perhaps you will start to see in a different way and add to your repertoire.

3) Change formats - this was an important one to me - no matter how I like to think of myself as a large format landscape photographer - the slowness and methodical nature of large format just doesn't suit the way I shoot - perhaps after 40 years of photography I should finally recognize that. That said, there may well be people who are frustrated with their small format work who would benefit greatly from going to a larger format. Some have found fun again by going to pinhole.

4) Change shape - this is somewhat tied into 3) above but you can of course crop or if shooting digitally stitch, so what about radically changing your images - normally shoot 2:3 ratio, how about cutting out a square hole in cardboard and use it as a viewing tool to deliberately look for square format images. Or go the other way and shoot nothing but panorama ratio images (at least 2:1).

5) Normally shoot for maximum depth of field, everything in focus - how about going out and shooting close to wide open with very selective focus - this will force a complete change in the type of images you take.

6) Change from colour to black and white or visa versa.

7) Stop photographing - give yourself a break, but spend the time (and money) adding to your collection of books of photographs, visiting galleries, swapping prints, and learning.

8) Take a workshop - you may not learn a lot but it's great for getting the interest back up.


9) Normally shoot everything from a tripod, then get rid of it and run around snapping things handheld, or if you don't know one end of a tripod from the other then buy, rent or borrow one and see if slowing down a little actually helps.

10) Regardless of trying to find other subjects to be interested in, what about giving yourself assignments. For example, how about giving yourself one day to create and print the best possible image of the contents of a drawer, of anything in the back lane behind your house, the best possible portrait of your dog (or borrow one). There are a million possible self assignments - think of Bill Brandt with his warped mirror images, Josef Sudek photographing from his window. Your goal isn't a great photograph. Rather the object is the best possible image within the parameters of the assignment - none of the images need to be keepers - but trust me, practising is better than not shooting, and making a rich toned image of a junk drawer is still going to help your other photography.

How about adding your own suggestions on how you get out of a slump in the comments section.

Sunday, July 02, 2006

Work In Progress


Perhaps you are tired of looking at this image, but the iterations it goes through as I work towards what I hope is a good print, is, I think; useful.

I was very clever - I shrunk the image for web publication, then came back later in the day and noted the image hadn't been saved, so of course did so, thus saving the small version on top of the big, and losing the full size version. This kind of error is essentially terminal as once saved, the original is gone. Fortunately of course I still had the three images which had been morphed by the stitching programme and could be put back together, and even better, I had decided part way through editing the image to save an unsharpened version so that I could upsize if if need be for making a really big print - say 3X4 feet.

I started with this unsharpened version. Of course, I had made hundreds of changes since saving the unsharpened version - all lost to my carelessness. Still, with a bit of work removing hundreds of rain drops from the image as well as reinventing the cropping, colour balance, contrast, burning and dodging, I have arrived at this version, which fortunately I prefer.

Colin of Auspicious Dragon had suggested the reshot image was weak across the bottom so in recropping the image, I decided after all to include the grass and also the full depth of the interesting rock mid bottom. The grass does take away from the completely abstract feel of the 2005 image but I think does provide an anchor and I don't think it hurts to identify it as a real rockface. Besides, I still have the abstract version which I am not going to hide.

I wanted to warm up the image a little and used photofilter warming to achieve that end - not something I have ever done before but it did the job nicely. I desaturated the blues as being a bit over the top (a side effect of increasing the contrast in the image earlier).