

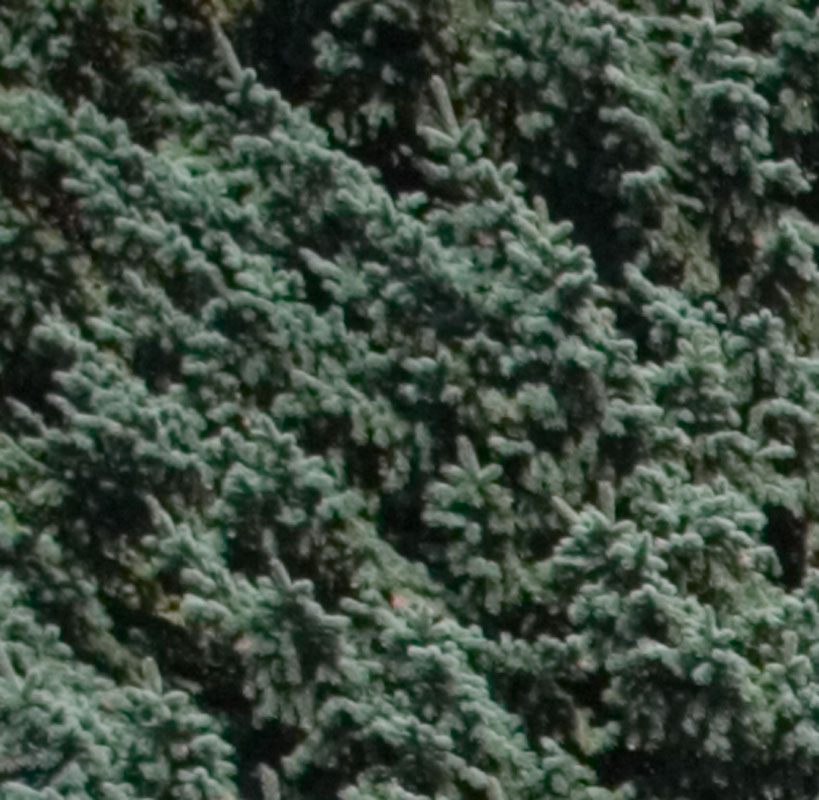
Arrived on Vancouver Island this morning and this afternoon stopped at Cathedral Grove - a preserved old grown forest with trees 12 feet in diameter, ferns below and decaying stumps lying around. It was midday and the sun was pouring through the canopy and for the most part made things way too contrasty - at one point I was exposing for 30 seconds at f16 - fortunately for a burned stump in the shade, but the sunlit ferns needed f16 at 1/60 - 11 stops difference.
My plan is to go back this evening if convenient to my wife or very early tomorrow morning before breakfast.
Cheers.
Friday, September 29, 2006
Thursday, September 28, 2006
Photo Excursion

I'm off to Tofino to photograph for 10 days. Not sure what connection if any there will be for updating the web blog but will certainly try.
Tofino is located half way up the Pacific Ocean facing outside edge of Vancouver Island, north of Seattle, west of Vancouver, home of miles of unspoiled beach, first growth forrest, whales, fishing villiages and other interesting photo subjects - besides it isn't near work!
Take care and good shooting till I get back to you.
Decided For Good Zooms Over Primes After All
It was no easy decision but I finally went for the 70-200 2.8 L IS
Reasons included:
I rented one last year for Vancouver Harbour and am hoping to photograph from small plane while in Tofino, also poss. whale watching, etc. where IS would be helpful. Tests suggested that it is significantly sharper than the 70-200 f4 in the corners and in fact is quite decent wide open (which the f 4 never was).
I quite often find myself in positions that I simply cannot move forward or backwards to crop by position so using a series of fixed focal length lenses is necessarily going to involve up to 20% cropping and will more than use up any sharpness advantage of primes. For when the focal length is spot on - well I guess I'll miss the prime, but I have to consider the total use pattern.
Anything that slows down the photography is going to cost me lost shots - contrary to the generally accepted view of landscapes taking time - I often have seconds to get a shot.
I remember all too well changing and rechanging lenses trying to find the ideal composition - that's a waste of time and increases dust exposure with each change.
I have found that very frequently that when I see a really good composition, that turns out to be absolutely the exact right spot to shoot from and any close or further while possible more often than not does not result in as good an image. Zooms let me nail that first shot, then I can move around looking to improve the shot if I have time, light, wind, etc. to do so.
I could certainly have purchased several primes for what I paid for the 70-200 2.8 L IS so we will have to see whether I made the right choice over time. It may even be that with the next generation 1D camera at 22 MP+ that only primes will be able to take advanage of its resolution, but I can't afford to replace my camera so it's a moot point for the forseeable future.
I sell my photographs and I have made good money with the lenses I already have, including the f4 70-200 which I will now send to Canon to have checked. I note that something rattles in it - nothing rattles in the new lens, hmmm...
I also settled on the 24-70 2.8 - I wanted the sexier IS 24-105 with it's better focal length range but at enough different focal lengths the 24-70 was significantly better than the 24-105 (including 85 and 105 compared to the 70-200)that it did not make sense for me. I'm going to miss that IS for handheld work - how often do I hand hold? - well there was that shot three years ago I think...
Picked up a 10 stop ND filter for these two lenses for my trip to the coast - one could argue that lots of people have done time exposures of the waves - but I haven't and I might still come up with a unique picture - and besides - I have always liked that etherial look so what the hell - I mostly photograph for myself.
Amazing Canon Lens Test Site
Have visited The Digital Picture before for the text reviews and comments on resolution, but check out the ansi test chart image comparisions, you get to pick two lenses, set the focal length (if a zoom) and the fstop and by running your mouse over the image it changes from the test image from the left selection to that of the right - incredible.
As a landscape photographer I have almost no use for wide apertures - all my shots are done at f11 if I can get away with it and more often f16 as the greatest depth of field without running into ruinous diffractio problems. Finally I can test this - guess what I found.
Even at f16, almost all the L primes are better than the L zooms - enough so in many cases to make me rethink my lens purchases. I was almost ready to get one of the 70-200 L zooms to replace my dropped one - but maybe I'd be better off with a 135 and 200 mm. lens, a 1.4 extender to replace my 300 that doesn't get used often. If I'm shooting from a balloon though, IS and zoom sure are handy - and I hope to do some flying while in Tofino - zoom would be useful there too - sigh - no perfect answer - but at least the website above answers my questions better than any site I have visited so far. Highly recommended.
Wednesday, September 27, 2006
Zoom Or Prime?
Upper left corner, 17-40 L Canon @ f16
Do you struggle to decide whether to go the convenience of zooms or the sharpness of single focal lengths. According to some articles, the war has been won by the zooms and resolution stopped down is now so close to good primes that the only reason for primes is if you shoot low light or sports.
For some time I have been unhappy with the corners of my images - reviews describe the corners as sharp, or slightly soft, I'd describe them as downright terrible. Oddly most disappointing has been my 70-200 Lf4 - though I have to confess I dropped it.
One defect of the current rage of backpack camera bags is that when you pick them up, the stuff automatically falls out. Unfortunately I happened to be standing on the concrete abuttment of a railway bridge over water at the time. Fortunately it rolled out of the bag as I picked it up, hitting the concrete but not actually smashing - in fact apparently no damage at all - and most importantly as it rolled to the edge of the concrete, I stopped it first. At that time I was shooting 10D and since then have graduated to full frame and notice that corners just aren't all that sharp - is this a feature of the lens (not shown by the frame cropping of the 10D, or did the lens not quite survive the fall. Oddly it's still plenty sharp at the centre and all four corners seem equally fuzzy so things still seem aligned.
Of concern is that what if the lens isn't damaged and this is just what it provides and everyone else is oohing and ahing about centre resolution or even edges but not corners - not sure I buy this arguement - some review specifically test the corners (eg SLRGear ) and that isn't what they are seeing.
Had a good look at the canon published mtf curves at Canon and the MTF curve for the 17-40 shows exactly what I was seeing - great centre resolution - terrible corner resolution - suggesting that the MTF curves could in fact be used for useful comparison.
In case you don't do a lot of MTF peeking, on Canon's site, the heavy solid blue line represents contrast at low frequency stopped down to f8 - and probably is your best guide to overall resolution. The heavy black line represents contrast wide open. The other lines refer to resolution (measured as MTF contrast in other directions of measurement - frankly I can't remember which is sagital and which radial and frankly it doesn't really matter. The ideal lens would be a perfect straight line across at 1 for all the lines. If you look at the MTF for the 135 you see just how close you can get to that. MTF curves don't measure at f16 so say absolutely nothing about problems of diffraction. My own experience is that resolution at f16 is a touch down from f8 and can be mostly hidden by a touch extra sharpening. The same cannot be said for smaller f stops on my full frame camera.
Testing the 17-40 has shown me that corners never get sharp and though I had indicated I could live with fuzzy corners because of cropping or stitching - some recent work where I needed the full 17 mm. wide meant I couldn't throw away the corners.
Anyway, I now have a 17-40 with fuzzy corners (and great central resolution), a probably defective 70-200.
I am in the process of figuring out what to do to replace the lenses. I tested a 135 f2 - very sharp but it's main characteristic is that it is sharp right from f2 - which as a landscape photographer I don't have any use for. I also tested the 24-70 - significantly fuzzy corners at 24 mm. but decent at 35 mm. and just plain excellent at 50 and 70 mm.
I'm wondering about the 70-200 f4L IS when it comes out in November - again I really don't need f.8 shooting landscapes- but a couple of times could have used the IS -= Vancouver Harbour and ballooning. I'm off on a major excursion on Friday though so have to come up with a solution this week - sigh.
I carry a beautifully sharp 300 f4L lens but seldom use it and only once have used it with a 1.4 extender - hardly worth the trouble of carrying it. The 70-300 is unaceptably fuzzy in the corners from examples I have seen so that isn't an option. Everyone raves about the 70-200 f2.8 L IS - but perhaps everyone isn't as fussy as me. Still, worth a test and I'm going to do so tomorrow.
Just to complicate matters it's been suggested that I test three different lenses to see which is sharpest - that's a bit scary, for a $2000 lens.
By the way - the f8 corner was even fuzzier - even though depth of field should not have been an issue at 17 mm.
Sunday, September 24, 2006
Eventually I'll Get It Right

More images from Jura Canyon - I'm convinced this place is going to produce a really gorgeous image, but so far technical problems plague my efforts. I need huge depth of field and have been using Helicon focus with mixed results - as things stand I can make a simple edit to the opcacity mask in Photoshop but as you no longer see the image, it's less than ideal and without edited masks it isn't doing a great blend. (if this comment makes no sense, see prev. reports on Helicon Focus). My 17-40 with it's soft corners was giving me grief so I have borrowed a 24-70 - not ideal testing circumstances since the corners are so much nearer you can't comment about sharpness - will test properly this week.
Thursday, September 21, 2006
On Choosing A Format
As someone who has struggled over the years to figure out the ideal format with which to shoot black and white landscapes, perhaps there's a lesson here.
First, this is a wonderful time to try a different format of film camera - medium and large format cameras can be had at very reasonable prices and where in the past converting a darkroom to handle larger film was often prohibitively expensive, now you can get 4X5 enlargers for a song. The other day I was offered a horizontal 8X10 enlarger for free - mind you it needed a large room and weighed several hundred pounds and would need an army to move, but still...
Medium Format
There are huge choices of cameras, from 645 to 6X6 to 6X7 and 6X9 cm. Film is still readily available, processing is simple and the quality jump from 35 mm. is huge and well worth the trouble. Medium format can be scanned well with a relatively inexpensive flat bed scanner such as the Epson 4990.
Downsides are the relative lack of zooms and if you insist on Hasselblad lenses, the expense. Let me recommend the Bronica SQ-A as a lovely 6X6 camera with an excellent series of lenses while being reasonably priced on e-bay. Even if you are not enamoured of the square format, the business of flopping the camera over on its side for vertical images is a pain and I would still recommend the 6X6 camera.
You have lots of choice - rangefinder, folding, compact, slr, rotating back, bellows, waist level etc., developing tanks can still handle multiple reels. The majority of my good work over the years has been medium format, starting with the folding Zeiss Ikonta to Yashicamat 124, Mamiya Press, Hasselblad, and Bronica.
Personally I detest rangefinder cameras for landscape - the framing just isn't accurate enough for me. Others really appreciate the reduced weight and bulk of these cameras and certainly the Mamiya 6 and 7 probably have the sharpest lenses available.
Large Format
I got my start by borrowing the local newspaper's Crown Graphic 4X5 they weren't using any more. While its tempting to reject it for the lack of movements and lack of rotating back, truth is that for the majority of landscape work it is all you really need. Forward lens tilt happened when you depressed the bed of the camera (which by the way works better than tilting the lens as it keeps the image circle closer to centred on the film meaning you need less coverage. To my surprise the littly 135 mm. Optar was in fact quite a sharp lens if you didn't use the shift. The camera is solidly made, very light and by folding within itself, well protected for tossing in a backpack. I had a tele-xenar 360 with compound shutter which was quite sharp - it did need a good lenshood to protect it from flare but at 1/5 the price of other telephoto lenses...
I found the Angulon 90 mm. wide angle very disappointing - edge sharpness is terrible - and I had one of the Technica supposedly pick of the litter ones.
In my time I have owned Toyo C - plastic standards actually move and stay out of alignment - Wisner Traditional - sloppy fit so that it doesn't set up square either - buy boy, it sure was pretty - original Zone VI (Tachihara? or Wista) that I unaffectionately referred to as 'old shakey' - a variety of Technikas - and my all time favourite, my 1950's Color Kardan (see my review on Large Format Photography).
People say they like the slow contemplative style of large format, frankkly I never understood - I am very slow with my DSLR and couldn't work fast enough with my view camera - landscape lighting often changes and the ideal light is fleeting. Wind which was non existent as you stopped the car, comes up just as you pull out the dark slide. I always aimed for a large format system that was the most comfortable and natural working and had no vices which slowed me down.
The real reason to go for large format is either you need tilts or you need a the biggest damn negative you can afford and carry equipment for. If you are printing wet , then you might also want it to correct verticals, if scanning and printing inkjet, then I'd correct verticals in Photoshop. Of course there is an image associated with being a large format photographer - people take you more seriously - you get to work with cool equipment and do arcane things, strangers stop to talk to you (whether you want them to or not).
Wednesday, September 20, 2006
Scouting Old Files

From 2003 - four images stitched, Banff, Alberta, Bow River, Akvis Enhancer toned down to about 20 percent of the effect. This can be done either immediately after using fade under the edit menu in Photoshop, or it can be done by duplicating the image in anoher layer, applying Enhancer to the upper layer, then decreasing opcacity of that layer, or even creating a mask so it can be toned down locally. The latter method has the advantage of being adjustable later on - fade only works immediately after the filter is applied and cannot be adjusted once applied. Fortunately it comes with a slider so you can select the amount you want.
Tuesday, September 19, 2006
Failures Beyond Our Control
OK, so last time I emphasized the failures that are technical or at least subject to some fairly simple do's and don'ts. What about the bigger frustration of you go out for a shoot, you do your best, you don't make any mistakes, yet what you come home with is crap?
Perhaps this hasn't happened to you but over the years it sure has happened to me - though it happens less often than it used to so perhaps I can offer some useful thoughts.
The first thing is that photographic excursions do sometimes result in crap. If you are photographing 2 or 3 times a month, the occaional complete failure isn't a big deal - if you only get out 5 times a year, you 'need' every trip to be successful - this is probably unrealistic, so if you are frustrated it may simply be that you are giving yourself too few opportunities.
The second problem is that sometimes we really force it - we're desperate to get out and photograph, yet perhaps we're tired, stressed, distracted and definitely not inspired. We go 'cruzen fer snaps' in the vain hope that inspiration will strike somewhere down the backroads. Without a specific project or destination in mind, the odds of success are not great and it is a recipe for frustration. Of course, even knowing that nothing has inspired us, we take out our cameras at every hint of an opportunity and ignoring all the reasons the pictures won't be great, blast away, or spend hours lining up a basically mediocre shot. Is is a surprise that when we review the proof sheets (digital or real), we are disappointed?
The solution here is either to only photograph at interesting places or to give yourself an assignment - say a portfolio of 12 images of XXX, whatever XXX might be - it could be back alleys, garbage cans, insects, cutlery, 11 year olds, hockey or whatever. Having given yourself an assignment, the ojbect is to photogrpah the subject the best way possible, not to create a 'great work of art' and I think it takes some of the pressure off.
What about the times that the subject matter is interesting, something you care about, even get excited about, but the results are disappointing? It could be that the excitement itself is actually interfering with your discriminatory skills - it's so good how could you take a bad photograph of it - trust me, it's easy. Perhaps it's so good others have been there before you and the pressure is to say something different about it. Sometimes it's worth getting the 'classic' shot out of the way first, then work on saying something new.
One of the 'techniques' I have developed since going digital is to 'overkill' the site. Instead of finding the few good shots and spending an hour setting up the view camera, I will work the scene. Everytime I take a picture, I then see if I can't improve on it. You might ask why not find the best position first then take a single image, but that just hasn't worked for me. In the field I often have multiple choices which seem equally good and I'm simply not sure which is going to work better in the print. Once the images are in the computer however, it's obvious that most of the shots aren't nearly as good as one or two and I realize that had I quit after the first 'good' image, I would have come home with nothing.
This is not to say that we should shot gun away - I carry round my neck a 2X3 cutout in plastic that I use as a framing device. I check to see if there is a better position than my first one. That said, I'm surprised at how often the thing that grabbed me is only or best photographed from exactly the position at which I first saw the image. Uusally I will shoot from that first position and then move on to improve it if possible.
It pays to analyse the scene. What makes it worth photographing - is the colour, the shapes, the receding lines, is it age, texture, opposites, or balance. Is there a way to photograph it to take what caught your attention and emphasize it?
After all that, there is still a good chance that what you saw didn't translate into a great photograph - we need to be prepared to deal with disappointment. Some shoots just don't work out. Some things which look wonderful in the real world don't translate to photographs - you really 'had to be there'. So you remind yourself you enjoyed being there, and you move on.
Monday, September 18, 2006
Dealing With Failure
I think it's a given that we are going to fail at times, in fact often, nay regularly. Failure is the norm - All great photographers shoot more lemons than prizes. Perhaps though we can have a look at the kind of failures we have and learn something from it.
There are technical failures - of focussing, exposure, camera steadiness, forgetting to reset the ISO back to normal after doing a basketball game, etc.
There are equipment failures - lenses that aren't sharp into the corners, or suffer barrel distortion or cameras with not enough pixels, too much noise, etc., etc..
There are compositional errors (I don't mean you didn't compose a great picture, I mean the simple errors like the tree out of someone's head, the white against white so shapes don't show, the overlap of things that would have been better almost overlapping but not quite, the fact of not considering that in black and white two obviously different things won't separate because it's their colour that separates them.
There are processing errors - whether it be poor technique in the darkroom or careless backups resulting in erasing a cf card you hadn't stored yet.
The above are mistakes - they shouldn't happen but they do - a good photographer minimizes them. There are also failures which simply happen because despite your best efforts, it just doesn't quite work. Perhaps it was worth trying, maybe you should have realized it wasn't going to work - but predicting the great images is extremely difficult and no photographer ever got it right even 10% of the time.
It can be rewarding to look at the proofs of some of the great photographers - occasionally you see them published in magazines - some of their 'other shots' the ones that didn't become famous, are real dogs. Oh, they were properly exposed and focused and well developed, but you wouldn't thank them for a print.
The other day I had an assignment to photograph a particularly ugly new building for the local college. I took 177 images and from those selected about 8 to show them - but of course that wasn't good enough - they wanted to see all my images - even though I had selected the ones that were clearly the best. But they want to make their own choices. I didn't like the idea of them seeing all the images and heaven forbid they should select one of the ones that I was least pleased with.
I was out shooting at Jura canyon with a friend. I noted at the time that he seemed overly optimistic about his depth of field and subsequently he called to say that none of the images had turned out - all of them lacked enough depth of field.
This is a fairly easy fix - I found a depth of field calculator for him (there are lots of them on the net) and it clearly showed that he couldn't do what he was trying to do - not with that lens, not at f11, and not from that position. This is the kind of mistake we all make once, but there isn't really any good reason to continue making it. There are too many other mistakes we can make instead to double up on the same one.
So:
Lesson 1) lean from your mistakes - do something so the same mistakes are unlikely.
Lesson 2) Accept that despite perfect technique and a 'good eye' you are going to take a lot more throw aways than keepers.
Next time I'm going to address the more difficult subject of how to handle the second kind of failures - is it possible to minimize the failures - does it even matter (if you can afford the film or cf cards?
True Confessions - I Don't Photograph Every Day
one reads that dedicated photographers 'keep in practice' by using their cameras every day. I don't. Does this make me a) lazy, b) incompetent, c) less talented, or d) take substandard photographs?
I hope the answer is e) none of the above, but I don't really know. I suspect that I'm like a lot of photographers who have busy lives and other competing interests. Ansel was married, Edward had several wives, as well as lovers. Both had commercial work to complete much of which couldn't have done much to improve their skills as a photographer - I hear from commercial photographers that 90+% of their 'work' is selling themselves and only 10% at best is photographing. Some recent printing projects have certainly held that to be true for me so I suspect that in fact a very few people shoot every day and that fortunately the fact that I'm not one of them doesn't really penalize me.
It might be that this is more true for landscape work than for say street photography where fast reflexes and assured technique are essential.
Of course, the fact that I have photographed for 45 years doesn't hurt either. I would guess that the newer you are to photography the more often you need to shoot.
Consider though that a day not handling a camera isn't necessarily a day not seeing. I have found over the years that I often look at things photographically - for example, when out walking the dog, or driving the car.
And this doesn't take into consideration the hours I spend pouring over photographs, from magazines, books, on the net and elsewhere - even ads can be a learning experience. Occasionally movie camerammen have superb eyes for an image and would make top notch still photographers so even your TV watching could be argued as helpful.
I do think, though; that the photographer who only photographs on workshops or only on holidays or special trips and thus photographs no more often than half a dozen times a year, is handicapping him or herself.
Saturday, September 16, 2006
More From Dorothy, Alberta

In Photoshop I used Helicon Focus to combine two differently focused images (the near post is only a foot away), and for optimum results used the updated Akvis Enhancer 4.2 for optimum results. Oddly in saving for the net, the advantage of Enhancer didn't reproduce so I can only suggest you experiment with it - no more crashes which was my only previous reservation - definitely a useful additional tool.
Midday Shooting

All the rules (and some of my previous comments) suggest that you should shoot early or late in the day. This was shot after I lost the good light and on my way home from Dorothy, now about 11 in the morning.
The image needs the strong shadows of midday light to work. In colour it was too obviously just a picture of a feedmill, in black and white it's an exercise in shapes, shadows and composition.
Friday, September 15, 2006
Recropping
New Crop

Old Crop

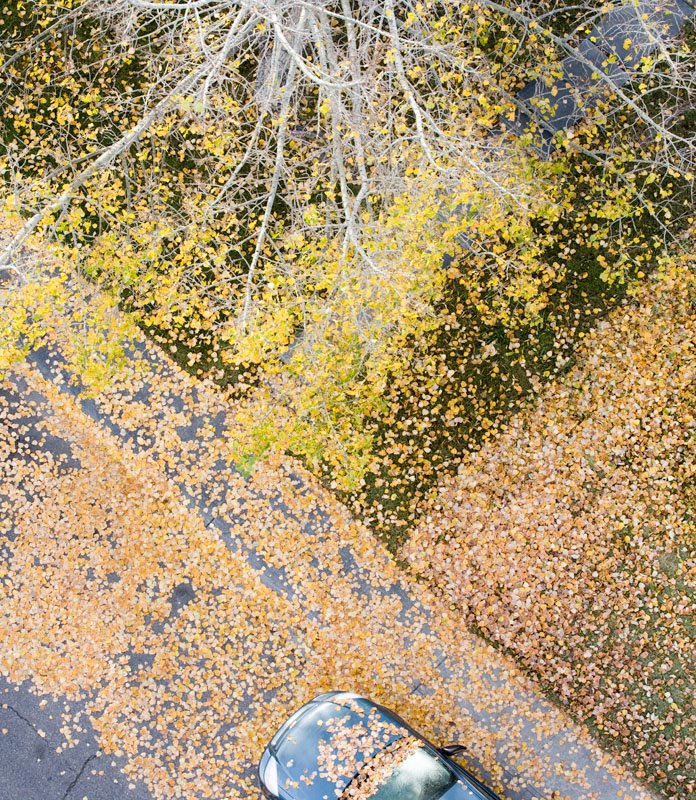
Who's to say that the first attempt at cropping an image i necessarily the best one. Was thumbing through my images looking for something worthwhile that I might have overlooked previously (occasionally a rewarding search) and I noted the full image of this shot included the car at the bottom. Here's both versions, the new crop and after it the old.
The bottom (original crop) image is more graphic and simple - but perhaps too simple as it hasn't been a particularly popular image even though I like it. The top image (the new crop) isn't as symetrical with the bare pavement in the lower left but the leaves on the car hood and the reflection of clouds off the windshield are interesting - hmmm...
Your thoughts?
Old Crop
Who's to say that the first attempt at cropping an image i necessarily the best one. Was thumbing through my images looking for something worthwhile that I might have overlooked previously (occasionally a rewarding search) and I noted the full image of this shot included the car at the bottom. Here's both versions, the new crop and after it the old.
The bottom (original crop) image is more graphic and simple - but perhaps too simple as it hasn't been a particularly popular image even though I like it. The top image (the new crop) isn't as symetrical with the bare pavement in the lower left but the leaves on the car hood and the reflection of clouds off the windshield are interesting - hmmm...
Your thoughts?
Thursday, September 14, 2006
If You Like Your Whiskey

Sad news, these are the empties. They do however have 300,000 barrels of whiskey aging (nicely tucked away indoors and safely locked). Shot early last Spring. For you purists, though, this is grain whiskey - not Scotch - no malted barley here.
Pentax K10D - Awesome Specs
Pretty exciting news for all of us with the announceent today of the Pentax K10D - 10 MP, waterproof body, image stabilization for every pentax lens ever made, sensor cleaning, but get this, price to be about $900 U.S. - incredible. This has to shake up the industry. Amongst other things (like forcing prices down on other makes of camera), this implies that money can be made at this level of camera. What will this do to prices of cameras like the D200 from Nikon and 5D from Canon? Pretty exciting times. What will Canon and Nikon do to respond?
These are really practical features to add - not frills like you see on some cameras - impressive looking but not really useful - who wouldn't love a sensor that was easy to clean, image stabilization without buying it in every single lens, or forking out big bucks for a robust camera that can take the beach, stream, snow storm or rain.
That said, landscape photographers almost universally use a tripod (image stabilization not helpful), no sensor has enough pixels to keep landscape photographers happy, and 10 MP makes prints only 30% bigger than 6 MP (square root of 10 divided by 6) - say the diffference between an 8X10 and 11X14 (almost). Of course, landscape photographers also shoot friends weddings, grand children, flowers, sports, etc. so still pretty handy features.
Tuesday, September 12, 2006
Beauty In The Oddest Things

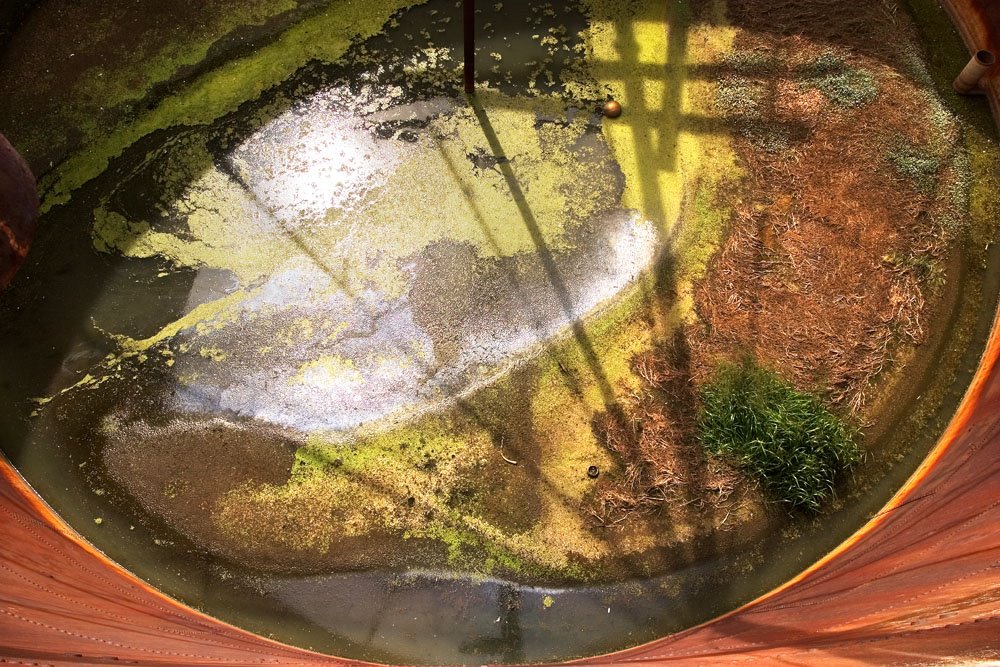
There's something about the way the elements of this picture work together that more than cancels the 'yuck' factor.
Last Night's Image
I was lucky to get this image as the government is now paranoid, not about terrorists, just bitchy neighbours who keep an eye on the Turner Valley Gas Plant Historic Site and report every imaginary and real violation they can come up with. Convinced this long since cleaned up site is continuing to polute the Sheep River (despite water tests to the contrary) they have forced closed this site so that even with special permission one cannot go in. Natural gas comes out of the ground on it's own and has done so for centuries and will continue to do so long after we leave this earth.
Anyway, the image:
Scott was right in his comments, we are looking at scsi water at the bottom of not a pipe but a 40 foot wide water tank, long since abandoned, yet with about a foot of water in the bottom and abundant growth. The lines are shadows of reinforcing beams across the top - it's photographed at noon so the sun is about as high as it gets in Alberta and most of the tank is well lit. The sides are of course rusted and made of welded sheet steel. There's even an old plastic ball in the bottom (gold coloured). It was shot with my 17-40 on the 10D so about 28 mm. equivalent for 35 mm.
Monday, September 11, 2006
I'm Pooped!
The building my office is in has made us move for the third time in 15 years, two of the moves at their expense, one, for $100,000 at our expense. Each time the mall is bought by new people, they stir things up - I'm fed up designing and suprervising and building and finally moving into a new office. Spent the day lugging 200 lb. examining tables and assorted other fun items.
Anyway, you don't need to hear me gripe, I'm off for a bath and bed and tomorrow the work is lighter and Wednesday we start seeing patients again (it was supposed to be tomorrow but you know construction goes).
So, back to photography, the picture above should make you think a little. It's not new and doesn't sell well, but I do get lots of comments on it. Answer to what it is next time.
Sunday, September 10, 2006
How Big Does A Print Really Need To Be?
There are two possible answers - the first is 'as big as the customer is willing to pay for', and the second simple answer is 'as big as I can afford to frame.
Assuming you are doing enough commercial work to pay for any equipment needed to make big images, then it's a simple business decision. If however, you are not selling enough work to pay for itself, then how large should you plan on?
Lets make sure we appreciate the full cost of making larger prints. Larger prints need more pixels (in most cases), bigger printers (exc. panoramas, so consider that as an option), faster computers, more hard disk space and better backups. Consider too that larger prints which are to be displayed require much more expensive frames and require wall space you may or may not have (or can negotiate with your significant other). Larger prints are harder to keep flat so unless you plan on stretching canvas, they may need dry mounted - more expense.
What if money were no object and the only consideration was what size looks best? Prints look best without any glass in front and gloss and semi gloss papers look best when you can angle them to eliminate relfections and bronzing (which shows at the same angle). To me this is a strong message for the hand holdable print. I would argue that the largest print that is practical to hand hold and view the whole image is 13X19 paper with a suitably smaller image (see an earlier blog for comments about white border sizes). There are however some images that just beg to be made really large and therefore wall mounted. My Columbia Ice Fields image looked really nice when I printed it big at 17X40 paper size but now that I have been asked to sell larger versions (and reprocessed the raw files with better software) I now print it 24X72 - and damn it looks nice (and the 17X40 looks puny).
I am getting ready for a show in Toronto and they require even bigger prints so I will get those done commercially. I just can't justify the cost of a bigger printer unless I can guarantee a return on my money - so I will wait and see how the first batch of really big prints sells.
If we only occasionally make really big prints, it makes more sense to oursource them. If only the occasional print is big, we don't really need the newest fastest computer available. It would be nice if every image was recorded with as many pixels as possible, but it is an option sometimes to plan to stitch so you can make a big image. That happened with my 'Horseshoe Canyon Before Storm' image. It just wowed me and I knew I wanted to make really big prints so I shot it as a total of 19 images with my 10D.
An option to consider for a dramatic effect while keeping costs down is to create an image as four separate pictures not overlapped and frame them separately using inexpensive frames and mount them on the wall together. This is sometimes done with paintings and there's no reason not to do it with a photograph. Not all images will conveniently let you divide them down the middle, but many will.
The standard size image I print is 13X19 - even the very first time. This is hardly efficient as I go through an awful lot of paper getting images just right (not to mention expensive ink).I really should print small to start with but as the standard size I sell is 13X19, I need to know the image works at that size. If you don't have a really good excuse, why not standardize on 8.5X11 - think how much less storage it will take up (if nothing else).
Subject matter determines size and I'd love to tell you I have the formula for figuring out which type of prints go to what size - unfortunately my experience is there is no logic - there are macro shots that look good huge and landscapes that look better small, go figure... Some photographers deliberately print an image in a series of sizes to figure out which is right - and then only sell the image at that size. Want it smaller or bigger and willing to pay - too bad, it is what it is. Maybe I'm greedy but I'm certainly willing to be more flexible than that.
Partly size is determined by whether or not there is anything worth seeing close up in a larger print - partly this is a matter of how many pixels and their quality and the resolution of the lens, but it is also a function of the subject matter. Although I have never seen a 3 foot high print of Pepper # 30, I can't imagine I'd see anything other than minor flaws in the pepper - enough is enough.
Finely detailed landscapes in which you can see more nose on print look good big if the detail is there and horrible if it isn't.
Friday, September 08, 2006
Triptych
 (click to get enlarged image)
It's common to hang a group of prints that are related to each other, but how about creating a set of images which need and complement each other, to be printed as one long print of four images or possibly separate prints which could be hung in a number of ways. They need to tie in not just because they have the same theme - the patterns, colours, textures should work together. I'd love to claim I knew this when I took the shots but truth is none worked well enough on their own to hold up, yet when put together, I think they work quite well (not that I'm biased or anything...)
Depth Of Field
After pouring through a forum request at Luminous Landscape for an explanation of the different depth of field with small sensors (it's more which didn't make sense to the questioner since he knew he had to 'enlarge' the image from the small sensor more), and encountering more wrong answers and irrelevent side tracks, here's my answer which is based on optical formulae, not guesses, assumptions or 'experience'.
Depth of field is simple. The mathematical formula for final sharpness in the print has depth of field inversely proportional to magnification from sensor to print (you make bigger prints, you have less depth of field, you use smaller sensor to make same size print, you have less depth of field), BUT, depth of field is inversely proportional to the SQUARE of the focal length, thus changes in the focal length of the lens used (the actual focal length, not some fudged 35 mm. equivalrent) have a much larger effect on depth of field.
This applies no matter what sensor size you have, whether it's film or digital, contact print or enlargement, sharpness fanatic or prebyopic baby boomer who's lost his reading glasses.
Next time I will show you the formula for hyperfocal distance - that distance you set your camera to have everything in focus from half that distance to infinity - still useful even in these days of digital, autofocus and no distance scales on some lenses.
Monday, September 04, 2006
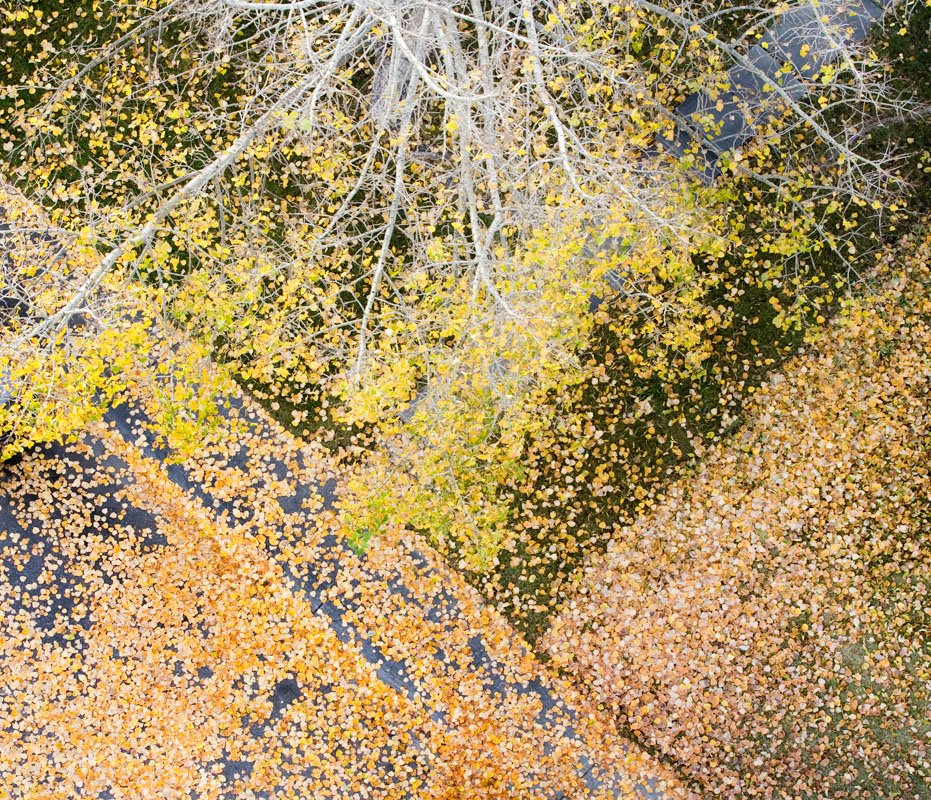
Fall Is Coming!
With the end of the Labour Day long weekend here in North America, we have to start thinking of Fall. The obvious is to shoot leaves in colour, but here's an example of a late fall image in black and white which might get you thinking about what you can do about Fall in mono.
Sunday, September 03, 2006
An Answer To Scot - and perhaps lots of others
Just received this comment from Scott and thought it deserved a more public response than simply posting another comment. Also, when you post a comment, I am unable to capture your email so cannot send a response directly - for better or worse so I normally simply add another comment below yours. Not in this case though.
Hi George,
Enjoying your newly found blog. Learned about it by revisiting your site after seeing your pictures again in B&W magazine. I see that you are a fan of PhotoKit Sharpener too. I love it, but why are you using something different for a capture sharpening? Also why are you RAW processing at one step up in resolution rather than using the native resolution of your capture.
Thanks for any comments.
Scott
Right Scott, and the rest of you. Paraphrasing the questions that Scott asked:
1) Why, when you already use Photokit Sharpener for your output sharpening, don't you use Capture Sharpener from the same company? I found that I got a more agressive sharpen with Smart Sharpen than with Capture Sharpener, without creating sharpening artifacts. Also, Capture sharpener tended to add a graininess to some pictures I didn't like. This was true, whether I used one size up on Camera Raw or not.
2) Why 'uprez' in Camera Raw when in other places you have railed against the virtues of uprezing to produce oversized pictures? For better or worse, once I was selling my photographs it quickly became apparent that people wanted large images and more importantly were prepared to pay a premium for them. It was for this reason that I purchased my 7600 and for an upcoming show am going to have to go 'outside' to have some 3 X 3 foot prints made.
This of course assumed that I had images which would print this large. In some cased I have had to tell clients that I was not comfortable with the quality of larger prints and so no, much as they wanted to shower me with money, I'd have to turn it down. Of course, it also meant trying very hard to reach optimum quality in my larger prints. I have commented earlier that with new raw processing and new sharpening algorithms I have been able to double the size of my prints at the same level of quality - all in a 3 year span. It's simply that I have found that if the original image is sharp throughout (not a given), that I could uprez in Camera Raw by one notch, use smart sharpen a bit more agressively (300, 1.1) and get a nice sharp image at 100% on screen. Further output sharpened for 300 ppi and then printed to 70-80 percent size, this meant a nice size image witth decent border on 13X19 paper. It also meant that I could make larger prints as needed. I recently told my gallery that no, they couldn't have Athabasca Falls # 1 at 3 foot square, but ran a test anyway to be sure, and to my surprise, even though on screen it looked grainy as all getout - in print it was sharp and smooth and didn't reek of oversharpening. I can't even remember now my technique to get the original 12X12 image though I know it was two shots from my 10D stitched. That would have made it about 3000X3000 pixels without 'uprezing'. To make the 3 foot square print, I doubled the size (4X the pixels) with Resample smoother in Photoshop, resharpened it and made the print. Other images have been complete disasters so go figure.
To summarize a long somewhat distracted answer - I chose to output in Camera Raw one size up because I thought the ultimate result allowed larger prints.
Saturday, September 02, 2006
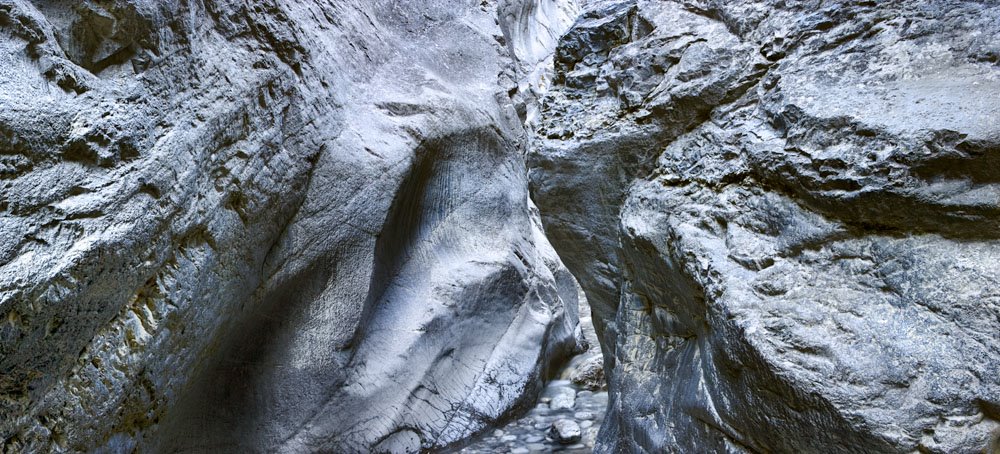
Return To Jura Canyon

Its one thing to return to a spot to rephotograph - perhaps in a better light, with a better light, with better technique or in a different season. The other issue is what about hoping for more pictures which don't repeat what is already done. This morning I returned to Jura Canyon in thge hope of finding different pictures. In that I was moderately successful, finding interesting compositions that I had not seen on the first trip. That said, I was drawn to rephotograph the most striking shots of the first trip. I did have my new Nodal Slider from ReallyRightStuff so I could do more stitching and those images will be processed over the next few weeks. In the mean time, here's a couple of images, one which is quite different from the previous shots, the other somewhat derivative, but I like it.
Friday, September 01, 2006
Pass Creek, Waterton, 2005

If you take a pony treck in Waterton, you ford the river just below this point. With a bit of care, you can wade across, water just above the knees and get to the beach. In theory you could climb down to the beach from the same side but I'm not going to guarantee you'd get back up again. Two images stitched with PTMac, output as multiimage TIFF and brought into Photoshop. The left image was added to the right as a separate layer, a white mask created and then with 80 percent sharpness of the brush, I painted black into the white mask to reveal the underneath right image, being careful to blend the images so no seams would show. In theory this should not be needed and you could let PTMac do the blend but unless you rotate the lens exactly around the nodal point, this can create trouble and I confess I have simply been rotating around the lens collar and not using my slider (the clamp points the wrong way for the lens collar).
Once I have the two images blended, I flatten the image, trim excess and work on it as I would any other image.
In this case, I warmed the image a bit with a colour balance layer, used a selective colour layer to redden the yellow ever so slightly, did some curves layers with masking to affect particular parts of the image, used Akvis Enhancer to bring out texture and open the shadows, used smart sharpen then Photokit output sharpener and printed it.
The images were shot on the 1Ds2, my 70-200 f4L lens, the final image size is approx. 7000X6000 pixels (I uprezed one notch in Camera Raw - 25 meg. output instead of 16, before doing the stitching on the tiff files output from Camera Raw).
PTMac loses the colourspace information so it's imprortant to assign the image ProPhoto Colourspace. The change in colour is dramatic and is back to what you saw with Camera Raw.
Note that I didn't get round to doing anything with image till more than a year later - one of the downsides of stitching, until you put the images together you don't know what you have. I do occasionally put the images together with Photohops stitching routine but it isn't accurate or useable and doesn't save that much time over the new automated matching point routines of PTMac.
Images In Both B&W and Colour
Just 4 images which have not appeared in the blog before but are amongst my favourites.
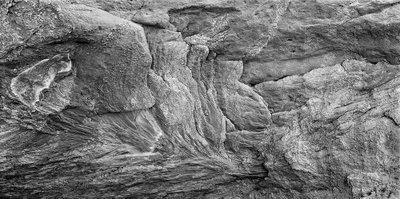
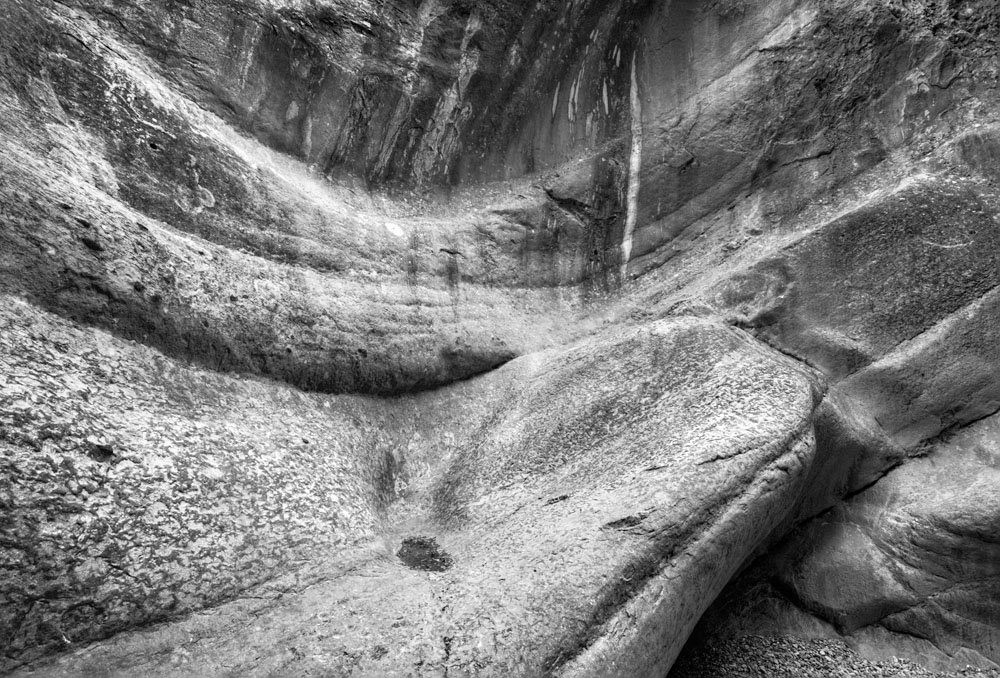
This is the roof of a cave (all be it a very short one) in Dinosaur Provincial Park, Alberta. It was shot with 4X5 and required forward tilt of the back - an unusual situation. It often is mistaken for a pencil sketch, no matter what contrast it's printed at - simply the nature of the rock.

This is two images stitched, using my Canon 10D, 70-200 @ 200 mm. and with some tricky blending to deal with the high wind and the fact that the clouds move significantly between images and didn't match up any more.

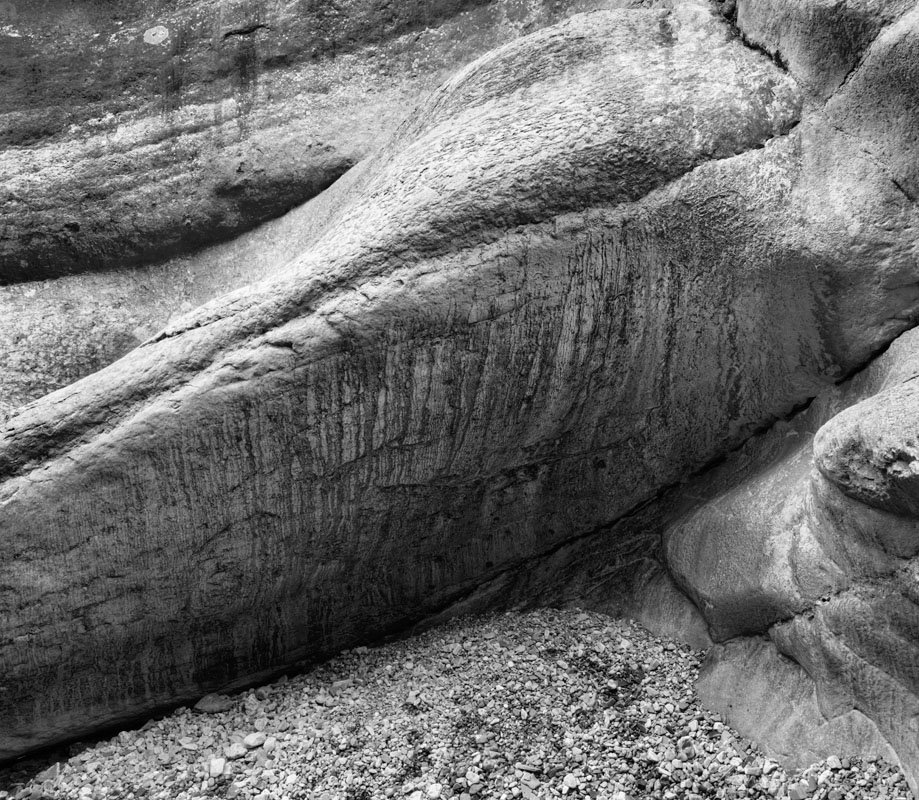
There's something about the age represented by this image, the crumbling yet still supporting foundation despite the apparent massive weight of the sagging structure above. A single cropped image from my 10D, shot at Turner Valley Gas Plant Historic Site.
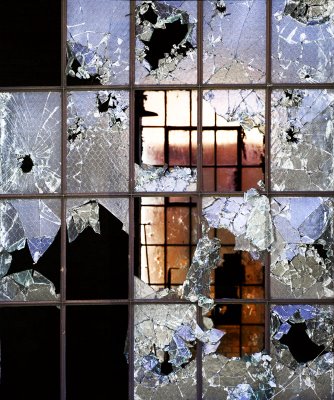
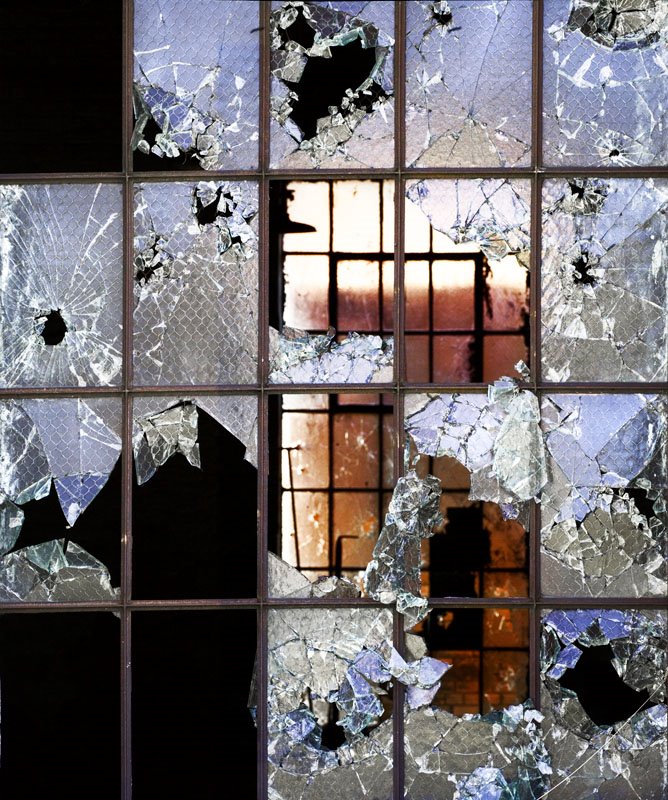
This broken window was in one of the original 1914 buildings at the Coleman Colliery below the town of Coleman in the Crows Nest Pass in south west Alberta. A sunlit red brick building in the back created the warm colour, the blue sky the reflection in the glass. Shot with Canon 1Ds2, two images stitched.

This is the roof of a cave (all be it a very short one) in Dinosaur Provincial Park, Alberta. It was shot with 4X5 and required forward tilt of the back - an unusual situation. It often is mistaken for a pencil sketch, no matter what contrast it's printed at - simply the nature of the rock.
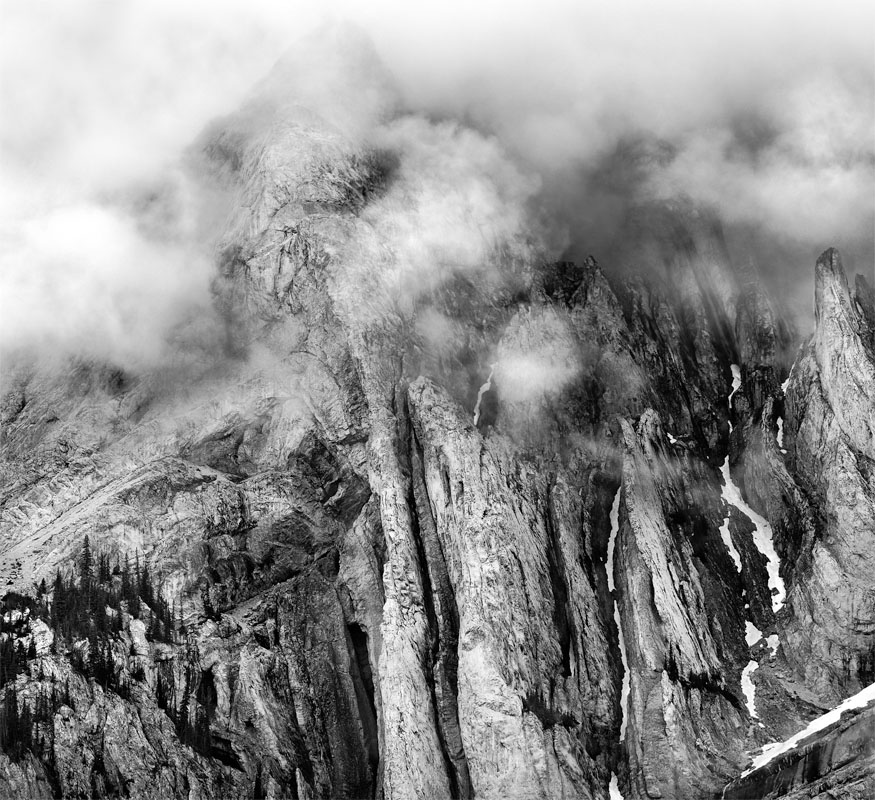
This is two images stitched, using my Canon 10D, 70-200 @ 200 mm. and with some tricky blending to deal with the high wind and the fact that the clouds move significantly between images and didn't match up any more.
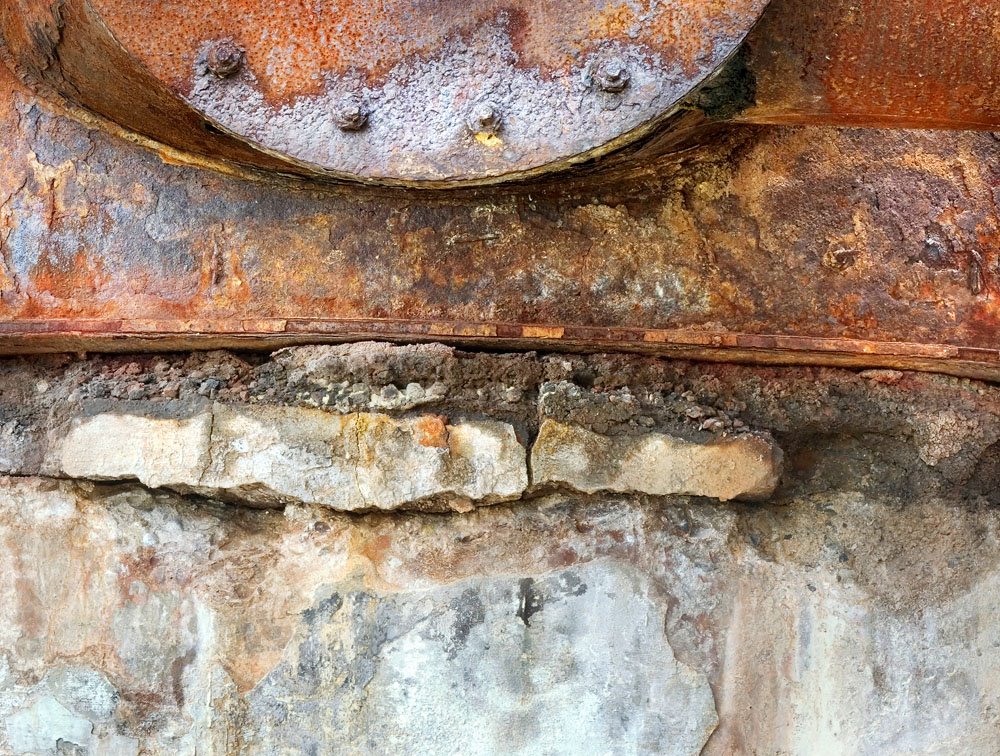
There's something about the age represented by this image, the crumbling yet still supporting foundation despite the apparent massive weight of the sagging structure above. A single cropped image from my 10D, shot at Turner Valley Gas Plant Historic Site.
This broken window was in one of the original 1914 buildings at the Coleman Colliery below the town of Coleman in the Crows Nest Pass in south west Alberta. A sunlit red brick building in the back created the warm colour, the blue sky the reflection in the glass. Shot with Canon 1Ds2, two images stitched.
Subscribe to:
Posts (Atom)