You'd think I'd take a break after finishing book 2, but I couldn't leave well enough alone. Some 40 photographers later and 37 essays written, the book is a go, the publisher on board, the project will fly.
It has been interesting communicating with as many famous photographers. The response has been overwhelmingly positive. I'm not ready to release names at this point - I still have to get formal agreements - hell, I still have to write the formal agreement, but lets just say a lot of very famous photographers think the book is a good idea and have been willing to support it by supplying an image free of charge.
I feel a significant weight of responsibility to them to do justice to their work and their generosity.
There have been some observations I have made in writing all these essays and over the next few months, I'll try to write about them.
Happy New Year to all and to all a good night.
Tuesday, December 29, 2009
Saturday, November 28, 2009
Another Old Find
Size Matters
Just picked up a print I made on the recent trip to Death Valley for the PODAS workshop, printed 17X22 on Epson Exhibition paper. I thought to myself, what a nice paper surface. Now, I had tried this paper before but in 8.5X11 and found it not glossy enough and also too textured for images at that size. Point is, the smaller the print, the smooother the texture you want, the larger, the more texture you can enjoy.
My standard gloss paper for 8.5X11 is Harman FBAL, but it is perhaps a bit too glossy and smooth for large prints. I can see myself using more of the Exhibition paper for 13X19 and up. Micheal Reichmann really likes Ilford Gold Fibre Silk which I find way too textured in small prints, but now I see why he likes it as he typically makes big prints (why wouldn't you with a 60 megapixel camera?)
It means that more than likely you won't have a single paper that is your standard for all sizes.
Wednesday, November 25, 2009
Recent Industrial Shoot
Dearth Of Great Colour?
My next book is going to be "Why Photographs Work". It will consist of some 30 - 40 images along with a 3 page essay on why the images work - at least that's the theory - it isn't written yet.
In considering photographers and images to put in the book, I had no difficulty coming up with a goodly list of black and white photographers and colour landscape photographers - but when it comes to non landscape colour - boy it's not easy.
I get announcements from a few galleries and that hasn't given me much help. I get the book announcements from photo-eye but can't say anything they have sent me recently got me excited (about colour non-landscape).
So this begs the question - is there really a dearth of good colour work on subjects other than landscape? Does it mean that street photography and still lifes and portraits are more artistic when in black and white? Is someone automatically handicapped when doing this kind of work in colour?
The more immediate issue for me is I need suggestions. The editors of photo-net used to recommend photographers but now they just have their themes and the images aren't as original - and they too mostly chose black and white before and colour now - interesting.
If you have either a favourite photographer or image in colour and it isn't a landscape, please point me in the right direction.
I'm happy to receive one of your own images that you think qualifies as "wonderful" but I won't be able to give any feedback other than if I'm interested in the image I will contact you about permissions.
Monday, November 16, 2009
Sunday, November 15, 2009
First Review And It's A Great One!
Discovered that while I was away, my book not only started shipping, early copies started arriving and I had a few emails already from readers. Further, the first review is out at amazon.com and it's a five star rating for From Camera To Computer
You come up with an idea for a book, you think it is a good one, a useful book, but a year later and thousands of hours of writing and editing, you start doubting yourself - will it catch on - will people get what I'm trying to do. Such a relief to find out that the goals have been met.
You come up with an idea for a book, you think it is a good one, a useful book, but a year later and thousands of hours of writing and editing, you start doubting yourself - will it catch on - will people get what I'm trying to do. Such a relief to find out that the goals have been met.
Images for "From Camera To Computer"
I have just finished uploading the images from my book From Camera To Computer to my website as a series of zip files - one for each chapter. For those who have the book, they can bring 1000 pixel wide versions of the images into Photoshop for your own editing ideas = from cropping to tones and see how the results compare with mine. You can also load a series of editing steps as layers in Photoshop so you can see the more subtle differences that might not be as obvious in print.
Saturday, November 14, 2009
Back From Death Valley
I have just returned from a five day workshop, sponsored by PhaseOne and taught by Michael Reichmann, Mark Dubovoy, Bill Atkinson and Jeff Schewe. The PhaseOne staff were terrific ,working extremely hard to keep us happy and producing images. The facility, Furnace Creek Resort was great, an oasis of palm trees, surrounded by almost nothing living.
Highlights of the trip were the casual conversations, at lunch or in the classroom or while driving with the individual instructors as well as a series of lectures. Jeff showed some neat tricks for controlling midtone contrast, Mark talked about achieving maximum quality, Bill did a cool demo of how to stretch canvas prints for framing, while Michael showed us some of his prints, talked about fill flash and presented the opening talk.
That Claus Modegard, head of development at PhaseOne was there was great, that he was so open with us talking about various aspects of the PhaseOne camera and P65+digital back was exceptional. So young, so smart, so nice...
Kevn Raber and his group are to be thanked for a huge amount of effort that went into making sure things ran smoothly. That none of the cameras had focusing screens until the afternoon of the evening start of the workshop yet we had functioning cameras that night because one of the New York staff flew out with the screens to be sure they got there, well that's the kind of effort that was made.
Were things perfect? No. Personally I had trouble taking a sharp picture all week - my use of a centre post was blamed (even though not raised), I shouldn't have been using manual focus (but auto focus didn't work on all lenses, there being some teething problems with this brand new DF camera, of which we had the first batch shipped, and a variety of other issues were raised - probably it's a combination of a number of factors, most of them mine rather than Phase One.
The 210 lens sometimes locked up the camera after a while, with the fix being switching to the 80 and back and things would work for a while. These are firmware issues which will be addressed in the next few months.
I liked using the PhaseOne camera/back combination and despite our first shoot taking place in the dark of early morning, the cameras were quite easy to use. That 15 out of 25 photographers ended up purchasing a back or camera or both by the end of the week speaks to the experience.
I couldn't afford one, and even if I could, would probably wait for live view, which I found so helpful on my 5D2. Claus, whose obcession is image quality isn't happy about laving big sensors on for any length as heat adds noise and degrades the image.
Even though I personally had trouble getting the best resolution from the camera, others did not and the quality of the tones was exceptional - shadows areas were exceptionally rich. Dynamic range was excellent.
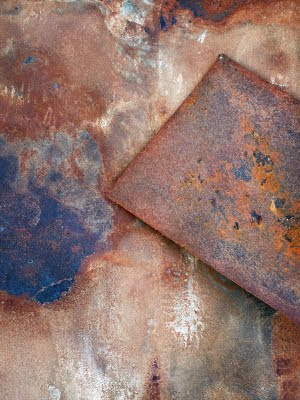
The above image was my find of the week, taken of some steel sheets lying on the ground at Death Valley Junction. Yes, I did take pictures of Zabriski Point and other classic landscape areas and yes, it seems odd to go to a national park and to be happiest with a junkyard image, but all that matters is the satisfaction of the image.
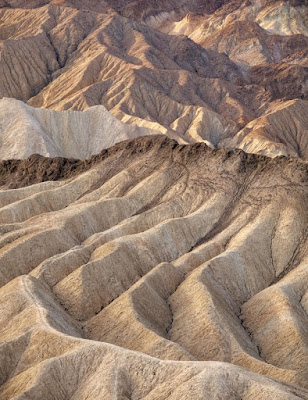
An important part of attending a workshop is chatting with fellow participants, comparing notes, looking at prints, discussing problems and how they have been solved.
Part of my hopes for the workshop were to rejuvenate my enthusiasm for picture taking after two years of slogging at producing the two books and the workshop did that in spades - this is one very satisfied customer.
Saturday, November 07, 2009
Viewer For Working The Scene
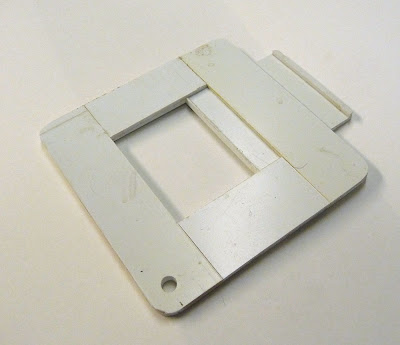
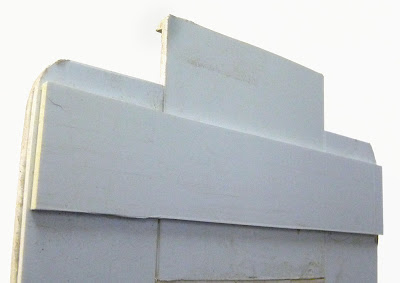
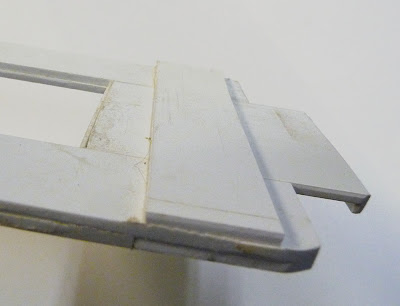
I'm off to Death Valley for the PODAS workshop and have made myself a new viewer, adjustable from square images to 2.5:1 ratio, which should nicely cover most images. It could be made of plastic or wood. I happened to use some 3/32 inch polystyrene I had lying around. You can get this at hobby stores - especially those catering to model railroaders. I imagine it wouldn't be difficult to make up a really beautiful one in wood.
Construction is simple. The size is 5X5 inches, the opening 2.5 inches, the top, bottom and sides obviously 1.25 inches wide by 5 inches or less. The slide is 2.5 inches by 3 inches.
Cut out the pieces for one layer 1.25X5Xtwo, 1.25X2.5Xtwo. Fit the next layer which is basically the same only rotated 90 degrees and with one of the small pieces missing (that's where the slider goes).Using appropriate glue (I was using styrene solvent glue) glue up the layers and either clamp or use weights to let things bond tightly.
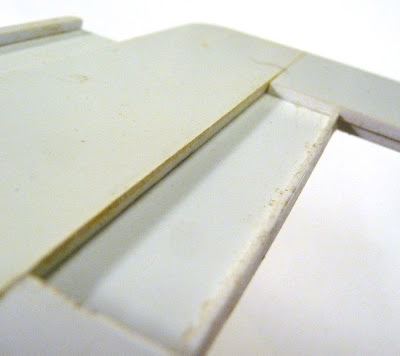
Cut the slider so it fits snugly and lay it in place (it replaces the missing fourth piece from the second layer). Glue on another 1.25X5 inch piece to hold the slider in place.
Either trim some small pieces of styrene (or buy them) to finish both the top and bottome edges of the slider (thin piece on the bottom so it doesn't compromise the window, thick piece on top so you can grab the slider) and now the slider can't fall out. There should be enough friction so that the slider holds its place when the viewer is held upright.
File, sand or grind down the outside edges and round the corners and then drill one bottom corner of the viewer to fit in a shoe lace so you can hand the viewer around your neck.
If you really want to get fancy, you can put knots in the shoe string to represent the various focal lengths of lenses you are using - with an opening of 2.5 inches, you would need to divide the 2.5 by the width of your film or sensor and multiply that by the focal lengths of your lenses. The knot goes against your cheekbone, the viewer held out with the string tight. I haven't bothered, given that I use zoom lenses, but for fixed focal lengths (as when I shot 4X5, or next week with medium format digital) this can be very handy.
I'll let you know how the viewer actually worked in practice - perhaps it will need modifications but so far so good. Of course, the other viewer that can be used is a pocket sized point and shoot with a 3 inch LCD - I'm borrowing my wife's TZ5 for the event. Will see which is better.

Wednesday, November 04, 2009
Up Close Or Far Away?
The black and white rockform image I posted the other day is now up on my examining room wall and I get to see it every time I go in to see a patient. I have discovered that I really like it from a distance, but am less thrilled with the image when I stand right in front of it.
This raises issues of print size and viewing distance, but more important is the question of whether really good images need to work both at a distance and up close, or is it acceptable to work well on one level or the other, and if so, which is more important?
Not all of this has to do with size. Some of it is also about first impressions and careful study - an image can really catch your eye, but not offer a lot of fine details which reward close study, or it might only be appreciated on close study, not offering overall design to attract your attention.
I'm not sure that any of us plan images down to the point of designing initial impact vs. later rewards (ok, advertising photographers do)but it might pay to at least think about these concepts when looking through our own images, perhaps asking ourselves whether we are happy with how the images come across.
If too often we are disappointed with either initial impact or staying power of the images, then we could make this an added checkpoint on the list of aesthetic checkpoints I discussed a few blogs ago.
If what is lacking is initial impact then consider the following suggestions.
- bold patterns
- large blocks of colour
- simple designs
- plain backgrounds
- light subjects against a dark background, whether naturally or through burning in
- careful use of editing to make the iamge more dramatic without making it harsh
If on the other hand what is missing is staying power, then you need to give the viewer something to come back to or stay with - interesting detail, stories within stories, added layers of sophistication in composition - not just the big items.
Sunday, November 01, 2009
When To Convert To Black And White
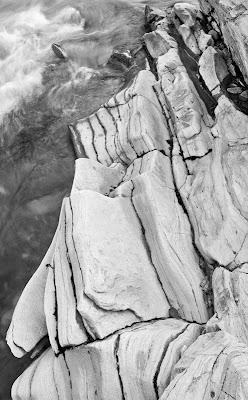
This image is a good example of an image that does better in black and white. There isn't a lot of colour in the original (see below, it's largely about form and other than the relatively neutral rock, the only other interesting thing is the waves which are white.
Also, in the original colour image, the rocks are blue white (shade), while the water is brown - not generally an attractive combination. In the black and white image I have been able to print down the water so it acts as a background to the rock formation rather than as more subject matter, even though it's only a few inches further away.
The white waves in the upper left provide a bit of balance to the rock formation and the diagonal line formed by the left hand edge of the formation.
Saturday, October 31, 2009
Highwood River

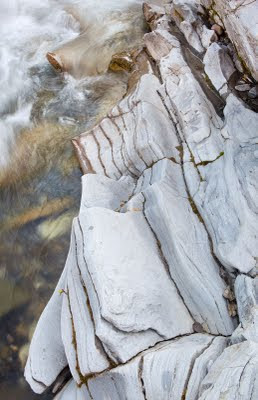
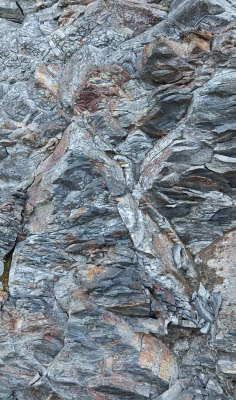
Part of a 100 megapixel stitch (after cropping), I photographed this at the side of the Highwood River off of highway 541 in southern Alberta. I'd been wondering how to access the river since it all seemed to be private fenced off land - turns out they allow anglers down there - one of my patients is a fisherman.
You can't see the great detail in such a small image but at least click on it to bring it up at 1000 pixels wide.
Friday, October 30, 2009
More On Backup
I have just inventoried my processed images - my keepers if you will - 380 gig of images that I cannot afford to lose (after all they produced two books).
At 15 cents per gig per month, my monthly charge (assuming no access) would be $2 for Jungle Disk, $57 for the storage and extra fees if I upload or access any of my stored files. This amounts to something in the order of under $1000 per year including those upload fees. I can think of a lot of things I can do with $1000 and probably so can you. Certainly one more 1 TB external drive will be around $200, but doesn't automatically back up and disconnect from power and any other connections that could be damaged by a lightning bolt or major power surge.
I do take my image files to the office for off site storage, but do it far less often than I really should. Perhaps I should just cough up.
Now, the vast majority of those images don't get edited month to month - probably fewer than 5% get edited in a year - after all they have taken 6 years of digital work to collect. Put that way, the sensible thing to do would be to back up everything I now have to a hard disk, unplug it and take it off site (as well as keeping local backups with my Drobo). I could then use something like S3 to back up all the new edited images (and any changed images from before) and once a year, put them onto a new hard drive, delete everything at S3 and start over with new edited images yet again.
In 10 years I will have accumulated 10 partially filled off site hard drives but only paying Amazon to store one years worth of images. This way I get automated off site storage (almost no effort on my part) for a modest sum of money (and once a year I have to back up my images to a hard drive. Given that I can back up all my processed iamges to one drive, it probably even makes sense to back up everything to each yearly drive so there is redundancy even in the off side hard drives.
What are you thinking about reliable painless off site backup?
Backup
Luminous Landscape has an interesting new article on backing up. It is written by Geoff Baehr and he clearly knows what he's talking about. Problem is, he's explained the steps but missed the concept.
A good computer system requires two separate and distinct components - both reliability and backup and I don't think that Geoff made it clear enough which is which.
He talks of redundant arrays using Raid to make sure that data is reliable, but at the same time refers to this as backup. It should not be both.
Reliability means that when your next hard drive fails, how difficult is it going to be and how long is it going to take to get you back up running again. Using Raid 5 or 6, you have the capability to survive a hard drive failure - but of course usually these drives are your data storage drives, not the boot drive which contains your operating system and usually your applications.
Backup has nothing to do with reliability other than that when reliability fails you, that's when you need a backup of your data.
Backups aren't about failing hard drives and redundancy and raid 6 etc.. You don't need any of this because you back up to more than one place, at least one of those places which is then disconnected from your computer and any electrical or other connections so that it isn't subject to power spikes and lightning bolts. If one of the backups is off site, then you are even protected against theft and fire and flood and it doesn't get much better than that.
What it comes down to is how much time are you willing to spend on doing your backups, how long are you willing to wait to restore your system (which often translates into how much money are you going to lose, how many clients are you going to piss off if you can't access your images).
Geoff mentions using Amazon S3 which looks possibly interesting, though at the usual upload speeds of a cable modem, the initial backup could take weeks. He discusses backing up to a hard drive then mailing the hard drive to Amazon but frankly if I have the data on one or more hard drives, why do I need to then mail it - wouldn't it be easier to just store the hard drives at mum's house?
I use a Drobo for backup though Geoff does have a good point about a proprietary storage system which might some day be hard to fix if the company goes away. Still, there are enough people using Drobo's that I suspect that it's going to be accessable for a long time to come. In theory, a Drobo or a raid system is often a mix of both reliability and backup in that the drobo can regenerate the data from any failed drive and maybe even two, which arguably isn't strictly necessary in a backup. I don't believe I can regenerate a boot disk from Drobo because what's sending data to it is Time Machine which doesn't back up absolutely everything.
My next move will be to buy an extra external drive and make a copy of the boot drive via super duper. Mind you, I'm still using a G5 so will have to upgrade that first - just as soon as I have some money.
Thursday, October 29, 2009
New Book News
Well, a milestone, Fed Ex delivered my advance copy of my new book "From Camera To Computer". Bulk shipping to bookstores should take a week or two. I think it looks good but you'll excuse a little bias.
I have posted information on the book to my website. Click on the right book and you will go to the cover image, information on the book and then to a page from which you can download pdf's of Chapter 21 and also the table of contents. Those of you who follow my blog have probably seen almost all the images in the book and even many of the editing steps blog entries and you might wonder what the book can add to the blog. The book is 286 pages long, and contains a lot more detail than was seen in any of the blog entries, along with more tips and suggestions and explanations, and more about the process of working the scene and deciding what needs changed in editing an image.
A huge effort to edit the book by myself, then the new editor, then my original editor has made the book much better to read. In several images previously shown on my blog, I have completely redone the editing steps to result in a stronger image (and shown the difference). Much more care has been taken to explain steps, terms and so on.
For those starting out with Photoshop there is a short primer which covers the essential part of Photoshop - the part that I use in editing. There are brief discussions of stitching and blending for focus and hdr, explaining which methods are best and where. I explain the steps necessary to do good stitching and point out where specialized software does a better job than even Photoshop CS4.
I would not recommend the book to someone who wants help with working the scene, making aesthetic decisions, wanting to know straight forward methods of fixing images and even more importantly improving images. Someone with years of Photoshop experience is unlikely to find the book all that helpful, or at least the editing parts which is half the book. That said, I think a lot of people will find it an entertaining read as I describe my failures and how I worked towards successes, solving the same problems you likely face in your photography.
My original hope for the book was that it would make an interesting read, somewhat like Ansel Adams "Examples, the making of 40 images" upon which this is based, albeit in a digital vein and including colour. Several of the images are black and white and there is a fair amount of discussion about black and white workflow and decision making.
Wednesday, October 28, 2009
An Aesthetic Checklist
I don't want to suggest that we can reduce photography to a formula, but just as it doesn't hurt to confirm you have done everything you can technically to capture a good image - it doesn't hurt to quickly review some points to see if you have done your best with the subject in the area of making a strong image as well as a sharp one.
1) does the image show what interested you in the first place? For example, you might be photographing an interesting face. You found the face interesting because of the person's smile - so have you done everything possible to capture that smile - from making the model comfortable to duplicating the angle from which you first saw the smile.
2) is anything interfering with showing what interested you to its best? Perhaps harsh lighting has destroyed the enigmatic smile or a disturbing shadow from the nose creates problems or maybe the angle you have selected to best show the smile has now made the chin look weak. Sure photographs are compromises but they are also puzzles for us to solve - how to get the most of the good with the least of the bad.
3) are there any elements in the image which distract from its simplicity and power? Sure that curve on the right is wonderful, but it doesn't do anything for the shapes which make the image and thus distract from them.
4) have I done everything I can to place the main subject against the background in an effective way. Sure we know not to have trees sticking out of people's heads, but there's a lot more to placement, not just to avoid distractions but to enhance the image - for example, the placement of dark background against light parts of the subject while dark subject has a light background - sometimes in the same image.
5) foreground - does it in fact lead you to the subject or just confuse? Would less depth of field actually be better?
6) edges - is there anything I can do to make them work better, likewise corners?
7) message - what is it and is it being said as clearly as possible - ie. what could I do to make that message clearer - better lighting, adjusted positioning, hdr, focus blending
8) how am I going to treat the image - ie. previsualization - is there anything I can do now that will help that interpretation of the image? It could be contrast management with a fill light or reflector, waiting for a cloud to pass over the sun, an adjustment to the exposure.
Tuesday, October 27, 2009
How To Be Lucky
1)photograph often
2) be observant, especially for things that weren't on your agenda for today's shoot
3) don't blow a great shot with technical issues - that's just mickey mouse - get that crap out of the way through lots of practice and careful routines, even check lists and being careful - and if hand holding under borderline conditions, take several shots so at least one will be sharp.
4) give yourself several possible shots to choose from whenever possible - often I find that the penultimate shot that I so carefully positioned and framed is subsequently beaten by an even better shot as I literally and figuratively circle round to where I started, doing a better job on the second go round
5) really work the scene - don't leave until you are sure you have done the best you can
6) arrange as much as possible before the decisive moment so that when it comes you are ready
7) put the extra effort in so you arrive before sunrise, go out in bad weather, etc.
8) have an aesthetic check list too - background ok, light perfect, edges strongly composed, subject best framed, etc.
9) keep your equipment relatively simple so you aren't changing lenses when the perfect situation comes up
10) stop believing in luck - it's all sweat equity, with a few smarts sprinkled in
Monday, October 26, 2009
Making Vs. Improving Your Best Work
A followup to the other ideas of today is the recognization that to make our best work is not the same thing as trying to improve our best work. In the former, we use our strengths to produce the best possible work we can, while in the latter, we work on those areas which most need help. Are you aware of when you do one vs. the other? Perhaps you only ever try to do your best work, never putting much effort into trying to improve your work other than by trying harder - whatever that means.
I could imagine someone suggesting that one of my weaknesses is in putting all my effort into careful compositions instead of finding intrinsically interesting subject matter in the first place.
This would suggest that I put more effort into finding interesting things first and good compositions second. Any time we discuss interesting, it has to be asked - interesting to whom? To be a serious photographer with something to say, I'm absolutely convinced that it has to be interesting to the photographer, that tailoring your subject, style, or technique to suit the viewer is to prostitute yourself. Fine if you are charging $4000/day - for that kind of money I can do a lot of grovelling - but not suitable to someone who professes to be a fine art photographer.
Subscribe to:
Posts (Atom)


