Tuesday, May 30, 2006

Compositional Trick


Here's a tip for creating interesting compositions. Take a small pad and pen with you. When you have set up your shot, take out your pad, have a good look through the viewfinder at the subject, then draw a simple outline of the basic shapes in your subject. Now ask yourself if this simple drawing looks like it would work. If the simple sketch consisting of half a dozen lines; doesn't make sense, it is unlikely the photograph will either.

With practice you can learn to draw that simple diagram in your mind and leave the pen and pad at home, but don't take the short cut at first, actually draw it out - very simply and crudely - it should take less than 15 seconds to make a very simple sketch.

The example below I traced from the image (cheating after the fact, not having a diagram to scan in and normally doing it in my mind anyway) and I think it a bit too complex - but you get the basic idea.


Of course, all this can do is show you that your current composition isn't as strong as it could be - it's now up to you to move around the subject to see if you can find a better way to put the elements together - most times you can. Don't just go left and right, also go up and down - what doesn't work at eye level may be perfect at waist level or even with your belly on the ground - you are waterproof after all. Move back and forth (remember, this isn't the same as zooming). See if you can change what you didn't like in your simple diagram. Find something better - stop and sketch it and compare.
Try this on the next couple of shoots and see if you don't strengthen your compositional skills. See if the recomposed image doesn't please you more.

Monday, May 29, 2006

Other Arts


On Saturday I had the priviledge of photographing a model railway. The builder was Herb Stroh, a 71 year old finishing carpenter, the layout O scale (1:48), the track handlaid and some of the coaches hand built. I just had to show you how someone else expresses himself.

Print Prices

For two years I have been selling my prints at the local Calgary Farmers Market and doing so at very reasonable prices. Currently my standard size prints on 13X19 paper are $69. My expenses for the weekend are $500 so I have to sell 8 prints a weekend to break even, more if I actually want to offset some of my equipment costs or to pay me back for the large amount of time I take running errands to support the market (paper, foam core, etc.), making and packaging prints and working at the market itself.

Yesterday I sold 6 prints and with what my hired assistants did on Friday and Saturday, we actually made a little money this weekend (we don't always break even).

Last week I was contacted by a gallery in Toronto for a possible show this Fall. Out of curiosity I did up a spreadsheet for print prices and breakeven points and it was quite an eye opener.

Here's how galleries typically work. They take 50% of the total sale price on prints. So if I make and show 10 prints and half sell (which is generally considered a success), and as these are large prints they want to sell, if they are priced at $1000 each, the gross take is $5000 of which the gallery gets $2500. Now, they also do the matting and framing for me, all be it at discount, say $200 per image so total cost to me (not shared) is $2000. There are show costs and stuff, $500, cost of making prints (about $50 each if I can make them myself, a lot more if I have to get it done commercially) - so cost is $500. So before the show opens, my expenses are $3000, not including travel to the show opening.

If five prints are sold, I get $2500 but my expenses were $3000+ so if I have a successful show, I lose $500. Mind you, of the $2500 the gallery gets, they have to pay rent, utilities, supply staff and amortize the renos on the gallery space so I don't begrudge them their share.

Bottom line, photographers don't have shows to get rich. They have other jobs to support them (I'm a family doctor), or they run workshops, take commercial assignments (Ansel Adams did commercial work through most of his carreer, Edward Weston ran a portrait studio.

So, I expect to lose money at this show, but hope for exceptonal sales so I can actually come out ahead.

Saturday, May 27, 2006

Ultrazoom Cameras

Thinking of a fun camera for family snapshots, don't want to carry 25 lb. of camera gear, consider one of the ultrazoom cameras. I had more good family snapshots from my Olympus 2100 than any other camera I have owned. I'm going to replace it with one of the several long zoom cameras we now have to choose from. Let me say that I would not even consider any long zoom without image stabilization. The 2100 had a Canon lens on this Olympus camera with image stabilization and that alone counted for more good snapshots.

I found that long zoom was more than handy - you could shoot head and shoulders across a room - and therefore more naturally and less obrusively - great for the grand kids - of course I could use my Canon 1Ds2 and pick up a 100 - 400 zoom, but I wouldn't want to carry it for long, and as for unobtrusive, forget it.

Many people hate electronic view finders. I personally didn't have any big issues with it. My next camera was a Sony 707, with a 5X zoom - great lens but I did miss the 10X and def. missed the image stabilization. Sure loved that tilting back though - wish my Canon had one - great for low shots - see ice and stream - it was painless to shoot despite being six images stitched with the 707 - I sell a 24 X24 inch print from that camera - quite successfully.

Anyway, the one thing that these cameras don't do well is sports - the 707 couldn't do it at all - I found with the 2100 that if I anticipated the shot, I could get quite good at picking off single shots - but forget sequences - the viewfinder either blanks out or stays on the first image meaning you can't even track the object - get it right or don't get it at all.

None of the current crop of ultrazooms is perfect - corners not sharp enough or too much purple fringing or useless ei. 400.

Arguably you could put one of the Tamron or other make 28-300 zooms on a Canon 350D but you wouldn't have the image stabilization. OF course you could crank up ei. to 800 but then these lenses tend to be f5.6 at the long end with absolutely no depth of field so overall still not an ideal solution.

Raw Processing Choices

I have been writing a four part article on black and white in the digital world, and wrote that I have only used Camera Raw. Uwe Steinmuller, for whom I was writing the article (Outback Photo) had recommended I check out Raw Developer (available for Mac only from Irident Digital).

I had argued that fussing with more software takes me away from my camera, but it's been pouring rain all day so this evening I decided I had to have a look - boy, the images sure do look different from Camera Raw which has a distinct painterly look to it when making big prints. Raw Developer images do appear to hold low contrast detail better. If you only look at high contrast edges there is no advantage to Raw Developer, but if you study the lower contrast areas, there seem to be significant advantages to Raw Developer.

That said, the smoothness of the Camera Raw image is in some ways more appealing and although painterly, doesn't look as 'grainy' as the Raw Developer processed image.

Frankly, this is a hassle, I don't want to deal with two raw processors. I know that for normal size prints (300 dpi of real pixels (not upsized) Camera Raw is great, for images larger than this, everything is a compromise and I think it comes down to what kind of compromise do you want - do you want the smoothness of the Camera Raw image or the fine low contrast detail of Raw Developer but which leaves the image looking 'grainy'. Sigh...

Camera Raw


Raw Developer

Wednesday, May 24, 2006

Unloved Images


In the previous article I indicated that taking photographs for yourself is entirely justified, and illustrated it with a picture of my bedroom. Except to illustrate the point, I'd never show that image - it's for me only.

Today I show an image that I think works very nicely, yet I have never found anyone else who likes it. I'd like to see this image published, purchased, admired and so on, but I don't think it's going to happen any time soon.

I think the general consensus is that this image is too cluttered. I on the other hand think it looks a bit like a Chinese ideogram - those Chinese characters that represent entire words or ideas.

It would appear that I see patterns in this image where everyone else sees mess. Does that make me smarter (I doubt it) or is it possible that somehow I am making connections in ways that don't show in the picture - perhaps because I remember the place I took the picture, or because it reminds me of something, or perhaps I'm just odd (a definite possibility). I have no doubt that most of you will reject the image after a quick look. Still, it's going to be near the top of my blog for a few days and if you come back to it, I'm curious to see if your attitude will change (you could get to downright despise it).

Monday, May 22, 2006

Pleasing Yourself


Sometimes its perfectly ok to take an image just for the heck of it, just because it means something to yourself only, and not to please anyone else, not to sell, not to stake your reputation on.

In this case, I woke in an especially good mood and the light was pouring into the bedroom and I didn't have anywhere to rush to on a Saturday morning. I was fascinated by all the angles and the light, the doorways and the odd angles as I lay on my pillow. My camera wasn't far so I reached for my camera and shot litterally with my head still on the pillow.

Will it ever hang in a gallery - extremely unlikely - but I won't throw it out - to me it means light, a warm pillow, waking up relaxed, enjoying the simple things... To you its a picture of someones bedroom, big deal - that's OK!

So, today, take a few images to please yourself.

Saturday, May 20, 2006

How Much Colour Do You Need?

I have noted several times that some images have only a single colour and not much of that, yet when converted to black and white, I don't like the result nearly as much - odd when you think of how little colour is in the image below. What do you think?


Friday, May 19, 2006

The Times - They Are A' Changin'


A few years ago I photographed some driftwood lying along a beach in Waterton Park. I took a number of shots but on going home, none struck me as great material. Almost a year later I rechecked the raw files (as I do occasionally when I haven't shot anything exciting lately) and noticed one image that I thought might work if converted to black and white. I still didn't like it but for some reason persisted and cropped a third of the image away. Starting to look promising - the general shapes were right. Unfortunately the picture had been taken with m y 10D and 70-200 at 200 mm. and the image was quite blurred. In hind site this is due to relying on the smaller f4 L Canon lens to be supported by the camera - not a great idea. I have since purchased a collar for the lens and hang the camera off the back end of the lens - much better. Anyway it was excedingly fuzzy but I persisted and with an application of a lot of sharpening in several goes with several different sharpening routines - unsharp mask, creative sharpen from Photokit, Output sharpen likewise, and some of them more than once, I had a fairly decent 10 X 10 image.

I continued to work on the image, using the techniques I have discussed before and am going into detail in the second and third installments of my articles on OutbackPhoto.com. It was starting to look really promising but it wasn't until I printed it that I really liked it, the image glowed, I really liked it.!

Now its three years later and things have improved. My original image was processed with camera raw version one in 8 bit (Photoshop didn't have 16 bit). It occurred to me recently that I might have another go at working on the image. I feared I'd never get that glow back, but I'd have the original output version, if it didn't work, I'd only be out a bit of time and effort.

I have to tell you times really have changed. This time I used one size up in the output of camera raw - it was incredibly fuzzy, but you know what - it sharpened quite nicely in smart sharpen with only an appropriate output sharpen. Here you see the latest version along with a 100% crop of the output from camera raw before any adjustments were made, and the whole file with in camera settings.

Lesson one - never throw away your raw files - protect them as well as your printing files. Hmmn...
Lesson two - never be afraid to have another go at something, starting all over, no matter how much time you have invested in the previous effort.

Original Camera Raw Output

Crop of unsharpened adjusted output of Camera Raw

Sharpened Version Of Final Image - 3200X2700 pixels - a crop from a 10D - print this at 300 dpi to get an idea of resolution

Thursday, May 18, 2006

Extreme Depth Of Field


The image above was a simple shot of a tulip - but note the incredible depth of field - this was done through a three image blend with the focus changed between shots, then run through Helicon Focus, a programme which takes the sharp part of each image and blends them. Pretty amazing. Sometimes images need a bit of work where things overlap, in this case none was needed. Helicon provide layer masks in their professional version of the software with which to fix trickier blends. Images don't appear to need to be macro or microscope images (as illustrated on their site), I recently blended an old building, shot with a 200 mm. lens and depth of field not nearly enough to cover the three dimensional aspects of the building - but Helicon Focus did, and a lot more accurately and painlessly than I could have done (as originally intended) by hand using layers and masks.

Tuesday, May 16, 2006

Black and White Vs. Colour


Whether 'tis nobler in the mind to show colour or convert to black and white....

Of my hundreds of images, it's generally clear whether the result should be in colour or black and white but I present two pairs here which I persist in showing and selling both ways.

Reflections - the colour image has better separation between the various parts of buildings, yet the black and white hasn't the distraction of the colours and provides more pure form. Am curious what other people think - add your vote in a comment and specify whether you normally work with colour or black and white.

Bluffs And Bush - generally I do the Badlands photographs in black and white, but the appeal of this silvery green bush, the subtle colours of the bluffs and the one brown rock in the right foreground are appealing.

Let me know what you think, I'll tell you my opinion in the next blog.

Friday, May 12, 2006

On Print Borders


At a workshop recently people brought all manner of prints - some printed to the edges of the paper, others had the traditional quarter inch border, some had paper which didn't match the ratio of the image, length to width so had large white areas at either end or top and bottom, a very few showed prints with a generous border - and the appearance was dramatically better. I know we want to take full use of whatever size printer we have, but for power of presentation, either as a single print or in a portfolio - a large white border sure looks a lot nicer.

Recently for the purpose of sales at the local farmers market, I have been producing prints on enhanced matte and I created an action to produce a pseudo matte, the idea being that people could drop the images right into a standard readily available document size frame o 8.5X11 inches, no matting, no trimming. I wouldn't do the fake matte for portfolios, but I would certainly use a generous border - inch and a half on 8.5X11 paper or more on 13X19 - something proportional to the image.

Tuesday, May 09, 2006

Colour For The Net

Planning to show your work on the net? Make sure you convert your colour space to sRGB before saving as a jpeg. Failing to do so resulted in my posting a very poor rendition of one of my abstract images to outbackphoto - I was horrified when I saw it displayed - I'd forgotten that I'd written in an sRGB conversion to my smugmug action in photoshop and had to do it manually this time as the output size was different. Remember you can't save as jpeg unless you first convert to 8 from 16 bit.

Monday, May 08, 2006

How To Make A Good Black and White Inkjet Print

1) start with a raw file that records all the range of tones you want to print - and if need be shoot diff. exposures and blend.
2) use the clipping warnings in camera raw to make sure you don't lose either highlghts or shadows - and in the case of shadows, play it conservatively and give yourself some operating room (really dark shadows are highly amplified in digital work and just like turning your stereo up really high, you start to get distortions). This ends up looking like grain but can completely spoil an image.
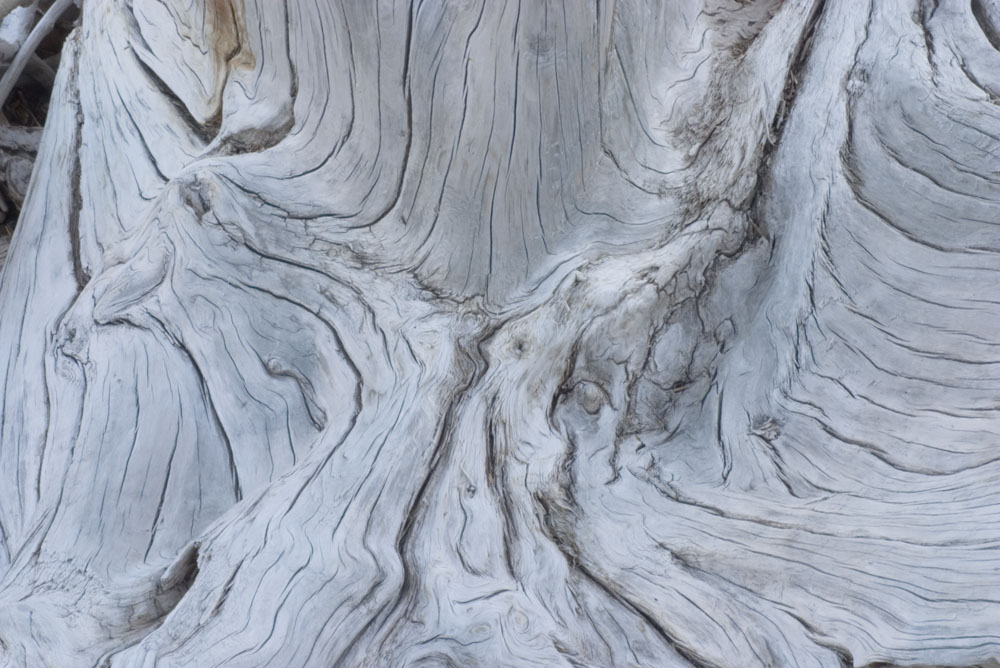
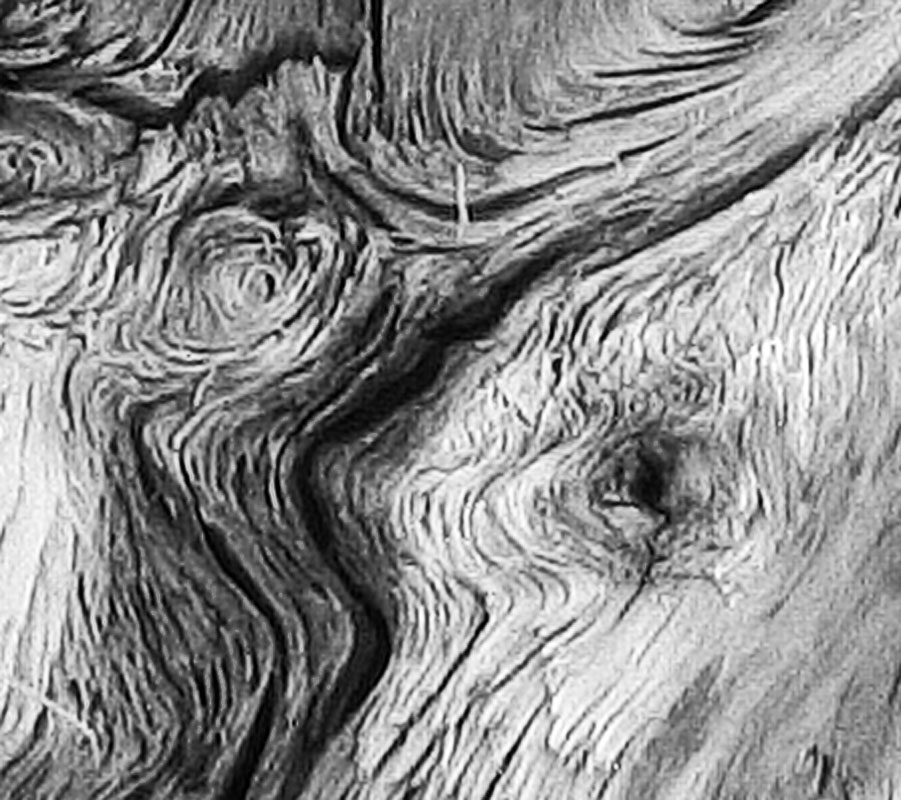
3) use enough pixels or more to the point, don't print larger than 300 native pixels per inch except in exceptional circumstances. No uprezing, no cheating, lots of detail. For goodness sakes, don't oversharpen the image. My own technique is to use smart sharpen built into photoshop and output sharpen from Photokit, for a print size about 25% larger than the one I am going to make (ie. the sharpening is a bit more subtle in my prints).
4) do not use burning and dodging in photoshop - it's been my experience that working on the original image with these two tools is destructive to the image quality. Instead use layers and masks. My own preference is to use curves made for each part of an image, but there are other valid ways to use layers and masks.
5) Use a dedicated black and white driver - either Epsons in their new series of pigment printers - the 2400,4800,7800,9800 series, or even better, either Quadtone Rip or Imageprint.
6) make sure that you are using the full range of tones - don't rely on the screen to tell you - use threshold layers to show you the tones above 253 or below 6 (on the 8 bit scale even when working with a 16 bit image) and adjust the tonal curve to create some blacks and whites in most images with detailed highlights and shaddows as required.
7) Never ever assume that what you see on the screen is what you get out of the printer - no matter how you profile your monitor or your printer, in black and white, it doesn't count - you still need to make lots of prints. DO NOT BE AFRAID TO USE LOTS OF PAPER. of course, if you don't know what the absolute best looks like, it's hard to come close - you have to look at prints from the greats. There are lots of superb printers around who are happy to show their prints at workshops and such and I can highly recommend the workshop experience.
8) Print onto a good paper - not all papers take as much ink or record detail as well or limit ink spread equally well - oddly good old Epson Enhanced Matte is a lovely paper producing very deep blacks and lots of detail, but it is a thin paper which must be dry mounted and protected from the air which can cause yellowing in some batches. Still, dry mounted and framed behind glass with archival materials, it is very nice.
9) having made the best print possible, pin it to your wall so you can live with it for a while. One nice thing about digital is you can pick up where you left off and improve it further - though even in digital, sometimes i go to far and have to start over.
10) print for the kind and brightness of light under which you plan to view the print - I confess I have no understanding of the rationale for these new 'viewing' lights which have a colour temperature matching noon - I never take my prints out at high noon to look at them in bright sunlight - why would I want to use a similar light to check colour and tone? My prints are generally looked at under ordinary fluorescent or incandescent bulbs, or under the blue skylight that comes in windows to indirectly light my prints.

On Inkjet Print Quality

Have just read another comment against digital, this from Mike Johnston and Carl Weese. I think we can safely say that those two haven't seen inkjet prints of such quality. That such prints don't exist however is incorrect. Their comments are divided into two parts, first the process of recording an image digitally, and also printing with inkjet. These are really separate issues as there are lots of people who record on black and white film( with it's inherently greater capability to capture dynamic range), then scan. There are even people who record digitally and make inkjet negatives to contact print in the wet darkroom.

On the subject of capturing the image digitally, I will comment later, but here are some observations about good inkjet prints.

First, let me say that at this point in time (before I have had a chance to use the new Hahnemuhle Pearl paper, inkjet prints look different from silver prints, but different doesn't necessarily mean worse.

I think my inkjet prints look better in the following ways:

1) the colour of the image is nicer. Sure, selenium toning gets rid of the seasick green colour of untoned silver prints, but there is still something wrong about the highlights - a yellowness to the gelatin that doesn't look right after you are used to looking at really good inkjet prints - and would you really pick purple as a colour of choice for the shadows? I know, its supposed to be subtle, but still...

2) Sharpness of inkjet prints is better - I never understood why book and magazine prints looked sharper than the original prints, now I see that it's part of the printing process. Of course, for digitally shot images to look great, there have to be lots of pixels and no fancy uprezing tricks (see prev. article). It can and often is grossly overdone, but we are talking the possibilities of inkjet, not the commonplace.

3) Sharpness of inkjet is better than platinum contact prints which show poor recording of detail and edges, possibly due to the papers, the homemade light senstive platinum coating or to the inherent lack of sharpness of lenses that can cover 12X20 - I'm not really sure.

4) Highlights can be recorded very well with dedicated black and white drivers for the printers (such as Roy Harrington's Quadtone Rip), in fact I would argue that you have far better control of highlights (assuming they were recorded in the first place) with inkjet prints.

Still, we don't yet have those luminous shadows seen in a naked silver glossy dried matte print on quality paper with lots of silver and fully developed. Interestingly, in my experience the difference disappears once the prints are behind glass. The matte print shaddows look every bit as luminous, but bare, in the hand, no, we're not quite there yet. With the strengths though of inkjet prints done well, for many images the inkjet image holds its own nicely.

Saturday, May 06, 2006

Magazine Published

I'm going to be in the following magazines over the next few months:

1) B&W Magazine Annual Portfolio Issue - due out in June - a variety of images
2) Focus Magazine - June - colour industrial
3) Parkhurst Exchange - ? date - a medical magazine for family physicians in Canada

Previous publishing includes:

Lenswork Magazine March/April 2005 - 17 images - black and white industrial
Black and White Photography - Sept. 2004 - 6 images - black and white Badlands
Outdoor Photography - single colour image

Friday, May 05, 2006

Chasing Steam


Spent Tuesday chasing trains. 2816 is the Hudson 4-6-4 steam locomotive owned by CP Rail. It had run out of Montreal in the early 50's, ended up at Steamtown in Pennsylvania and when Steamtown received U.S. federal funds, they wanted to reduce their foreign collection and CP was ready to buy it back. Some refer to it as Rob Ritchie's 1:1 scale toy train. Mr. Ritchie, retiring CEO of CP Rail has been a great supporter of first the Royal Canadian Train - vintage Tuscan Canadian Pacific coaches running out of Calgary and pulled by two FP7 locomotives in the tuscan and grey. Here's just a sample to whet your appetite, see my gallery of colour train pictures for the other images.

On Blogging

I got the idea for this from Mike Johnston's blog and shamelessly copied his blogger.com format as it was by far the nicest. I can recommend his blog as sometimes useful, often entertaining and generally interesting. Go to The Online Photographer

Sensor Cleaning

Tried sensor swabs - couldn't clean the corners
Tried sensor brushes and compressed co2 from American Recorder (oil free) - it wasn't - took 6 swabs to clean off the oil from my sensor and had to clean the brush
Butterfly - incredible - it works exactly as advertized - that's the cleanest my sensor has ever been - you do need to centre the brush in the holder so it will spin fast but even the normal brush splays out the bristles and they must pick up static because the dust came off absolutely painlessly - now if only I could find out where I hid it, cause it's time to do it again. Highly recommended and not just for travel - it's the only way to clean a sensor. Order from Visible Dust

Thursday, May 04, 2006

Uprezing Or How Big Can You Print Digital Images

There are some very nice people who tell you they can make 16X24 prints from 6 MP digital slrs or even from 8 MP consumer cameras. They do this by either allowing the print driver to magnify the image or more often by using one of a large assortment of uprezing tricks and formulae - from genuine fractals to photoshop bicubic to stepwise upsizing, etc. They then claim to produce great results. As a landscape photographer photographing fine detail, I know this is a lot of hooey - but their prints do look good - so whats going on? The ideal image to upres would be a black rectangular box against a white backdrop. Theoretically and with a good uprezing programme there would be absolutely no limit to the amount you could enlarge- billboards that accept nose prints would be the norm. If you look at the images that upsize well, they tend to be along that vein - large blocks of colour, little fine detail. I find that faces upres very well - hiding fine detail like pores can be a blessing. Sports images and buildings upres nicely too.Grass and trees in the distance on the other hand uprez very littlewithout turning to much or jaggies of over sharpening. Better sharpening algorithms have allowed me to make bigger prints than previously, but they definitely aren't nose on print sharp. I still find that for close inspection (8 inches away) of any size print, you still need 300 dpi of real information in a highly detailed image. That means for a print that is 15 inches across by 10 high, you are looking at 300X15X300X10 = 13.5 megapixels - so for a detailed image like many landscapes, you need to stitch with a 6 MP camera, or use at least a Canon 5D, 1Ds2 or Nikon D2x.

Why 4X5 Didn't Work For Me

The other day I did some math - turns out that with digital I shoot about 100 shots to get one decent image - not a world beater, just a decent shot. This is for either black and white or colour. Were I to limit myself to black and white, the success rate would be lower as not all shots work in black and white and despite previewing and viewing filters and all, it doesn't always translate.

In the days when I shot only black and white 4X5 film, a very busy day I might expose 20 sheets of film, though 12 was a more normal number. Think about this, if my success rate when I can use either colour or black and white is 1 in a hundred, that means I'd have to photograph at least 5 different days to get one decent image - now I see why I kept puting down my camera, sometimes for years at a time, and why since I went digital and started working with colour as well as black and white, I'm having a whole lot more fun and more success.

Digital Vs. Film

Heated discussions are held around the issue of which is better, at what point does digital replace film, how many pixels are needed to equal film. I think it is simpler than that. You can break it down into issues for the photographer and issues for the viewer.

The Photographer:
Here digital has it over film in most ways - cost of film and processing, time to finished image, instant review, greater dynamic range (more f-stops of brightness), carrying capacity of images, xray issues, blended exposures, stitching, dirt and dust, filtering to name some. On the other hand, long term storage of images is a huge issue and the tendency to upgrade computers and cameras regularly and often can be very expensive. I'm guessing that more digital photographers have lost more images than film photographers ever did - backup while travelling isn't a luxury, it's a necessity, and I would guess that few casual shooters back up and the majority of ammateurs don't either, at least till they get home.

The Viewer:
We can spend time arguing about how many pixels does it take, but I think that ultimately the real question is what is the reaction of people looking at our prints. In general and when done competently, reasonably sized prints from digital look darn good. My own experience is that 35 mm. never looked as good as the images from my 6 mp camera and my 16 MP camera produces results that overall look as good as my 4X5 work. Now, I'm not comparing outright resolution, nor am I comparing giant prints, bigger than 16X20, but reality is in my wet dark room days I never ever made a print bigger than 16X20 so knowing that I could have is somewhat irrelevent. That the quality is there in digital for colour is becoming the accepted truth. In black and white, the situation is more controversial. My own feeling is that when you throw away much of the recorded information (ie. the colour) to make a black and white print, you need to replace that discarded information with more recorded pixels (and I don't mean uprezing - which would make an interesting topic on it's own). My own path to quality black and white images has been to stitch most of the images from my 6 MP Canon 10D, and some from my 1Ds2 as well. The result from the 6MP camera stitched has been some very nice 8X15 images which look as good as 4X5. This usually involves mounting the camera vertically and swinging horizontally so the total pixel count is in the order of 3000X6-10 thousand pixels. People like Bruce Barnbaum have said they have never seen a digital print which equalled a wet print. I think the biggest roadblock to changing his opinion is the current lack of inkjet papers which have a surface as good as the traditional glossy dried matte that most fine art photographers use. I'm hearing rumours that the new papers coming out real soon may change that situation, but we'll see. Tonality wise, resolution wise, there is no issue. Colour wise, I much prefer the colour of inkjet images to untoned black and white photographic papers and even with selenium toning, I have more control with my inkjet printing.

I know that my inkjet prints on matte paper don't have the rich deep shaddows that traditional photographic papers are capable of reproducing, yet overall the images look great. Brooks Jensen has actually done comparisons and people strongly favoured the inkjet prints over wet darkroom so even in the world of black and white - digital is taking it's place.

Staying With Film:
There are lots of reasons to stay with film - many people like the darkroom and have the time to do it well, I have a friend who shoots slides and as of now, slide projectors are still a heck of a lot more common than digital projectors and he likes slide shows. When friends dig out 35 year old kodachrome slides and painlessly project them, you have to see their point - what are the odds that digital files from 35 years ago are going to be readily accessable. Mind you, you have to file the slides in some sort of organized fashion - the idea of finding a particular 35 year old slide from a large number of unlabelled shoe boxes isn't to be thought of.

Anyway, each of us uses what works for ourselves.