I thought this time I'd describe a recent image - in fact shot yesterday afternoon - that way I could better describe the efforts to find a good image. I'm also including a series of unedited images below showing the general approach to the scene and my gradually working round it.
This water tank was a complete fluke. I'd visited the farm to photograph the horses and some old carriages, but it was the 'lucky' find that got me most excited. There's a lesson here - always keep looking, even when you think you have your shots litterally in the bag.
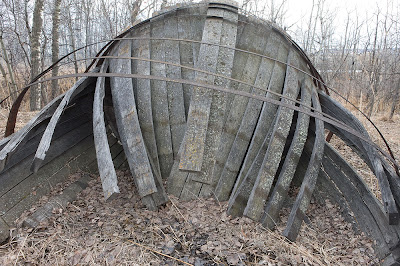
So, having spotted this old disintegrating water tank, on my way off the property, I stopped, hauled out my equipment and set up (ie. mounted the camera on tripod with the most likely lens - 24-70), to start with. I laid down the tripod and held up my viewing rectangle (plastic with a 2:3 inch cutout for framing). The splayed staves and curved hoops were wonderful and my first reaction to the scene was this was a guaranteed photo.

As soon as I put up the viewing RWECTANGLE though, I realized that with a round object, I was going to have to deal with corners exending beyond the tank, or I was going to have to severely crop - neither of which appealed to me. I had approached the tank from it's top as it laid on the ground so I wandered round to check out the other side, thinking I'd be able to look inside the staves - but this was the bottom of the tank and was both solid and ugly - no shot there.
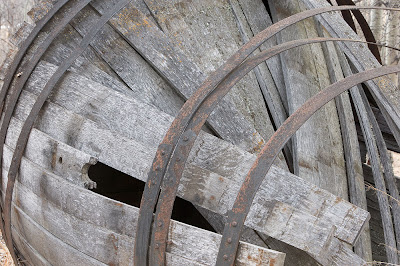
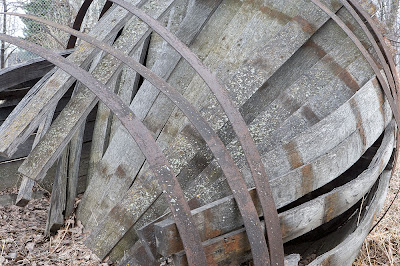
I tried a series of shots from the left of the tank but there was a 'bunghole' in one plank and the plank had broken off at that point, leaving a large gap in the wood, rather like a 5 year old with a tooth missing. I didn't like this solid black area. Eventually I gave up on that side and moved round to the right of the tank and things looked a lot more promising from this direction. Unfortunately almost as soon as I moved over, the wind picked up and the freestanding hoops of metal started shaking in the wind.

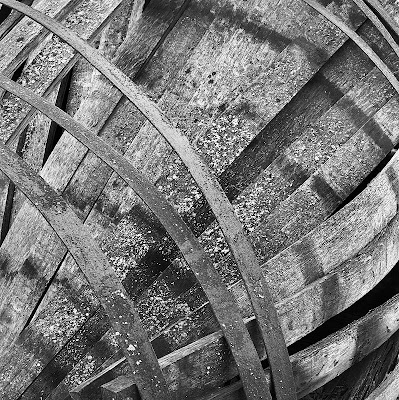
I still had the problem of a round object in a rectangular field to deal with, but felt I could probably use a square image and avoid losing too much of the hoops in cropping. Any time I'm thinking square image, I immediately think of stitching and in fact that is what I did with the image above - it's two images, 70-200 lens at 70 mm. using the tripod bracket on th lens to mount the camera and to swing for stitching. Perhaps not exactly the nodal point, but close enough for a good stitch as it turned out.

Even here I took several images, some of them for stitching, others for focus blending and all the time trying to include as much of the tank without messing up the corners of the image.
To stitch these two raw images, I used command (control on PC) click to select the two images, then command -O to open them in Camera Raw. I clicked on select all (upper left) and synchronize then synchronize all so each image would be processed identically. This isn't the end though because if your camera was on auto white balance, the white balance of each image is different and chances are Camera Raw is still set to maintin original white balance. In fact, even though you have synchronized all the images, you don't want them all to have 'original white balance' you want them to have the same white balance. This is easily achieved by adjusting the white balance slider on the right in Camera Raw. Even if you end up putting it back to where it was to start, you now have 'custom white balance' and therefore the same white balance for all images - exactly what you want.
As per usual, I adjust the exosure slider to as far right as it will go without blowing the highlights - if the exposure was right in the first place, this isn't very far. I take advantage of the show highlight and shadow clipping boxes in Camera Raw to make this obvious. I do the same adjustment for the shadows - worrying more about preserving details in the shadows at this point rather than keeping them nice and deep - if this means the image in camera raw looks dull and muddy, that's ok, I can correct in Photoshop.
I don't often adjust the contrast but usually adjust the brightness slider after nailing highilghts and shadows to make the image look overall right.
At this point I save the two images into a folder I reseve for stitching images. PTGui can't deal with PSD Photoshop files so I save in 16 bit TIFF.
I now opened PTGui and loaded the two images for stitching, clicked on Auto Align and it as usual did an excellent job finding the matching points between pairs of images. I then went to Create Panorama and adjusted the image size to maximum, output to 16 bit PSD. I created the panorama, saving it to my current images being worked on folder (documents 13 as it happens).
Editing in Photoshop was fairly straight forward. First I cropped the image, I took a little off the left because it was distracting to include the background trees. I was able to include a small amount of the background in the upper right because it wasn't distracting. The lower corners were cropped to within the staves.
The image was nearly black and white so I simply added a hue saturation layer and turned down the saturation to zero - instant black and white image. Next I pegged the highlights and shadows using a curves layer. Further editing was done with additional masked curves layers to work on various parts of the image - darkening corners, increasing contrast locally as needed. I cloned out a blade of grass in the way.
Sharpening was with smart sharpen 300/.6 for settings.
I didn't use any fancy filters on this image, preferring to maintain detail and not add any artifacts. I could have increased local contrast with Akvis Enhancer as I often do but didn't feel the image needed it.
The image isn't quite square but I don't feel any need to make it perfectly square. If I did, I'd crop off the bottom so I can maintain the metal band reaching into the upper left corner, but I'm happy not to have to.
There were a total of about 15 layers to the image by the time I was finished.
Printing is with the help of Photokit output sharpening for 300 DPI.


5 comments:
George, Txs for sharing your general approach to this image. Couple questions;
1) I am curious how long it takes people to digitally "develop" an image - how long did it take you to "develop" this one?
2) have you tried the PS3 stitching? I find it fast and accurate. Very usable and no need for yet another app.
Mike
Mike: yes, I'm looking forward to using CS3 - and will certainly give it a try for stitching - though PTGui is pretty darn good and very easy.
Re time to work on the image - I didn't measure but I'd guess I worked on the image for about an hour after bringing the stitched image into photoshop. The time to get to that point was probably 5 minutes or so, plus some time for PTGui to do the actual stitching - say another 5 minutes, during which time I worked on other things.
You've taken a good shot of the old water tank, George. This is literally an old water tank built with a wooden material. It's very rare to see one of these nowadays. But, why did they leave it there lying on the ground for no reason? Some of its materials might be a little useful to build another water tower, I suppose.
Your discovery of the old water tanks at the farm is fascinating. I admire your detailed approach, from setting up equipment to post-processing. The challenges with the tank's round shape and your solution of stitching images were insightful. The final black-and-white image sounds remarkable. Great work!
Your discovery of the old water tanks at the farm is fascinating. I admire your detailed approach, from setting up equipment to post-processing. The challenges with the tank's round shape and your solution of stitching images were insightful. The final black-and-white image sounds remarkable. Great work!
Post a Comment