

Got a call Thursday before last, surgeon had a cancellation, did I want to move up my surgery? This news in the middle of a busy day seeing patients. Well, there were issues with the previously scheduled date in Jan. like no locum and a lot of missed office during the recovery - so yes, 4 days ago on the 17th I had my left hip replaced - interesting process, lying there awake while they bang and saw and drill, fortunately with something to relax you so you don't freak.
Went for a walk outside today, barely a block in total but after my hip really stiffened up. Otherwise I'm pottering round the house with one or two crutches (turns out crutches don't have cup holders. I've learned that if I bend my operated leg backwards, I can bend forward and touch the ground without breaking the rule about not bending my hip more than 90 degrees.
Stairs are interesting - going up, lead with the good leg, down with the bad. For the most part I don't have pain just lying back on a recliner or lying on the sofa, minor discomfort sitting upright - actually better than I'd hoped for this stage.
With luck, some weight loss and a fitness programme, by spring I'll be ready to go out photographing.
Monday, December 22, 2014
Wednesday, December 10, 2014

Saturday, December 06, 2014
Rephotographing Negatives

A recent Luminous Landscape article discussed both the merits and the process for photographing negatives and slides, bypassing the exageration of grain and dust that tends to come with flatbed scanning of film.
It seemed both easy and practical. I happened to have a macro lens. One photographer used flash to back light the film, the other a small 4X5 inch light table. It was no longer available from Vistek but B&H sell the same thing made by Logan, for about $80 - very reasonable.
I ordered one and when the table arrived, set up my tripod at the corner of the dining room table, the light table sitting on the dining table, and the camera aimed straight down at such a height as to capture the entire 4X5 inch negative.
I grabbed a pile of negatives in their paper sleeves and started going through them - any that seemed to have strong composition, I'd photograph them.
At this point, some film comes out of the sleeve dead flat, no sweat. Others have a distinct curve and I'm going to build some metal guides for the negatives so they end up near flat. Experiments have shown it doesn't take a huge curve at f 11 and only a foot away from the negative to blur the edges of the film.
This is very much a work in progress. Resolution - better than my 4870 flatbed scanner, grain dramatically less, dust - wow - so much less hassle.
The bad news, this image wasn't sharp when printed in the wet darkroom, now at least I can see why - the focus is on the centre lighter tree and there just isn't enough depth of field - it makes an 8X10 but not a 13X19 of quality.
Tonality - excellent - detail - nice throughout the negative, nothing lost in rephotographing - I think we're really onto something here.
My 120 macro for the Pentax 645z goes to 1:1 so I can get full resolution on my old 6X6 negatives and adequate resolution for 35 mm.
Expect to see some old work - this from the early 80's, shot with a wooden lightweight field camera and 210 mm. lens.
Sunday, November 30, 2014
Scrambled Eggs

Did I say I was a good cook, no I didn't. Actually, with my wife recovering from a total knee replacement, I've been scrambling in more than just cooking and burned the pot. An attempt to clean left it like this, so I figured... Time to get some steel wool.
Saturday, November 22, 2014
A Sober Look At The Work Done
I want to do a book of my black and white photography. I know that I'm unlikely to find a commercial publisher because I simply am not known enough to sell thousands of books of fine art photographs. The market is quite tiny anyway and compared to technical photography books, those sell at a rate that is probably 100:1
So I've been thinking, I need to get my work out there. An email arrived announcing the latest portfolio contest for B&W magazine. I've been in it a few times, but not in several years. A check of my hard drives shows submissions in 2008 and 2010 but frankly I can't even remember if I sent those in.
The contest rules state it can be a 'best of' collection, but I decided I'd limit myself to seeing how many strong black and white images I could find that I have made in the last three years, 2012 - 2014.
Well, much of my work in the last few years has been in colour, and with one thing and another, I have not been shooting as much as I used to, so finding some 8-12 strong images in monochrome from a three year period has not surprisingly been, shall we say, interesting.
Do I include the cowboy images - I think they are strong, but they sure don't fit when sitting next to a bunch of landscape and semi abstract industrial images. It's the usual question, that applies whether cropping or selecting a series of images for presentation - do the extra images or extra pieces of image add more than they take away.
My thinking right now is the cowboy images just don't fit, even though the rest of the images are a hodge podge.
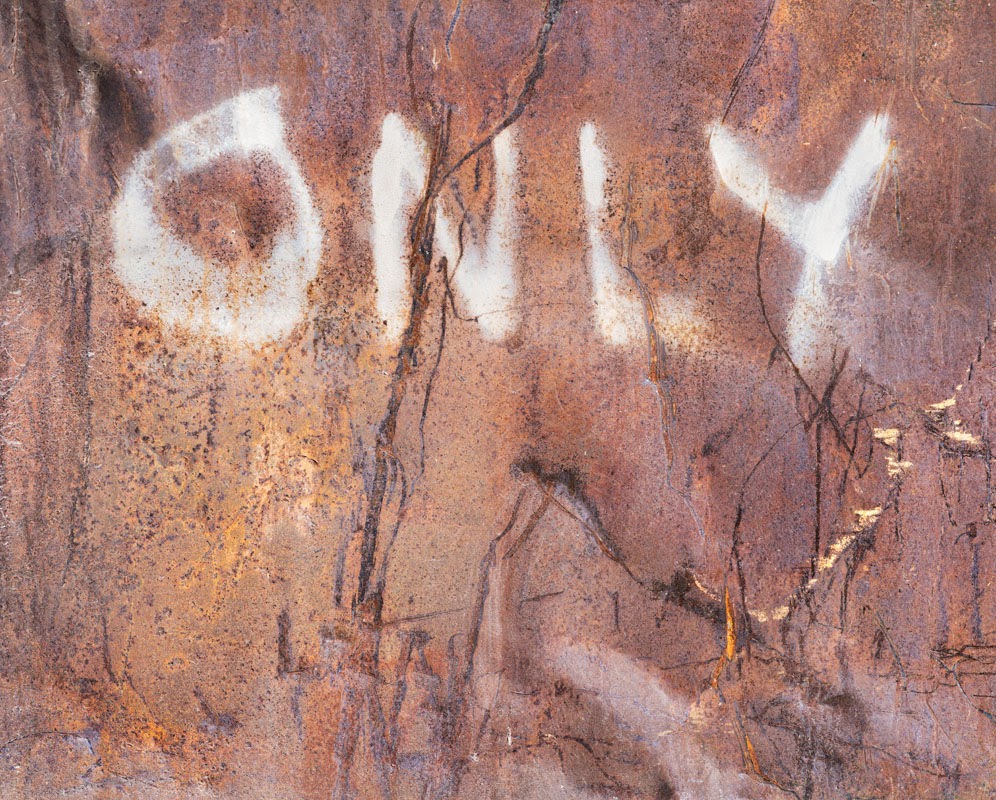
I tried flipping a number of colour images to b&w and some certainly worked, but weren't better for the conversion and didn't stand out - so much for that idea. A couple of images did look good though in black and white and with further editing might just serve. Below are five that have survived the road to black and white. and I'm open to thoughts.
I'm fairly sure I'm not finished editing all the images. For example I did the first image last night, and made a print, but felt today that while it had potential, it was weak and so worked on the image further, adding some subtle highlights and shadows to the rubber bumper on the left, and darkening the wall on the right, while lightening the base of the wall, and then bringing back some highlights by using a straight curve, white point moved to the left and carefully painting into the masked layer in Photoshop.


But I need 8-12 images so on goes the selection process. Stay tunes for further iterations.
So I've been thinking, I need to get my work out there. An email arrived announcing the latest portfolio contest for B&W magazine. I've been in it a few times, but not in several years. A check of my hard drives shows submissions in 2008 and 2010 but frankly I can't even remember if I sent those in.
The contest rules state it can be a 'best of' collection, but I decided I'd limit myself to seeing how many strong black and white images I could find that I have made in the last three years, 2012 - 2014.
Well, much of my work in the last few years has been in colour, and with one thing and another, I have not been shooting as much as I used to, so finding some 8-12 strong images in monochrome from a three year period has not surprisingly been, shall we say, interesting.
Do I include the cowboy images - I think they are strong, but they sure don't fit when sitting next to a bunch of landscape and semi abstract industrial images. It's the usual question, that applies whether cropping or selecting a series of images for presentation - do the extra images or extra pieces of image add more than they take away.
My thinking right now is the cowboy images just don't fit, even though the rest of the images are a hodge podge.
I tried flipping a number of colour images to b&w and some certainly worked, but weren't better for the conversion and didn't stand out - so much for that idea. A couple of images did look good though in black and white and with further editing might just serve. Below are five that have survived the road to black and white. and I'm open to thoughts.
I'm fairly sure I'm not finished editing all the images. For example I did the first image last night, and made a print, but felt today that while it had potential, it was weak and so worked on the image further, adding some subtle highlights and shadows to the rubber bumper on the left, and darkening the wall on the right, while lightening the base of the wall, and then bringing back some highlights by using a straight curve, white point moved to the left and carefully painting into the masked layer in Photoshop.
But I need 8-12 images so on goes the selection process. Stay tunes for further iterations.
Saturday, November 08, 2014
Back Out Shooting
Still a long way back to normal but oh, it was nice to be out shooting today.

I printed the image above on metallic paper and it works very nicely. Shot with the 120 mm. lens, wide open.
I printed the image above on metallic paper and it works very nicely. Shot with the 120 mm. lens, wide open.
Sunday, October 26, 2014
Atlas Coal Tipple, Wash Shed, Pentax 645Z

I can't speak highly enough of the Pentax 645Z files - there's just so much to work with - so much resolution, dynamic range, shadow detail that can be edited, and robustness of files when manipulated - probably too far in this image, but I saved it as a colour version before adding the extras so can blend that back for a more mellow effect.

Ah, that's better.
Sunday, September 28, 2014
All Quiet, But About A Book
So what happened to all the work being done with my new Pentax 645Z?
Well, it started with a 30 cm. snowfall early in September that broke hundreds of branches on our own property alone. In the cleanup and haul to the dump (thank heavens for a stock trailer) I managed to hurt my back, to the point I have loss of function of the right hand and pain that keeps me from standing for more than a minute or two. Bad enough to prevent typing on my desktop computer never mind shooting more Paper images. Hell, I'm not sure I could even hold the camera.
It has however given me some time to think about book production. I have been thinking for some time of using Kickstarter to collect funding for a proper run of my book of black and white images, currently only a private blurb book that is far too expensive to be practical to market.
Before I can even think of starting such a task, I'll need to get detailed costing and timing on printing, packaging and shipping the book, as well as rewards for investors. I'll need to figure out how to deal with a bad print run and how to get rewards shipped in a timely fashion, as well as how to get the word out as broadly as possible.
It occurs to me to use canvas prints as rewards - shipped directly from the printer within Canada or US, or even to use as a reward a digital file that could be used by the investor to print at home, or have printing done locally even including framing.
As part of my research I have been looking at failed attempts on Kickstarter - I will be producing an introductory video, and won't be flogging signed pictures of me, and will have rewards that can be delivered promptly if funding is completed.
The worst nightmare I can contemplate would be disastrous print run - funny green printing that the printer refuses to take responsibility for. This risk can be mitigated by careful choice of printer and inspection of the work done as well as full understanding of the printers proofing system, as well as reputation. Doing three books so far has given me considerable experience. Books of colour images intermingled with black and white run the greatest risk of poor results where this would be all black and white.
One obvious option for investor rewards would be a pdf digital book.
I will be studying problems and strategies, successes and failures to learn as much as possible before committing myself to this idea. I have already arranged free shipping of canvas prints as rewards and the next step is to talk numbers and dollars with a printer.
Sunday, September 07, 2014
Is f22 Useable On The Pentax 645Z?
There has been a heated discussion on the Luminous Landscape Forum about whether one can use f22. It would appear to be divided between those who theorize that this should never be done (and have not done so) and the few who actually have done it and found it to work, within the parameters of adequate depth of field combined with sufficient resolution to satisfy them.
I was curious to see just what sufficient to satisfy means, and in particular if it would satisfy me. I used the single central image of the stitch made today, shot with the 75 mm. lens, at f22.
I arbitrarily decided that a sharp up close 30X40 inch print would be my definition of sharp enough. As usual, I applied my normal amount of sharpening in lightroom, 58, .7, 70, 0 the same setup I had used with my D800e.
Once the image had been edited extensively, I applied output sharpening of 247, .7, 0 in Smart Sharpen. The result looked a tad over-sharpened at 100% on screen, an amount I was reasonably sure would produce a tack sharp print with no sharpening artifact.
The result - exactly as predicted. Inspection under a bright light as close as my bifocals will take me (8 inches).
So, f22 works just fine with the 75 mm. lens. Might it not work with other lenses - possibly.
Why didn't I compare it to 5.6 - because the question wasn't whether 5.6 would be sharper, the question I wanted answered (the same one Michael Reichmann wanted) is whether f22 works and it does.
Why 30X40 print - well, this was already going beyond 300 DPI - actually 206.4 pixels per inch. Printing larger would not be expected to produce perfect prints to be viewed from 8 inches at any aperture. In fact, the Pentax 645Z with 75 mm. lens did remarkably well and I completely agree with Michael - f22 is more than useable - it's just fine thank you.
 Don't forget to click on this to see the whole section - which is about 3 inches across at 30X40!!!
Lessons learned:
Theory and Practice don't always match up.
Only the real world counts (ie. what happens in practice).
Diffraction is different from out of focus and responds much better to additional sharpening.
Sensor size controls the highest useable f-stop. I tested (in prints of real subjects - the only thing that counts) with my full frame 35 equipment and even with the 22 mp 5D2 and 3 and D800e, I could not go beyond f16, but I have proved to my satisfaction that I can with the modestly larger 33X44 mm. sensor of the Pentax.
So, how is this relevent to you? It isn't - except that you need to do your own test - with a real subject and in viewing prints. You might have better eyes (more than likely), or closer vision (almost certainly if younger) or higher standards (I'm pretty damn fussy) or you might not standardize on 30X40 prints with the Pentax, or use a different camera or sensor size.
If you do the test - with a real subject, and look at the print (on its own, not compared to anything) does it satisfy you - that's the only relevant question. If it does, great - if not, well you've answered an important question for you and your equipment specifically.
Feel free to write - but ONLY if you have done the test, as I have described.
I was curious to see just what sufficient to satisfy means, and in particular if it would satisfy me. I used the single central image of the stitch made today, shot with the 75 mm. lens, at f22.
I arbitrarily decided that a sharp up close 30X40 inch print would be my definition of sharp enough. As usual, I applied my normal amount of sharpening in lightroom, 58, .7, 70, 0 the same setup I had used with my D800e.
Once the image had been edited extensively, I applied output sharpening of 247, .7, 0 in Smart Sharpen. The result looked a tad over-sharpened at 100% on screen, an amount I was reasonably sure would produce a tack sharp print with no sharpening artifact.
The result - exactly as predicted. Inspection under a bright light as close as my bifocals will take me (8 inches).
So, f22 works just fine with the 75 mm. lens. Might it not work with other lenses - possibly.
Why didn't I compare it to 5.6 - because the question wasn't whether 5.6 would be sharper, the question I wanted answered (the same one Michael Reichmann wanted) is whether f22 works and it does.
Why 30X40 print - well, this was already going beyond 300 DPI - actually 206.4 pixels per inch. Printing larger would not be expected to produce perfect prints to be viewed from 8 inches at any aperture. In fact, the Pentax 645Z with 75 mm. lens did remarkably well and I completely agree with Michael - f22 is more than useable - it's just fine thank you.
Lessons learned:
Theory and Practice don't always match up.
Only the real world counts (ie. what happens in practice).
Diffraction is different from out of focus and responds much better to additional sharpening.
Sensor size controls the highest useable f-stop. I tested (in prints of real subjects - the only thing that counts) with my full frame 35 equipment and even with the 22 mp 5D2 and 3 and D800e, I could not go beyond f16, but I have proved to my satisfaction that I can with the modestly larger 33X44 mm. sensor of the Pentax.
So, how is this relevent to you? It isn't - except that you need to do your own test - with a real subject and in viewing prints. You might have better eyes (more than likely), or closer vision (almost certainly if younger) or higher standards (I'm pretty damn fussy) or you might not standardize on 30X40 prints with the Pentax, or use a different camera or sensor size.
If you do the test - with a real subject, and look at the print (on its own, not compared to anything) does it satisfy you - that's the only relevant question. If it does, great - if not, well you've answered an important question for you and your equipment specifically.
Feel free to write - but ONLY if you have done the test, as I have described.
Kananaskis River Shallows

This was a three image stitch, with the 75 mm. lens. Why stitch with a 51 MP camera? Well, I have a 75 and a 35 mm. lens. The 35 was too wide and included some tree reflections from downstream, while mounting the 75 vertically gave me just enough height wise, but I needed more width than a single image would give.
Interestingly, within about 10 seconds of finishing the third image, I heard a roar of water from upstream - they'd opened the sluice gates of the dam, and within 30 seconds this entire scene disappeared under two feet of turbulent water. The kayakers started arriving and it was time for me to pack up.
Wednesday, September 03, 2014
Looking At Images - Brooks Jensen

You will perhaps remember that I wrote the book Why Photographs Work. I recently started reading Brooks new book and before I started, I felt a bit awkward - do I say his book is better, or mine, or what. After all, I chose my way of writing deliberately so it seemed a bit weird to be then commenting on Brooks writing.
Turns out it wasn't a problem at all. I'm not Brooks, and he's not me, and I learned quite a bit from this book, that I am currently half way through.
For a start, Brooks has selected an interesting collection of both black and white and some colour work to discuss, many of the works beautiful to my eye, and perhaps more importantly, when an image doesn't first impress me, I'm intrigued to find out what Brooks saw in the image that I missed. It doesn't make one of us right, but it does broaden ones horizon to look at images that aren't obviously great. I may not get the image on first reading, or perhaps the tenth, but sometimes things will percolate for some time and guess what, you can't ever look at image the same again. And that ain't bad.
Brooks is of course editor of Lenswork, perhaps the most respected magazine of black and white photographs around. Some have faulted Brooks for his middle class white American relatively conservative taste, but over the years Lenswork has definitely pushed and changed my boundaries, widening my tastes in photography. Traditional black and white landscapes are a minority in both the magazine and this book. There are abstracts and documentary photographs, manipulated images, and yes, enough 'traditional' photography to suit most.
If there is one thing in particular Brooks brings to looking at these images, it is not surprisingly his vast knowledge of other photography that he references in about half of the images discussed. Although it's true that he doesn't include all those images (downright impractical without doubling the size of the book) but with the internet, a very small effort will show you the work he compares and contrasts. There is a great deal to be learned, dare I say; by everyone who follows his thoughts about the place of these images in both the history and art of photography. In this way his writing is fundamentally different from mine and even when he doesn't reference other images, his discussion of individual images often comes with a point he wants to make, about something to be learned, and the work is discussed in the context of all the photography that has gone before it.
This makes the book an excellent tool for learning about images, about strengthening our own photography, and about seeing in different ways.
Turns out I can happily give this book a hearty recommendation. Yes, I know, it's so much easier to read about technical stuff, but I'm betting this will do a lot more for your own image making.

And can I remind you - every photographer needs at least a few Lenswork Folios - sets of beautiful prints of great work at a bargain price. What photographer doesn't wish he could go back and purchase Pepper # 30 direct from Edward Weston for $5. Well, some 80 years later, we're talking original work for $12.50 a print - what a bargain.
Saturday, August 30, 2014


Saturday, August 23, 2014
Pentax 645 Update - Still Smiling!
The honeymoon continues. I love the camera and the lenses are performing well. I would NEVER go back to a camera without at least a tilting LCD screen. My used 35, 75 and 120 lenses didn't come with lens hoods so last night I made some from Edmund Scientific Flocking paper. Handy and they stuff back into the bag easily. Today I shot several images with very strong lighting just outside the frame and did not see any problems with flare (which I had seen previously with the 120 which surprised me as the front element is quite recessed). Anyway, problem fixed.
I took some images today with the 200 mm. lens at 1/6 second, some with the 2 second self timer, then later with the 12 second - the latter are sharp, the former definitely soft - so I need 12 seconds on the self timer for both the 200 and 300 mm. lenses - so now I know.
Several times today, rather than using live view magnified focus, move the magnified image to the extreme corner (slow), I simply turned live view off and checked focus with the view finder - turned out to work very well (I was focus blending so needed to find the near focus point which happened to be at the edges). This speaks well to the quality of the viewfinder.
When the Sony A7r came out, there were concerns for image sharpness in a vertical format because of shutter shake - although I haven't done any formal testing, lots of images shot vertically have not shown any concerns on the Pentax 645z.
I've been doing a lot of lens swapping, guessing incorrectly on the focal length I needed. It's possible that zooms would have avoided this but my feeling is only to a modest degree and I'm happier to accept the quality of the fixed lenses. This is a bit of a surprise to me - I hadn't thought I'd be as comfortable without my zooms, but so far it's been a non-issue.
Both the 25 and 35 mm. lenses have some barrel distortion, but auto correction with the 25 and manual with the 35 has not been a problem.
I know I have said it before, but I love how robust the files are. I can correct for barrel distortion, rotate the image, fix horizontal and vertical perspective and rotate the image, all on top of focus blending and followed by Akvis Enhancer without the image falling apart and still able to make a tack sharp 30X40 print.
That's all that I ever hoped for and more.
Does the Pentax do anything that smaller cheaper cameras can't do - no - it's simply down to print size. If you don't routinely go above 13X19, there are many cameras that would suit better and be more versatile.
Even if the Nikon 810 came with a complete set of Zeiss Otis lenses (not that I could afford them, my Pentax lenses cost between $200 - $1000 exc. for the 25 mm. so that's 5X$4500 less for a set of lenses - that's a lot more than I paid for the Pentax and 25 mm. lens combined. And to not have a tilting LCD, and to have to put up with stop down live view focusing - NO WAY.
Hatch

It was difficult deciding how to crop this image - I made the original with the entire valve on the left included including it's wheel (of which you see only half here), but in the end decided that a clean left edge was more important than the valve itself and it was the shadow of the valve that was important, with just enough of the actual structure to 'explain' the shadow.
Whether to include the base of the tank I'm less certain of - on the one hand, the image is cleaner without, on the other it provides framing for the tank. I'll probably try it both ways before making a final decision.
Paper

This is simply the start of a new project. Some years ago I purchased an entire box of 32X40 Crane Museo matte paper, warmtone. I never used it as the paper was way too yellow for selling prints at the farmers market under mercury lighting (the paper was a lovely cream at home).
Anyway I have decided to try MY hand at creating images with paper - hardly original, but creative none the less and this is just effort one, made quickly with a roughly torn wedge of paper. The lighting was from an overhead fitting above the dining room table, the cool lighting from a window behind the camera. Depth of field was restricted by choosing a moderately large aperture. Considering this was just a 'test of concept' I find I like it more than I expected and look forward to doing more experimenting.
Compressor Plant Cylinder

Editing consisted of some 20 adjustment layers, various curves, straight lines with the white point moved left, Akvis Enhancer toned way down and applied only to parts of the image, and the foreground really burned in.
These cylinders come 3 to a unit, driven by 600 horsepower engines, the building containing more than a dozen units (or 36 cylinders and 7200 h.p. of engine). That ought to supply natural gas to one or two houses...
Wednesday, August 20, 2014
From Newfoundland, Sony A6000

Fortifications at Cape Spear

South Shore, Newfoundland

Memorial University Gardens
Tuesday, August 19, 2014
Take Your Audience Where You Can Get It
Two nights ago I got a phone call. A lady reported that her grand daughter, age 8 had shown up at home with four photographic prints, sealed in mylar, with my name on the back, and even a price sticker - was I missing any of my artwork?
It seems the grand daughter had found the prints (along with several more) in the fork of a tree, with a note attached, free to a good home.
Well, back in the spring I did a major cleanout of the garage, including hundreds of prints left over from when I had worked at the farmers market. I noticed on day two of the cleanup that all the prints put out on day one had disappeared. I was pleased to think someone was getting some use out of them, even if all they use it the foamcore backing board.
So, it would appear that whoever took the prints, picked out the ones they wanted, and put the other ones in the tree at the playground - and now an 8 year old has taken home my architectural images because she liked them.
That's nice.
Black And White Vs. Colour At Turner Valley

To make the black and white version, I added a b&w conversion layer, then adjusted the colour sliders - darkening red so the window frames were darker, lightening green so the corrugated paneling looked right, then adjusting the yellow slider darker till the grass looked right. I then added a masked curves adjustment layer in which the white point was moved left, and the line kept straight - this selectively emphasized lightening the lighter areas without affecting the darks. I brought out more texture in the windows, while avioding driving the cracked glass to pure white. I tried it on the paneling but it was too harsh so used a simple s curve on those to brighten the lights without pushing them to pure white, and slightly darkening the darks.
I then did my brown to black action which applied a solid tone adjustment layer, set it to colour, toned it down, then used the available layer adjustment blending sliders (by double clicking on the layer) so that the colour applied much more to the light tones than the dark. i then toned down the effect using a hue/saturation layer to taste.
My impression now is that I much prefer the new version, but that I might choose to work further on the right sided windows so that the lighter areas better balance he left side of the picture - but first I'll live with what I have for a while.

Monday, August 18, 2014
Pentax 645Z And Shutter Shake Updated
No examples this morning because frankly we're talking subtleties here, but on the weekend I did get to play further with the 300 mm. lens (equivalent to 240 mm. on full frame 35 mm. - ie. quite long). I did a single image at 1/200 second and that was fine but I'll need to do more tests at this speed - I'd previously tested at 1/400 and found it good, so perhaps I can drop the short limit of questionable speeds.
At the other end I did several images at 1.3 seconds long and to my surprise these too were tack sharp, so it looks like for now the range for watching exposures is anything shorter than 1.3 seconds and anything longer than 1/200.
Remember that all the images with the 300 and 200 mm. lenses are now done with the 12 second self timer, while the 2 second setting seems to be fine with the 120 mm. lens, and that's handy for focus stacking.
So, if I had an exposure that fell between 1.3 and 1/200 second, what would I do? If a modest boost to ISO can get me to 1/200, then that's what I would do - on the weekend, I simply had to bump to ISO 800, a non issue quality wise. On the other hand, if the base ISO exposure had to be something like 1/2 second, bumping upwards isn't practical (that would be ISO 12,000) so the only option is going down the way and there's only three ways to do that, open up the lens (but usually I'm controlling the amount of depth of field I want), move closer to the subject and use a shorter lens (possible sometimes), or to put a neutral density filter in front of the lens and that's what I'll do.
Shooting suggests that blurring with the 300 mm. from the shutter is minimal but real, but in common with all lenses, , the least wind on the lens hood, movement of a foot anywhere near the tripod (unless you are standing on cement), or brushing your leg against the tripod even lightly can have a huge impact in sharpness. I learned this with my Canon cameras and sometimes would even take off the lenshood if there was a cross wind, and in really strong wind would sometimes take multiple shots with me hanging onto the camera and bearing down.
Saturday, August 16, 2014
Turner Valley Window

this is a slight crop of the full frame Pentax 645Z with the 120 mm. macro lens. I like the subtle detail of the building interior - hints only and nothing glaring.
Bag For Pentax 645z

The bag contains the camera, that can mount the 25, 120 or 300 mm. lens in the bag and store the other two. In addition the back also holds the 35, 75 and 200 mm. lenses - so six lenses and camera body. The bag is the Lowpro Computreker AW, one of the smaller backpacks and most definitely flyable in North America. It works very well and the zips only need one hand (unlike the much heavier albeit more waterproof model I carried my Nikon gear in.
Turner Valley Doors


Pentax 645Z, 35 mm. lens, f11, ISO 100
Monday, August 11, 2014
Michael Reichmann 20 Year Retrospective
This is a $350 book so I can't recommend it to everyone though I wish you could all afford it. But, considering that the full cost of the book goes towards the Luminous Landscape Endowment Fund (Michael paid for the printing of the book himself) to support photographers and projects, perhaps there are some of you who find yourself in a position to help, while at the same time receiving a wonderful book.
The book is massive and with 380 large photographs on heavy paper and beautifully printed is a real joy to own. There are some black and white images but largely it is Michael's colour work that is exhibited here and there are some truly wonderful images - a mix of favourites (ladder and wall from San Miguel) and Bullfight in motion, and images from Antarctica, Bangladesh, Iceleand and China.
There are delightful surprises too, and images going back to medium format film. Michael has a strong eye for both colour and composition and images range from subtle to brilliant.
The book includes landscape and people and working environment photographs and the website has videos of the book's production as well as each image in the book.
The book is 12 inches square and the book clean and elegant. Some images bleed across the gutter, but only where large is worth while and the pages open up easily so the gutter can be seen - this is a sewn book.
Think of it as payback for 15 years of Luminous Landscape - so about $22.50 a year - not a bad deal.
Strongly recommended.
Sunday, August 10, 2014
Pentax 645Z And Shutter Shake
So yesterday, while I was at the gas plant photographing, I decided to check sharpness with the 300 mm. lens with mirror lock up and 12 seconds self timer instead of 2. You will remember I had problems getting sharp pictures outdoors, but no problems in a dark interior with 30 second exposures - so it had to be shake and not lens blur. I suspected the short duration self timer (my remote hasn't come yet) but wasn't totally sure. How much could be from the shutter mechanism, even though reportedly improved compared to the 645D?
The two images below tell the tale - they were not taken together and don't have the same framing, but I think you can see that there is some definite softness to the first image that isn't there with the second.
The difference?
For the first image I shot at ISO 100, 12 second self timer, live view, 1/25 scond.
For the second shot, I upped the ISO to 800, giving a shutter speed of 1/400, both at f16.
I later did some indoor work and know that a 5 second exposure is absolutely sharp. For now, with the 300 mm. lens, I'll try to avoid anything lower than 1/400 or higher than 5 second but perhaps test two seconds. I'll use the great high ISO capability of the Pentax 645Z to keep away from that area.
This is far from ideal as that's a 10 stop difference or ISO 100 to ISO 100,000 - just not on. Printing the centre section of the 'blurry' first image for a print of 30X40 shows slight but acceptable softness checking from 10 inches. Additional sharpening within Photoshop results in a 30X40 print of superb quality and no signs of sharpening.
This really is the difference with the Pentax, not that it's so many more pixels than the Nikon 810, but that the files are so robust. As far as I'm concerned, I've just eliminated the one nagging doubt about the system - how would 300 mm. perform - very well thank you. The 12 second self timer has fixed 90% of the blur I was seeing in previous shoots outside, and I can work around that other 10% if need be, most of the time, and when I can't, it won't actually matter in a 30X40 print - how cool is that?
I have never felt as good about a system as I do with the 645Z, not even at the time, when I didn't know any better, and now that I do, wow...


Wednesday, August 06, 2014
Bin Bottom Redux

Don't forget to click on image to see 1200 pixels wide (of the original 26 thousand)
So, I have been living with the print for 24 hours and am not happy. The version I made then is below. This evening I decided to start back at the original stitched image after basic trimming. I elected to NOT chop off the right side after all but see if I could make the various parts of the image relate better. A variety of curve layers later (probably about two dozen), and a few curves that had the highlight point shifted left, but this time no Akvis Enhancer (that increased local contrast). I then felt I needed to improve the highlights, but didn't want the near whites driven to stark white. What I did was to create a curve starting in the upper right, running on the diagonal for the lightest pixels, then lightening for the light gray areas, then returning back to the diagonal line for the rest of the curve. To get that you need a few points that force it back to the diagonal otherwise anything that goes above the diagonal in the lighter areas automatically curves below the diagonal line in the darker tones and that wasn't what I wanted.
I still wasn't happy with the image and wondered what it would be like to play with the temperature slider in Camera Raw - no sweat. Save the image then save again as a TIFF and open that in Camera Raw and adjust tones and temperature to taste, a little cooler as you see in the above image. What I really did was make it a lot more contrasty and cool, then opened the image, copied all, then closed it and pasted it as a new layer in the image I was editing earlier this evening. Now I could use layer opacity and masking to control just how much of the cool contrasty image I wanted, and where.
Turned out I didn't want a lot, and not everywhere, and with some more tweaks above is what I have ended up with.
I might still lighten the gray areas on the far right a tad more, but that's for another day.
I want to discuss what role complex images like this play in photography and when I have settled (for the near future) on the editing, will do so.
I would really like comments about this image, NOT about how you would fix it, but whether as is it works for you or not, and why.

Monday, August 04, 2014
Smugmug For Images
I have yet to find the ideal website. Rapidweaver did odd things with text so that what was lined up properly on my screen would overlap on other peoples' computers. Smugmug had been unattractive a few years ago, the site I had developed professionally looked good and worked well - but loading images is a pain (Joomla).
I now have the vast majority of my images at Smugmug and my newer images at this gallery.
The images are larger than ever before, and when you click on the images, can be seen on their own, with no thumbnails occupying half the screen. You can go through the images via the keyboard, using the left and right arrows.
I haven't found a convenient way to make Smugmug do everything I have on my website (eg. downloading pdf's) so for now, it's just a way to look at images conveniently.
100% Clip From Single Image, Pentax 645, 120 mm. Lens

Stitching With The Pentax 645Z (what was I thinking?)

Shot today with the Pentax 645z, and for my sins, I couldn't help stitching it - after cropping, it's 22,000X8,000 pixels and took hours to process and edit. I had found an industrial refuse bin, lying on its front, and shooting into it, this would normally be the bottom of the bin - made with the 120 mm. lens. I actually shot it twice - once using a swing (and depth of field was no where near enough to compensate for the greater distance to either side) and later, shifting the tripod laterally so that focus was maintained (ie. distance to subject constant). There's tons of detail of course and I think that once I have finished editing, I'll get a large print made. This would be 26X73 inches at 300 dpi.

This was the side of a bin, with only about two feet between this and the next bin. I played with the 25 mm. lens but even with this, I could only include a small part of the subject. I decided to shoot it from the front, doing a 12 image focus blend to get the depth of field from left to right, near to far. Shot with the 200 mm. lens, the FA model, which I'm pleased to report, is sharp to the corners.

This is a reprint of the image made on Friday, aiming for better balance in the bottom third and bringing out some highlights in the upper third. Previously the right bottom was too dark, the left bottom too light, and not enough texture in the bottom right.
Saturday, August 02, 2014
Print Size With Pentax 645Z

What we have here is normal sharpening in Lightroom, and additional sharpening in Photoshop, .6, 312, 0, 0 and we can see sharpening artifacts at 100% but this makes a very nice print at 41X75 inches (150 dpi), this from a two image stitch.
I don't know that I'm getting any more resolution with the Pentax compared to the Nikon D800e, what I can say is that I get it consistently which I didn't with the Nikon - everything had to be ideal - now I just fire away and can reasonably assume I'm going to get great results. This may not seem right, that somehow I'm compensating for poor technique with more expensive equipment, but what I see happening is that with the Nikon, I could not always control every factor, and now I don't need to. Welcome to the real world of less than perfect lenses, less than absolutely still tripod and camera, and no wind, and , yes; absolutely perfect technique.
It reminds me of the days of trying for absolutely highest resolution with 35 mm. film, we'd shoot with high contrast copy film, processed in a compensating developer, and use only the best lenses in camera and under the enlarger, and yes, the results were sharp, though not always, and more often than not the prints were crap because the tools only really worked for a very limited selection of subjects and soft lighting. Switching to medium format produced images of a rich tonality across a variety of subjects and conditions that could not be reproduced in 35 mm.
The Pentax 645z is simply more reliable than smaller cameras when it comes to quality large images, and that's important to me.
Sulphur Plant, Turner Valley

Below is a 100% crop (see more of it by clicking on it) after all the edits - this includes stitching, stretching (Edit-Transform-Warp) and Akvis Enhancer, and gives you an idea of what happens when you manipulate a file like this. There is sharpening in Lightrooom (see below) as well as some additional sharpening in Photoshop before applying Akvis Enhancer (always do the sharpening before the Enhancing).

The clip below is the same sharpening I gave my Nikon D800e images in Lightroom, 58, .7, 70, 0

And below is 80, .7, 50, 0 - as this was shot at f16, more sharpening to compensate for diffraction is reasonable and perhaps a little more might still be ok.

and here we have 101/1/50/0 which goes a bit too far - though you'd neve see it in print.


Turner Valley Reshoot

Tuesday, July 29, 2014
Print Sharpness Vs. Image Sharpness
I used to write with a fountain pen. With some paper the ink would bleed from the original line, perhaps as much as an 1/8 of an inch in diameter on cheap paper with a loose weave - for example, newsprint. The same thing happens with solvent based felt pens writing on newsprint flipboards.
Well, the bad news is the same thing happens with inkjet ink. Yes, it dries fast, but in the second or two before it does, the ink can spread, and the very surface that is designed to hold a lot of ink and therefore make rich prints, can also result in more spread of the ink.
So, it turns out that how sharp your prints look is a function of the individual brand and surface of the paper. Another brand in a similar surface may be significantly less or more sharp.
I recently switched (for routine printing) from the very expensive and no longer made Ilford Galerie Gloss Baryta paper, to Inkpress luster. I quite like the paper, but I think I'm taking a hit in print sharpness. Oh, not a lot, just enough to annoy me, especially in smaller prints.
To some degree this can be compensated for with output sharpening. I used to do this routinely with matte paper but had stopped when I went to the Ilford paper, but looks like I'm going to have to restart it. I was using Photokit sharpener output for prints.
Pentax DFA 25 mm. on Pentax 645z

The whole scene

Centre crop - click to open in new window at correct size

2/3 of way out to upper left - remember to click for actual size

3/4 of the way to upper left - and click

extreme upper left - yet again
So, this is f8 in a real subject, not a flat plane. Lightroom used its profile for this lens to correct for distortion and I had to add some extra purple defringing so this is what one would actually have to work with. Clearly the corner is not great, but remember this is a tiny part of the picture. I made a print, 41X55 inches, or at least the corner thereof, and the 13X19 print of the corner is sharp from 6 inches in - this looking at a 5 foot print from 10 inches. Do I wish the corner was a bit sharper, sure, but I can live with it. In practice, this means that with the Pentax 645Z I can make a 41X55 print that looks as good at the same viewing distance as a 24X36 inch print made with my Canon 5D2 and 17-40 at 17 mm. - so almost double the linear dimension (24 to 41). Essentially that's what I was looking for.

This is 100% even without clicking, but you see more when you do, of the same corner, but at f16, and a little bit more sharpening in Lightroom (70, .8 instead of 50, .7), also a bit more shadow recovery.
Subscribe to:
Posts (Atom)
