
 Posts


1)photograph often
2) be observant, especially for things that weren't on your agenda for today's shoot
3) don't blow a great shot with technical issues - that's just mickey mouse - get that crap out of the way through lots of practice and careful routines, even check lists and being careful - and if hand holding under borderline conditions, take several shots so at least one will be sharp.
4) give yourself several possible shots to choose from whenever possible - often I find that the penultimate shot that I so carefully positioned and framed is subsequently beaten by an even better shot as I literally and figuratively circle round to where I started, doing a better job on the second go round
5) really work the scene - don't leave until you are sure you have done the best you can
6) arrange as much as possible before the decisive moment so that when it comes you are ready
7) put the extra effort in so you arrive before sunrise, go out in bad weather, etc.
8) have an aesthetic check list too - background ok, light perfect, edges strongly composed, subject best framed, etc.
9) keep your equipment relatively simple so you aren't changing lenses when the perfect situation comes up
10) stop believing in luck - it's all sweat equity, with a few smarts sprinkled in
Tuesday, October 27, 2009


Monday, October 26, 2009
Making Vs. Improving Your Best Work
A followup to the other ideas of today is the recognization that to make our best work is not the same thing as trying to improve our best work. In the former, we use our strengths to produce the best possible work we can, while in the latter, we work on those areas which most need help. Are you aware of when you do one vs. the other? Perhaps you only ever try to do your best work, never putting much effort into trying to improve your work other than by trying harder - whatever that means.
I could imagine someone suggesting that one of my weaknesses is in putting all my effort into careful compositions instead of finding intrinsically interesting subject matter in the first place.
This would suggest that I put more effort into finding interesting things first and good compositions second. Any time we discuss interesting, it has to be asked - interesting to whom? To be a serious photographer with something to say, I'm absolutely convinced that it has to be interesting to the photographer, that tailoring your subject, style, or technique to suit the viewer is to prostitute yourself. Fine if you are charging $4000/day - for that kind of money I can do a lot of grovelling - but not suitable to someone who professes to be a fine art photographer.
I could imagine someone suggesting that one of my weaknesses is in putting all my effort into careful compositions instead of finding intrinsically interesting subject matter in the first place.
This would suggest that I put more effort into finding interesting things first and good compositions second. Any time we discuss interesting, it has to be asked - interesting to whom? To be a serious photographer with something to say, I'm absolutely convinced that it has to be interesting to the photographer, that tailoring your subject, style, or technique to suit the viewer is to prostitute yourself. Fine if you are charging $4000/day - for that kind of money I can do a lot of grovelling - but not suitable to someone who professes to be a fine art photographer.
Going With Your Strengths
It might seem obvious that you should photograph subjects and with methods which have been previously successful for you. It would appear that the opposite of the above is to never learn from our experiences and thus never advance as a photographer.
I think it is actually quite common for photographers to not even be aware of their strengths - or to put it another way, the strengths of their images. Sure the bigger problem would appear to be not being aware of their flaws, but in truth we need to work on both.
Both strengths and weaknesses in your images tend to show up when you hold up your work against that of others. This could be in a show, or simply at a camera club, or failing even that connection, holding up your work against what you find in magazines. Far be it for me to suggest you rip up your latest and pristine copy of Lenswork but it might pay to order an extra copy of one or two issues which feature work at least a little bit similar to yours. Remove individual pages and trim them, pin them to the wall next to similar sized images of your own - in other words have your own home show, your work and the published work side by side.
Workshops are an excellent way to get a sense of how your work holds up. Contests are not a good way - a few winners and hundreds if not thousands of "losers" which tells you almost nothing about your work.
Sometimes it's possible to sign up for a critique, or to have someone you respect look at your work, but you aren't looking here for a rating - this is how good your work is - rather you want to determine its strengths and with a bit of effort you should be able to determine these strengths for yourself.
Strengths can take a number of forms, from technical perfection to emotional impact, skills in composition, finding interesting subjects, the richness in your tonalities, the way you get your message across clearly and so on. Don't discount as a strength such simple things as wonderful colour, clever use of shadows, amusing images or simply being informative.
Having identified your strengths, it's time to think about what to do with this information.
Perhaps your strengths point to a particular kind of photography that would best make use of your skill set. Maybe your strengths are such that they apply to all your images, not some subset.Maybe now that you recognize your strengths, you can make them pay off more often. You might literally do an inventory of any scene to see how you could best use your strengths.
By the same token, you have to avoid or preferably overcome your areas of weakness. Do remember though that if you try to improve your strengths, it will take a lot more effort for much less return than if you work on your weakest areas, where there is so much room to improve.
My first book started with a series of articles on assessing your level in photography but in that we lump all your technical or aesthetic skills into one asessment. That concept remains valid but here I am suggesting that knowing the particular strengths (and weaknesses) of your images and yourself as a photographer can be of great help.
I think it is actually quite common for photographers to not even be aware of their strengths - or to put it another way, the strengths of their images. Sure the bigger problem would appear to be not being aware of their flaws, but in truth we need to work on both.
Both strengths and weaknesses in your images tend to show up when you hold up your work against that of others. This could be in a show, or simply at a camera club, or failing even that connection, holding up your work against what you find in magazines. Far be it for me to suggest you rip up your latest and pristine copy of Lenswork but it might pay to order an extra copy of one or two issues which feature work at least a little bit similar to yours. Remove individual pages and trim them, pin them to the wall next to similar sized images of your own - in other words have your own home show, your work and the published work side by side.
Workshops are an excellent way to get a sense of how your work holds up. Contests are not a good way - a few winners and hundreds if not thousands of "losers" which tells you almost nothing about your work.
Sometimes it's possible to sign up for a critique, or to have someone you respect look at your work, but you aren't looking here for a rating - this is how good your work is - rather you want to determine its strengths and with a bit of effort you should be able to determine these strengths for yourself.
Strengths can take a number of forms, from technical perfection to emotional impact, skills in composition, finding interesting subjects, the richness in your tonalities, the way you get your message across clearly and so on. Don't discount as a strength such simple things as wonderful colour, clever use of shadows, amusing images or simply being informative.
Having identified your strengths, it's time to think about what to do with this information.
Perhaps your strengths point to a particular kind of photography that would best make use of your skill set. Maybe your strengths are such that they apply to all your images, not some subset.Maybe now that you recognize your strengths, you can make them pay off more often. You might literally do an inventory of any scene to see how you could best use your strengths.
By the same token, you have to avoid or preferably overcome your areas of weakness. Do remember though that if you try to improve your strengths, it will take a lot more effort for much less return than if you work on your weakest areas, where there is so much room to improve.
My first book started with a series of articles on assessing your level in photography but in that we lump all your technical or aesthetic skills into one asessment. That concept remains valid but here I am suggesting that knowing the particular strengths (and weaknesses) of your images and yourself as a photographer can be of great help.
Stats And How It Could Influence Our Photography
If we take it as given that a busy and good photographer can make a dozen strong images in a year (as per Ansel Adams comments), it might pay to spend some time reflecting on the circumstances which led to those images. How many of them happened when you simply picked up a camera with no idea of what you were going to shoot, just wandering around some place?
Did you see something worth photographing and ran home for your camera and thus captured one of your best?
What percent were from an organized shoot - I'm going to place A to shoot subject B and I'm going to dedicate several hours if not multiple visits to do so?
Do you know what percent of your best images were made while photographing with someone else - perhaps company stimulates you to perform - or maybe it inhibits you - the answer to the question is quite relevant for planning future shoots.
How similar are your best images? - too much alike, close enough to be the start of a project, totally random, each begging for more work of the same theme?
Next time I'm going to discuss the problem of going with your strengths without simply being repetitive.
Did you see something worth photographing and ran home for your camera and thus captured one of your best?
What percent were from an organized shoot - I'm going to place A to shoot subject B and I'm going to dedicate several hours if not multiple visits to do so?
Do you know what percent of your best images were made while photographing with someone else - perhaps company stimulates you to perform - or maybe it inhibits you - the answer to the question is quite relevant for planning future shoots.
How similar are your best images? - too much alike, close enough to be the start of a project, totally random, each begging for more work of the same theme?
Next time I'm going to discuss the problem of going with your strengths without simply being repetitive.
Thursday, October 22, 2009
Perfection
You may want to read what I previously wrote about perfection, but I wanted to expand on the subject.
Perfection 1
Perfection 2
Perfection 3
We may aim for the bulls eye but be happy that we got close. Really, all we need in an image is that the imperfections don't interfere with our enjoyment of the image. One could even make the case for an image being too perfect, shadows so open they look unreal, repetition so perfect you almost itch for just a little imperfection.
In practice, what we really want is for our images to be that little bit more perfect than the ones we have been doing recently- ever improving, strengthening, perfecting.
In order to make our images that little bit better than our current skill set, we are going to have to change something.
One option is simply to spend more time waiting for the perfect image. The difficulty with this is it isn't as much fun, can be very frustrating and besides you end up with fewer good images from which one or two are going to surpass the others - not a sensible option, yet one which many hobby photographers follow.
We could approach this in a logical fashion, carefully analyzing what makes our images less than perfect and working to improve those characteristics - efficient if a bit cold and methodical and not a lot of fun. Probably more sensible than a careful analysis of each image is simply to go with your instinct of the one thing that most obviously weakens an image or even better a series of images and work on that weakness.
How you go about working on your weaknesses depends on what they are. If you aren't sure, then a read of my first book "Take Your Photography To The Next Level" would be a darn good start but if you know what your images lack, then you simply have to come up with a battle plan to improve that.
For some it will be composition, for others tonal quality, or perhaps it's because it isn't clear what the image is trying to say, or perhaps you like to include the kitchen sink in all your compositions, firmly believing that more good stuff is better.
Perfection 1
Perfection 2
Perfection 3
We may aim for the bulls eye but be happy that we got close. Really, all we need in an image is that the imperfections don't interfere with our enjoyment of the image. One could even make the case for an image being too perfect, shadows so open they look unreal, repetition so perfect you almost itch for just a little imperfection.
In practice, what we really want is for our images to be that little bit more perfect than the ones we have been doing recently- ever improving, strengthening, perfecting.
In order to make our images that little bit better than our current skill set, we are going to have to change something.
One option is simply to spend more time waiting for the perfect image. The difficulty with this is it isn't as much fun, can be very frustrating and besides you end up with fewer good images from which one or two are going to surpass the others - not a sensible option, yet one which many hobby photographers follow.
We could approach this in a logical fashion, carefully analyzing what makes our images less than perfect and working to improve those characteristics - efficient if a bit cold and methodical and not a lot of fun. Probably more sensible than a careful analysis of each image is simply to go with your instinct of the one thing that most obviously weakens an image or even better a series of images and work on that weakness.
How you go about working on your weaknesses depends on what they are. If you aren't sure, then a read of my first book "Take Your Photography To The Next Level" would be a darn good start but if you know what your images lack, then you simply have to come up with a battle plan to improve that.
For some it will be composition, for others tonal quality, or perhaps it's because it isn't clear what the image is trying to say, or perhaps you like to include the kitchen sink in all your compositions, firmly believing that more good stuff is better.
Wednesday, October 21, 2009
Are You ADD or OCD?
What kind of photographer are you? Do you see yourself as:
careful, methodical, efficient, cautious, organized, logical, productive, do you photograph in logical sequences and steps?
or, are you
spontaneous, thinks outside the box, easily distracted, fascinated by all manner of odd things, risk taking, creative?
In other words, are you attention deficit, or obcessive compulsive?
Some people are strongly one way or another. If you turn the first list into negatives, that's me, disorganized, messy, late, def. not sequential and I tend to go with my gut instincts photographically - it works because it works - I may be able to explain why afterwards but that's not why I'm attracted in the first place.
So, how could knowing your own tendencies help you in your photography? There are probably only a small minority of us who nicely straddle both groups - who are highly organized and efficient, yet spontaneous and creative and so on. In reality most of us lean one way or the other in either our strengths or our weaknessses. This being so, recognizing these will allow us to work on our weaknesses and take advantage of our strengths.
Now, human nature is such that we tend to practice what we are already good at, ignoring those areas where we 'suck', so breaking with tradition and improving those areas where you are weak will reap huge benefits.
For the illogical person, check lists - of equipment - of compositional steps or whatever may be useful. Rearranging so there is a labelled place for everything and insisting that you put everything back in place will help. I know that I am careless about picking up my backpack without checking to see if it's zipped - so I zip it up every time I remove or return something - might explain why I wore out the zipper in my last pack, but anyway, that's how I get around my weakness. It would be handier to leave the backpack open till I'm finished, but a lot harder on the lenses if I pick it up without zipping it (yes, I learned this the hard way).
You may be less familiar with ways in which you can become more spontaneous, creative, thinking non linearly, jumping ahead, thinking outside the box etc. There are books with creative exercises - for example those by Freeman Patterson. There are workshops like those by Jay Maisel and Craig Tanner which specifically encourage being creative and breaking rules and observing and letting yourself see in a non labeling, non judgmental way.
You can easily assign yourself a small project which takes you out of your comfort zone (not another damn landscape, etc.), which forces you to do things differently (like me locking up my tripod), or limiting you to one lens, or one location.
An oft recommended assignment is to photograph in a bathroom. The logical person looks round and sees a series of boring items - a toilet, sink, bathtub. The creative person wonders what it would look like to photograph the water coming out of the tap, at a variety of shutter speeds, or photographing the curve of the toilet bowl with shadow only, or climbs into the tub and photographs the shower curtain from below. They take a bath towel and try placing it in interesting folds, patterns and shapes. They undress, hang their slacks on a hook and photograph the belt hanging down.
The ideal photographer would look at the two lists above and declare that both describe him/her to a tee, but people like that are rare as in many ways the two lists are opposites of each other - like being both tall and short. The trick is to pick up enough of the skills and strategies of the other type of person to help you take advantage of the strengths you already have.
careful, methodical, efficient, cautious, organized, logical, productive, do you photograph in logical sequences and steps?
or, are you
spontaneous, thinks outside the box, easily distracted, fascinated by all manner of odd things, risk taking, creative?
In other words, are you attention deficit, or obcessive compulsive?
Some people are strongly one way or another. If you turn the first list into negatives, that's me, disorganized, messy, late, def. not sequential and I tend to go with my gut instincts photographically - it works because it works - I may be able to explain why afterwards but that's not why I'm attracted in the first place.
So, how could knowing your own tendencies help you in your photography? There are probably only a small minority of us who nicely straddle both groups - who are highly organized and efficient, yet spontaneous and creative and so on. In reality most of us lean one way or the other in either our strengths or our weaknessses. This being so, recognizing these will allow us to work on our weaknesses and take advantage of our strengths.
Now, human nature is such that we tend to practice what we are already good at, ignoring those areas where we 'suck', so breaking with tradition and improving those areas where you are weak will reap huge benefits.
For the illogical person, check lists - of equipment - of compositional steps or whatever may be useful. Rearranging so there is a labelled place for everything and insisting that you put everything back in place will help. I know that I am careless about picking up my backpack without checking to see if it's zipped - so I zip it up every time I remove or return something - might explain why I wore out the zipper in my last pack, but anyway, that's how I get around my weakness. It would be handier to leave the backpack open till I'm finished, but a lot harder on the lenses if I pick it up without zipping it (yes, I learned this the hard way).
You may be less familiar with ways in which you can become more spontaneous, creative, thinking non linearly, jumping ahead, thinking outside the box etc. There are books with creative exercises - for example those by Freeman Patterson. There are workshops like those by Jay Maisel and Craig Tanner which specifically encourage being creative and breaking rules and observing and letting yourself see in a non labeling, non judgmental way.
You can easily assign yourself a small project which takes you out of your comfort zone (not another damn landscape, etc.), which forces you to do things differently (like me locking up my tripod), or limiting you to one lens, or one location.
An oft recommended assignment is to photograph in a bathroom. The logical person looks round and sees a series of boring items - a toilet, sink, bathtub. The creative person wonders what it would look like to photograph the water coming out of the tap, at a variety of shutter speeds, or photographing the curve of the toilet bowl with shadow only, or climbs into the tub and photographs the shower curtain from below. They take a bath towel and try placing it in interesting folds, patterns and shapes. They undress, hang their slacks on a hook and photograph the belt hanging down.
The ideal photographer would look at the two lists above and declare that both describe him/her to a tee, but people like that are rare as in many ways the two lists are opposites of each other - like being both tall and short. The trick is to pick up enough of the skills and strategies of the other type of person to help you take advantage of the strengths you already have.
Sunday, October 18, 2009
Arbutus

The paper like bark of the evergreen Arbutus tree in Victoria had peeled back and exposed this interesting pattern.
Through A Fence

Some scrap steel from disabembling some sort of ship along the waterway in Victoria harbour, I was shooting through a chain link fence, hand held, lens hood off so that I could get the lens closer to the mesh (to at least blur it out if not eliminate it). No chance for full depth of field but I quite like the soft background - less distracting - in fact it makes me wonder if I should have used even less depth but then the main angle of steel wouldn't be quite as sharp - always a compromise.
Friday, October 16, 2009
What An Image Is About
The image I showed the other day of the brass door with handle and pink surrounding corrosion raises an interesting point. The apparent subject, some old piece of equipment is really quite uninteresting and were someone to title the image "furnace door with corrosion", you'd really have little reason to want to look at it.
What I think the image is about is PINK. To me that is the subject. The colour is so unexpected and attractive against the bronzy background that the colour becomes the primary subject and where the colour came from is secondary at most.
The interseting question will be whether if you start thinking of it as a "pink" instead of as a door, will it change the way you think about the image.
Comments?
What I think the image is about is PINK. To me that is the subject. The colour is so unexpected and attractive against the bronzy background that the colour becomes the primary subject and where the colour came from is secondary at most.
The interseting question will be whether if you start thinking of it as a "pink" instead of as a door, will it change the way you think about the image.
Comments?
Not Our Cruise Ship

This tug upstream from the lift bridge crossing Victoria BC's inner harbour had a lovely patina of wear. The back end was rusted and dented and I struggled to make something of the colour and shapes, with no success. The bow on the other hand reflected nicely in the late afternoon sun and a tight cropping eliminated extraneous details (crap).

This old railway trestle crossed the inlet and from my rented kayak I was able to manouver to a suitable position, a very pleasant morning. it was harder than expected to get just the right overlap of logs and I spent about 40 minutes and a good 50 images trying for just the right shot - a lot of work for a simple image, worth while none the less.

Not exactly a new barge, located next to a metal scrap yard. Often you can get some really nice images on brilliantly sunny days with harsh shadows simply by shooting what's in the shade. Care in keeping the sun from the lens is essential. Especially on zoom lenses, the right hood is not enough, and remember that if you are using a lens with full frame coverage on a small sensor camera, the right hood is in fact the wrong hood (because of the image magnifcation factor (1.6 in the case of my 40D)).
I wondered about the placement of the ladder in dead centre, but it seemed somewhat artificial to place it in the one third position just because it's traditional - in the absence of any good reason to be there, it seemed more "right" to place it square on, dead centre.
Wednesday, October 14, 2009
Images Which Don't Rely On Composition
The following images are all I could find from my own images which do not heavily rely on composition, and even here, in several cases one could argue that there is an arrangement, an organization, a pattern to the elements that is not accidental.
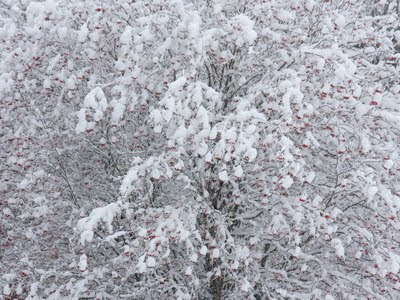
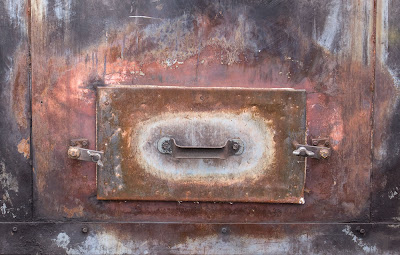
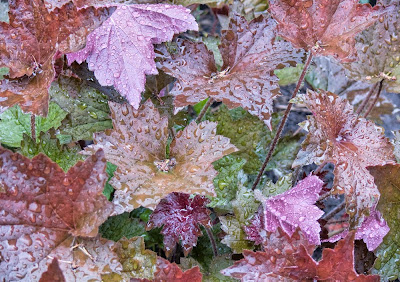
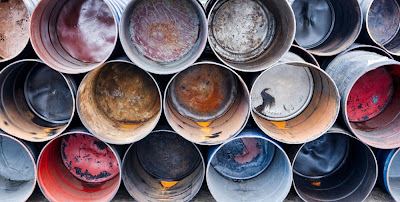
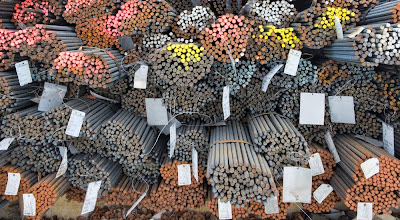
Now it begs the question of whether it is my own bias towards strong composition which made it hard to find images which I feel work yet don't use composition to a huge degree. What is your own experience - how many of your images don't rely heavily on composition.
I note that all of the examples are colour - I could not quickly find a single example of a black and white image of mine which did not strongly rely on composition, though on the face of it, you'd think that tones could replace colours as the main feature of an image - it just doesn't in my images.


Now it begs the question of whether it is my own bias towards strong composition which made it hard to find images which I feel work yet don't use composition to a huge degree. What is your own experience - how many of your images don't rely heavily on composition.
I note that all of the examples are colour - I could not quickly find a single example of a black and white image of mine which did not strongly rely on composition, though on the face of it, you'd think that tones could replace colours as the main feature of an image - it just doesn't in my images.
When Don't We Need Strong Composition?
Are there any circumstances in which composition isn't necessary and if so, what are they?
I don't think there is any image that couldn't or wouldn't be better if it were strongly composed. That said, there are a number of images in which other factors are more important than careful use of edges, leading lines, interesting use of negative space and so on.
The expression on a naughty child might well far outweigh any benefits from careful composition. In some images, colour is the overwhelmingly important element of the image and everything else comes secondary. A black and white image may have some wonderful tones which don't form any logical pattern or sequence yet are sufficiently strong to make composition of secondary importance.
Whether any of the above images would be even better if in addition to all its strengths it were strongly composed too is uncertain. For sure if you have two images of equal merit in other ways, then I'd select the strongly composed one every time. I can't think of any examples in which a strong composition interfered with the enjoyment of other aspects of an image - though I'd be interested in your thoughts on this. Often though, the circumstances are such that the great colour only comes without composition and if I insisted on strong composition, then the image wouldn't be. In capturing kids, often it's all you can do to catch the moment, never mind the composition, but Cartier Bresson sure managed it - by working on the composition first then waiting for the subject to place them selves just so - a matter of skill and perseverance and organization.
Thoughts?
I don't think there is any image that couldn't or wouldn't be better if it were strongly composed. That said, there are a number of images in which other factors are more important than careful use of edges, leading lines, interesting use of negative space and so on.
The expression on a naughty child might well far outweigh any benefits from careful composition. In some images, colour is the overwhelmingly important element of the image and everything else comes secondary. A black and white image may have some wonderful tones which don't form any logical pattern or sequence yet are sufficiently strong to make composition of secondary importance.
Whether any of the above images would be even better if in addition to all its strengths it were strongly composed too is uncertain. For sure if you have two images of equal merit in other ways, then I'd select the strongly composed one every time. I can't think of any examples in which a strong composition interfered with the enjoyment of other aspects of an image - though I'd be interested in your thoughts on this. Often though, the circumstances are such that the great colour only comes without composition and if I insisted on strong composition, then the image wouldn't be. In capturing kids, often it's all you can do to catch the moment, never mind the composition, but Cartier Bresson sure managed it - by working on the composition first then waiting for the subject to place them selves just so - a matter of skill and perseverance and organization.
Thoughts?
Thursday, October 08, 2009
More On My Second Book And Discussing "Why"
GC Bakker wanted to know if the second book would in fact explain why I make changes rather than be another how to make changes book. Despite all the months writing and editing the book, I had to really think about the correct answer to his question. I certainly did show what to change and some basics on how to change it (but it isn't a photoshop manual, despite the one chapter quickie primer).
It would be easy to toss of a glib answer to the why along the lines of "Well, to make the images better, dude!" but of course that is neither helpful or friendly. I do think that anyone can learn from seeing the changes that I make to my images, but I think the short answer is no, this book does go into great detail about why I make a particular change though where there is a problem, it is often identified as to what the problem is - which is a way of explaining the why, all be it in one sentence. What my book does do is point out the problems and weaknesses and what you can do to improve images well beyond simply fixing them.
I wonder if CG really means why make the changes or does he in fact mean that he would like help knowing what to change. It's fairly easy with image problems to say why a change is needed. Over here is a yellow green tinge on the rocks and it needs fixed. The unwritten but implied "why" is that the change is because the yellow green tinge is unnatractive and doesn't balance the colour of the rocks elsewhere in the image. This is an example of what happens in chapter one.
It is a little harder to explain improvements in areas that already looked ok - or at least they did until you see the improved version. I tend to still talk in terms of there being a problem - needs more contrast, should be lighter, highlights need brightening.
Clearly CG Bakker is going to have to look at the book for him/herself to decide if the book is helpful. A few of the chapters are based on previous blog entries in which I took you through the steps in editing an image - all be it improved and edited - but if you check out the previous Athabasca Falls image discussion, you will find the basis for chapter one, the Bowl of Fruit image for chapter 3, for example. Most of the other chapters are similar.
This has been a complex answer to what seemed like a simple question. I look forward to GC Bakker giving us some feedback and further explanation behind what is meant by "Why".
It would be easy to toss of a glib answer to the why along the lines of "Well, to make the images better, dude!" but of course that is neither helpful or friendly. I do think that anyone can learn from seeing the changes that I make to my images, but I think the short answer is no, this book does go into great detail about why I make a particular change though where there is a problem, it is often identified as to what the problem is - which is a way of explaining the why, all be it in one sentence. What my book does do is point out the problems and weaknesses and what you can do to improve images well beyond simply fixing them.
I wonder if CG really means why make the changes or does he in fact mean that he would like help knowing what to change. It's fairly easy with image problems to say why a change is needed. Over here is a yellow green tinge on the rocks and it needs fixed. The unwritten but implied "why" is that the change is because the yellow green tinge is unnatractive and doesn't balance the colour of the rocks elsewhere in the image. This is an example of what happens in chapter one.
It is a little harder to explain improvements in areas that already looked ok - or at least they did until you see the improved version. I tend to still talk in terms of there being a problem - needs more contrast, should be lighter, highlights need brightening.
Clearly CG Bakker is going to have to look at the book for him/herself to decide if the book is helpful. A few of the chapters are based on previous blog entries in which I took you through the steps in editing an image - all be it improved and edited - but if you check out the previous Athabasca Falls image discussion, you will find the basis for chapter one, the Bowl of Fruit image for chapter 3, for example. Most of the other chapters are similar.
This has been a complex answer to what seemed like a simple question. I look forward to GC Bakker giving us some feedback and further explanation behind what is meant by "Why".
How Small Should A Travel Camera Be?
I'm just back from Victoria and it seems a good time to discuss what is a good travel camera. What I took was my 40D, 18-55IS and 55-200 IS. I made good use of the full range, occasionally wishing I had wider than 18 - but probably not enough to want to carry an extra lens (and remember you can always stitch - even hand held if you are reasonably careful).
I have just read dpreview.com's review of the Panasonic GF1 which got me to thinking about camera size. No question that the GF1 is significantly smaller than the 40D, but what about the size of a 28-400 mm.(full frame equivalent) kit look like. Yes, that 20 looks small and cute - but no IS and frankly a lens that is smaller than my 18-55IS would not be all that helpful. The Panasonic 45-200 doesn't look all that much smaller than the 55-250 I have and would need an adaptor anyway. Net result is a very small camera would not make for an especially small kit. My case could be one size down but frankly that doesn't really make a difference.
What really happens with camera kits is that things change when there is a quantum jump in storage - from a carry bag to a belt clip on to a rain coat pocket to a shirt pocket.
My wife's Panasonic TZ5 (now replaced by the ZS-3) is shirt pocketable and covers better than the same range. Of course I lose a view finder, manual controls, high ISO, rapid focusing, and the ability to make larger than 11X17 prints. The GF1 will still require an over the shoulder case and two lenses and won't make a fundamental difference to carrying, storing and accessing the camera - so is it worth both the money and the compromises to have such a system? I suspect the answer for me is no. I guess it might be a nice carry around camera when you don't want to have more than one lens and are willing to live with the size of a zoom or the lack of zoom and IS in the 20 mm. lens. For some, that is all they need, it just wouldn't work for me - I'd miss the longer focal lengths.
What have you been thinking about these new small camera, decent size sensor models?
I have just read dpreview.com's review of the Panasonic GF1 which got me to thinking about camera size. No question that the GF1 is significantly smaller than the 40D, but what about the size of a 28-400 mm.(full frame equivalent) kit look like. Yes, that 20 looks small and cute - but no IS and frankly a lens that is smaller than my 18-55IS would not be all that helpful. The Panasonic 45-200 doesn't look all that much smaller than the 55-250 I have and would need an adaptor anyway. Net result is a very small camera would not make for an especially small kit. My case could be one size down but frankly that doesn't really make a difference.
What really happens with camera kits is that things change when there is a quantum jump in storage - from a carry bag to a belt clip on to a rain coat pocket to a shirt pocket.
My wife's Panasonic TZ5 (now replaced by the ZS-3) is shirt pocketable and covers better than the same range. Of course I lose a view finder, manual controls, high ISO, rapid focusing, and the ability to make larger than 11X17 prints. The GF1 will still require an over the shoulder case and two lenses and won't make a fundamental difference to carrying, storing and accessing the camera - so is it worth both the money and the compromises to have such a system? I suspect the answer for me is no. I guess it might be a nice carry around camera when you don't want to have more than one lens and are willing to live with the size of a zoom or the lack of zoom and IS in the 20 mm. lens. For some, that is all they need, it just wouldn't work for me - I'd miss the longer focal lengths.
What have you been thinking about these new small camera, decent size sensor models?
Tuesday, October 06, 2009
Victoria B.C.

This image was shot from a kayak - near ideal way to tour the harbour, but I did find that the kayak had to be pointing at the subject, not always easy in wind and current, but a lot steadier than twisting sideways and shooting. Having learned the lesson of multiple exposures when you aren't sure about hand holding, I shot several images of this particular composition. You see it with very little adjustment - the colours were wonderful.
Thursday, October 01, 2009
My Second Book
Book 2 exists as a stapled together version from the printer, so it's real, it will come out - probably mid November. The book is called "From Camera To Computer".
It consists of 23 chapters and a Photoshop Primer, plus introduction and notes on the book, and a small index.
There is a chapter on on people pictures (unlike in my first book which was quite reasonably criticized for being all landscape and industrial. There are travel pictures. There are other chapters on abstracts, sculpture and architecture, manipulations and so on. There are short discussions on stitching and focus blending.
Mostly the book is full of chapters which discuss and illustrate either working the scene and or editing images beyond simply fixing problems.
There are a few tricks, many suggestions and tips, and dozens of example images shown from raw output to final image. There are proof sheets so you can see the failed attempts as well as the successes.
There's a chapter on pairs of images, comparing two somewhat similar images, discussing why one works better than the other.
The book is aimed at enthusiasts who want to make better images, who don't really know how to go about improving images beyond simply fixing things like colour balance and overall brightness and contrast. It's for the person who wants more information about working the scene and looking for solutions to real world problems in image taking.
The book is specifically geared to image editing in Photoshop and the concept of adjustment layers.
Unlike books by commercial photographers for whom a single trick can be applied to one thousand similar images so is worth learning and using, I show you techniques that can be used with all your images.
The photoshop primer shows you the 10% of Photoshop that is needed to edit 100% of your images - making it a practical and relatively painless tool for your image editing.
I plan to put the table of contents as well as a sample chapter up on my website closer to the release date.
My first book has sold 7,400 copies, is into it's second printing, and has been translated into German, Italian, Swedish, Polish, and two different forms of Chinese. none of which has made me rich but it has generated more income than print making ever did. I understand the break even point for a publisher is somewhere around 2000 books sold - guess that's why they were happy to do a second book. Wait till they find out I have an idea for a third book - a topic for another day.
It consists of 23 chapters and a Photoshop Primer, plus introduction and notes on the book, and a small index.
There is a chapter on on people pictures (unlike in my first book which was quite reasonably criticized for being all landscape and industrial. There are travel pictures. There are other chapters on abstracts, sculpture and architecture, manipulations and so on. There are short discussions on stitching and focus blending.
Mostly the book is full of chapters which discuss and illustrate either working the scene and or editing images beyond simply fixing problems.
There are a few tricks, many suggestions and tips, and dozens of example images shown from raw output to final image. There are proof sheets so you can see the failed attempts as well as the successes.
There's a chapter on pairs of images, comparing two somewhat similar images, discussing why one works better than the other.
The book is aimed at enthusiasts who want to make better images, who don't really know how to go about improving images beyond simply fixing things like colour balance and overall brightness and contrast. It's for the person who wants more information about working the scene and looking for solutions to real world problems in image taking.
The book is specifically geared to image editing in Photoshop and the concept of adjustment layers.
Unlike books by commercial photographers for whom a single trick can be applied to one thousand similar images so is worth learning and using, I show you techniques that can be used with all your images.
The photoshop primer shows you the 10% of Photoshop that is needed to edit 100% of your images - making it a practical and relatively painless tool for your image editing.
I plan to put the table of contents as well as a sample chapter up on my website closer to the release date.
My first book has sold 7,400 copies, is into it's second printing, and has been translated into German, Italian, Swedish, Polish, and two different forms of Chinese. none of which has made me rich but it has generated more income than print making ever did. I understand the break even point for a publisher is somewhere around 2000 books sold - guess that's why they were happy to do a second book. Wait till they find out I have an idea for a third book - a topic for another day.
Which Camera Shall I Take?
I'm off to Victoria with my wife for a few days of R&R, but of course I'll take a camera with me. Do I take the 5D2, the 40D or even something pocketable?
The 5D2 isn't sig. larger than the 40D and has wonderful resolution and high ISO performance - but the lenses are so much larger. I'd have to take my 70-200, a 2X converter, and a 24-105 to get the equivalent of my two lens combo for the 40D 18-55 and 55-250.
I could take a traditional tiny sensor consumer grade camera but if we go whale watching, forget them for their poor focus speed. I could use a Panasonic GF1, but by the time you carry lenses that cover the same range as my 40D kit, they aren't a whole lot smaller and besides, I don't have one.
Once before in Victoria I took a Canon S3IS, at the time a decent camera, but could only make 5X7 prints with it - and I made a lovely image at Buchart Gardens that I could have sold many times over had I shot with a decent sized sensor camera. So far, what I have seen of the G11 and S90 test shots suggests that they are not going to be the panacea of a small camera, small zoom, general purpose carry around. My Panasonic FZ50 was decent but not great - great 8X10 prints but not 13X19 - so no, it will have to be the 40D. I think I'll pack my lightweight tripod too, for just in case. Will I regret not having the 5D2 - probably not - the 40D did very well for me in San Francisco and again in Germany and the two lens kit in a sling bag from Tamrac was easy to carry.
I have two batteries, just in case, and the small charger fits in a pocket of the camera bag. I'll probably take along my Epson 2000 both to view images and to back them up - it's a lot smaller than lugging along a lap top for what is supposed to be a holiday.
The 5D2 isn't sig. larger than the 40D and has wonderful resolution and high ISO performance - but the lenses are so much larger. I'd have to take my 70-200, a 2X converter, and a 24-105 to get the equivalent of my two lens combo for the 40D 18-55 and 55-250.
I could take a traditional tiny sensor consumer grade camera but if we go whale watching, forget them for their poor focus speed. I could use a Panasonic GF1, but by the time you carry lenses that cover the same range as my 40D kit, they aren't a whole lot smaller and besides, I don't have one.
Once before in Victoria I took a Canon S3IS, at the time a decent camera, but could only make 5X7 prints with it - and I made a lovely image at Buchart Gardens that I could have sold many times over had I shot with a decent sized sensor camera. So far, what I have seen of the G11 and S90 test shots suggests that they are not going to be the panacea of a small camera, small zoom, general purpose carry around. My Panasonic FZ50 was decent but not great - great 8X10 prints but not 13X19 - so no, it will have to be the 40D. I think I'll pack my lightweight tripod too, for just in case. Will I regret not having the 5D2 - probably not - the 40D did very well for me in San Francisco and again in Germany and the two lens kit in a sling bag from Tamrac was easy to carry.
I have two batteries, just in case, and the small charger fits in a pocket of the camera bag. I'll probably take along my Epson 2000 both to view images and to back them up - it's a lot smaller than lugging along a lap top for what is supposed to be a holiday.
Tuesday, September 29, 2009
White Balance
Why do people get so het up on white balance - it is absolutely meaningless in your camera if you are shooting RAW and why wouldn't you be?
I leave my camera on auto white balance just so the thumbnails are of a reasonable colour, then when I take the raw file into Camera Raw, use the gray balance dropper (upper left) to neutralize the image. If you happen to have some tones that are supposed to be neutral then you are laughing - this weekend I was shooting white lab coats. More often you won't have a neutral colour. In that case I will do one of two things, play with the colour temperature slider (top right) or I will use the gray balance dropper on the most neutral colour I can find, then make small adjustments to the colour temperature sliders (there are two, a main one and a cyan/magenta one).
Once in Photoshop, one can do an Auto Colour in the Image menu or do a curves adjustment layer, using the gray balance dropper once again on the most neutral colour. Here I can use the layer opacity slider to tone back the colour effect and often this is just exactly what is needed to get the colour adjustment where I want it.
There are many other ways to colour balance - this is simply the method that works for me.
I leave my camera on auto white balance just so the thumbnails are of a reasonable colour, then when I take the raw file into Camera Raw, use the gray balance dropper (upper left) to neutralize the image. If you happen to have some tones that are supposed to be neutral then you are laughing - this weekend I was shooting white lab coats. More often you won't have a neutral colour. In that case I will do one of two things, play with the colour temperature slider (top right) or I will use the gray balance dropper on the most neutral colour I can find, then make small adjustments to the colour temperature sliders (there are two, a main one and a cyan/magenta one).
Once in Photoshop, one can do an Auto Colour in the Image menu or do a curves adjustment layer, using the gray balance dropper once again on the most neutral colour. Here I can use the layer opacity slider to tone back the colour effect and often this is just exactly what is needed to get the colour adjustment where I want it.
There are many other ways to colour balance - this is simply the method that works for me.
Tilting LCD
I was very sorry to see that the recent Canon 7D did not come with a tilting LCD screen. I have no ambition to shoot movies but Michael Reichmann mentions on Luminous Landscape that a tilting LCD is really essential for shooting video - after all the viewfinder is blacked out.
For myself, I'd find it great for low and high shots and some of those awkward positions we sometimes find ourselves in, camera jambed between a rock and a hard place, and no room for my eye behind the viewfinder - ok, it's an industrial thing - between a pipe and a ledge, right?
Anyway, I'm curious about how other people feel about a tilting LCD screen - let me know what you think - and just to guage interest level - how many of you would be willing to pay an extra $100 for a model that did have a good tilting swinging screen?
For myself, I'd find it great for low and high shots and some of those awkward positions we sometimes find ourselves in, camera jambed between a rock and a hard place, and no room for my eye behind the viewfinder - ok, it's an industrial thing - between a pipe and a ledge, right?
Anyway, I'm curious about how other people feel about a tilting LCD screen - let me know what you think - and just to guage interest level - how many of you would be willing to pay an extra $100 for a model that did have a good tilting swinging screen?
Monday, September 28, 2009
Commercial Assignments
Occasionally I have taken on a commercial assignment. A few years ago I shot Mount Royal College. There were no questions about who owned the images - I did, and I simply charged for the images produced, the prints made. I have used those images in my first book and any time the college wants to use the images in a new way, they need to get my permission and I charge accordingly. It was an arrangement that worked well for both parties.
This last weekend however, I was asked by one of my patients to handle an industrial assignment - they are redesigning their website. I was escorted and had access to the entire complex, inside and out.
It was clear from the start that they wanted to control the images, that I could not use these images for my own purposes - not unreasonable because that's what they were paying for. In fact, I did ask that if I were to find something of artistic merit, would it be possible to get permission to use specific images. Already I have found two that I would like to show you, to make prints, to publish or even to sell.
You might be wondering why I'd even agree to such an arrangement which could limit my use of the images. Simple. They wouldn't agree to the assignment under any other terms - take it or leave it. Actually they didn't say that, but it was understood.
Some time ago I was photographing a log pile and the plant manager was concerned that his competition could do a log inventory on the basis of my images and so he wouldn't let us into the middle of the plant but did let us photograph from the driveway - given the speed those log carriers whipped round corners with gigantic loads, I was very happy to be where I was thank you very much.
I was refused access to ADM flour mill - apparently there are proprietary methods and machines which they don't want their competitors to see.
In the case of this weekend, the largest concern was of inadvertently photographing a safety issue, not because they are careless, rather the contrary, because they are very aware of safety and rule issues and work hard to have a good plant, but human beings being what they are, anyone can make a mistake now and again and a photograph taken at just the wrong moment before someone else catches the mistake could create problems for the plant. I fully sympathize and simply hope that the images that I particularly like and want access to are not ones to raise any concerns.
When presenting a customer with images, it really isn't practical to hand over 1000 unedited full resolution images which might require 40 DVD's or their own hard drive. You can either set up an action in Photoshop or the equivalent in Lightroom to process the images to small jpegs and put those on a single CD, or you can publish the images to a private website, password protected for client use. In the case of my weekend customer, head office is elsewhere and so publishing to a private website makes the most sense.
You probably don't want to give your customer every image - why should they have to plow through all your mistakes or closed eyes or whatever. In fact, what I'm doing is I have gone through every image taken so far (900 or so) and marked them in Bridge as being either useable or not (zero or one score). I am now in the process of editing the one score images and saving them to a separate folder. So far I have corrected colour balance, perspective, and tonality on about 100 images, selecting the best of the one score images, and I'm about half way through. Anything for printing will likely need more editing work, but these edits are useable already. Some are cropped but keep in mind that clients often need to do their own cropping to specific shapes and so coming in really tight on the subject is going to create problems for them - one thing to crop out something that spoils the image, another to eliminate excess sky or wall when it might just be handy.
I swore that as soon as I was finished with my second book (that was last week), I'd start to switch over to Lightroom with suitable keywords for searching for my several thousand images, but it looks like it might be after this assignment. I may have to get tough on myself.
Before accepting an assignment, make sure that both parties understand who is going to hold the original files, have publishing rights to them and who is going to get printing done. For my assignment this weekend I am simply charging for my time and have given them some sample prints 13X19 on epson enhanced matte - relatively cheap, easy to stack feed, easy to look at in any light. They are welcome to pin them to the wall but have already warned them that before spending money on framing and whatnot, I'd recommend they let me make "final" prints with more editing and care in printmaking. Still, they served to let the customer know where he stands in terms of useable quality.
Anyway, these are issues you need to consider if you contemplate taking on a commercial assignment.
This last weekend however, I was asked by one of my patients to handle an industrial assignment - they are redesigning their website. I was escorted and had access to the entire complex, inside and out.
It was clear from the start that they wanted to control the images, that I could not use these images for my own purposes - not unreasonable because that's what they were paying for. In fact, I did ask that if I were to find something of artistic merit, would it be possible to get permission to use specific images. Already I have found two that I would like to show you, to make prints, to publish or even to sell.
You might be wondering why I'd even agree to such an arrangement which could limit my use of the images. Simple. They wouldn't agree to the assignment under any other terms - take it or leave it. Actually they didn't say that, but it was understood.
Some time ago I was photographing a log pile and the plant manager was concerned that his competition could do a log inventory on the basis of my images and so he wouldn't let us into the middle of the plant but did let us photograph from the driveway - given the speed those log carriers whipped round corners with gigantic loads, I was very happy to be where I was thank you very much.
I was refused access to ADM flour mill - apparently there are proprietary methods and machines which they don't want their competitors to see.
In the case of this weekend, the largest concern was of inadvertently photographing a safety issue, not because they are careless, rather the contrary, because they are very aware of safety and rule issues and work hard to have a good plant, but human beings being what they are, anyone can make a mistake now and again and a photograph taken at just the wrong moment before someone else catches the mistake could create problems for the plant. I fully sympathize and simply hope that the images that I particularly like and want access to are not ones to raise any concerns.
When presenting a customer with images, it really isn't practical to hand over 1000 unedited full resolution images which might require 40 DVD's or their own hard drive. You can either set up an action in Photoshop or the equivalent in Lightroom to process the images to small jpegs and put those on a single CD, or you can publish the images to a private website, password protected for client use. In the case of my weekend customer, head office is elsewhere and so publishing to a private website makes the most sense.
You probably don't want to give your customer every image - why should they have to plow through all your mistakes or closed eyes or whatever. In fact, what I'm doing is I have gone through every image taken so far (900 or so) and marked them in Bridge as being either useable or not (zero or one score). I am now in the process of editing the one score images and saving them to a separate folder. So far I have corrected colour balance, perspective, and tonality on about 100 images, selecting the best of the one score images, and I'm about half way through. Anything for printing will likely need more editing work, but these edits are useable already. Some are cropped but keep in mind that clients often need to do their own cropping to specific shapes and so coming in really tight on the subject is going to create problems for them - one thing to crop out something that spoils the image, another to eliminate excess sky or wall when it might just be handy.
I swore that as soon as I was finished with my second book (that was last week), I'd start to switch over to Lightroom with suitable keywords for searching for my several thousand images, but it looks like it might be after this assignment. I may have to get tough on myself.
Before accepting an assignment, make sure that both parties understand who is going to hold the original files, have publishing rights to them and who is going to get printing done. For my assignment this weekend I am simply charging for my time and have given them some sample prints 13X19 on epson enhanced matte - relatively cheap, easy to stack feed, easy to look at in any light. They are welcome to pin them to the wall but have already warned them that before spending money on framing and whatnot, I'd recommend they let me make "final" prints with more editing and care in printmaking. Still, they served to let the customer know where he stands in terms of useable quality.
Anyway, these are issues you need to consider if you contemplate taking on a commercial assignment.
Subscribe to:
Posts (Atom)
